
Contacts in SparrowDesk

Contacts in SparrowDesk represent the people who reach out to your business—via email, chat, or any other integrated support channel. They are the core of every customer interaction and help you build a clear picture of your customer base.
What is a Contact?
A Contact is any individual who has interacted with your team through SparrowDesk. Each contact profile contains essential details like:
- Name and email address
- Phone number (if available)
- Company (if associated)
- Custom fields (like plan type, user ID, etc.)
- Tags (labels your team adds, like VIP or Beta)
- Interaction history (all past conversations)
This helps your support team personalize replies and understand the customer's journey at a glance.
How are Contacts Created?
Contacts in SparrowDesk can be created in the following ways:
1. Automatically from Conversations
- When a customer sends an email or starts a chat, a contact is automatically created using their email address or chat identifier.
- Any future interaction from the same user is added to the same contact profile.
2. Manually by Agents
Agents can create a contact directly within SparrowDesk.
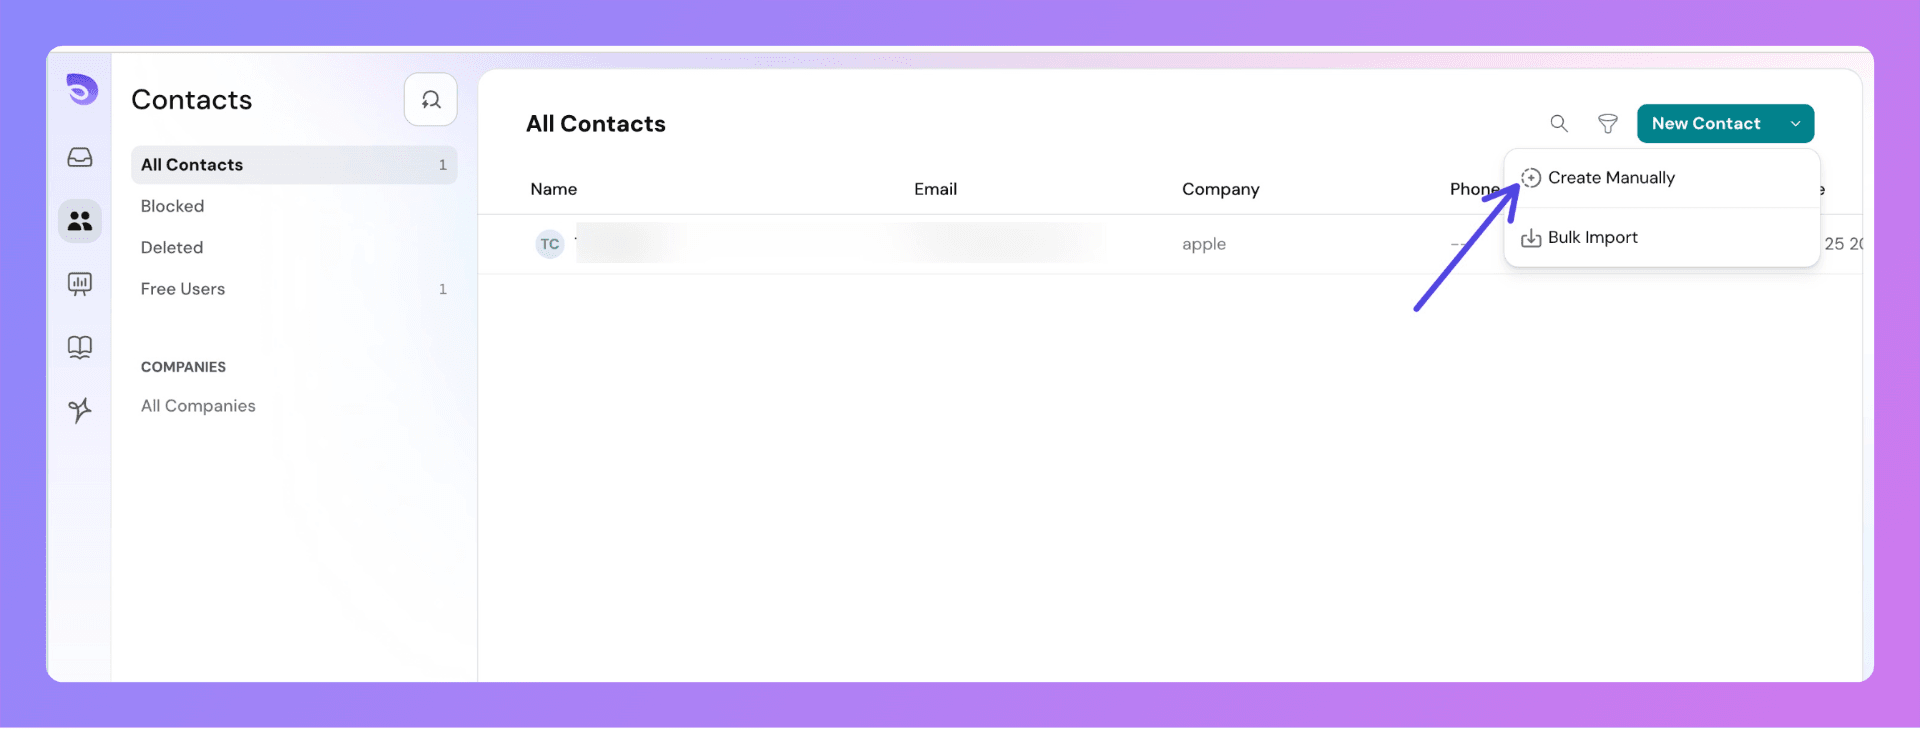
- Click on the Contacts tab from the sidebar.
- From the contacts page, click on New Contact Button and click on Create Manually from the dropdown options.
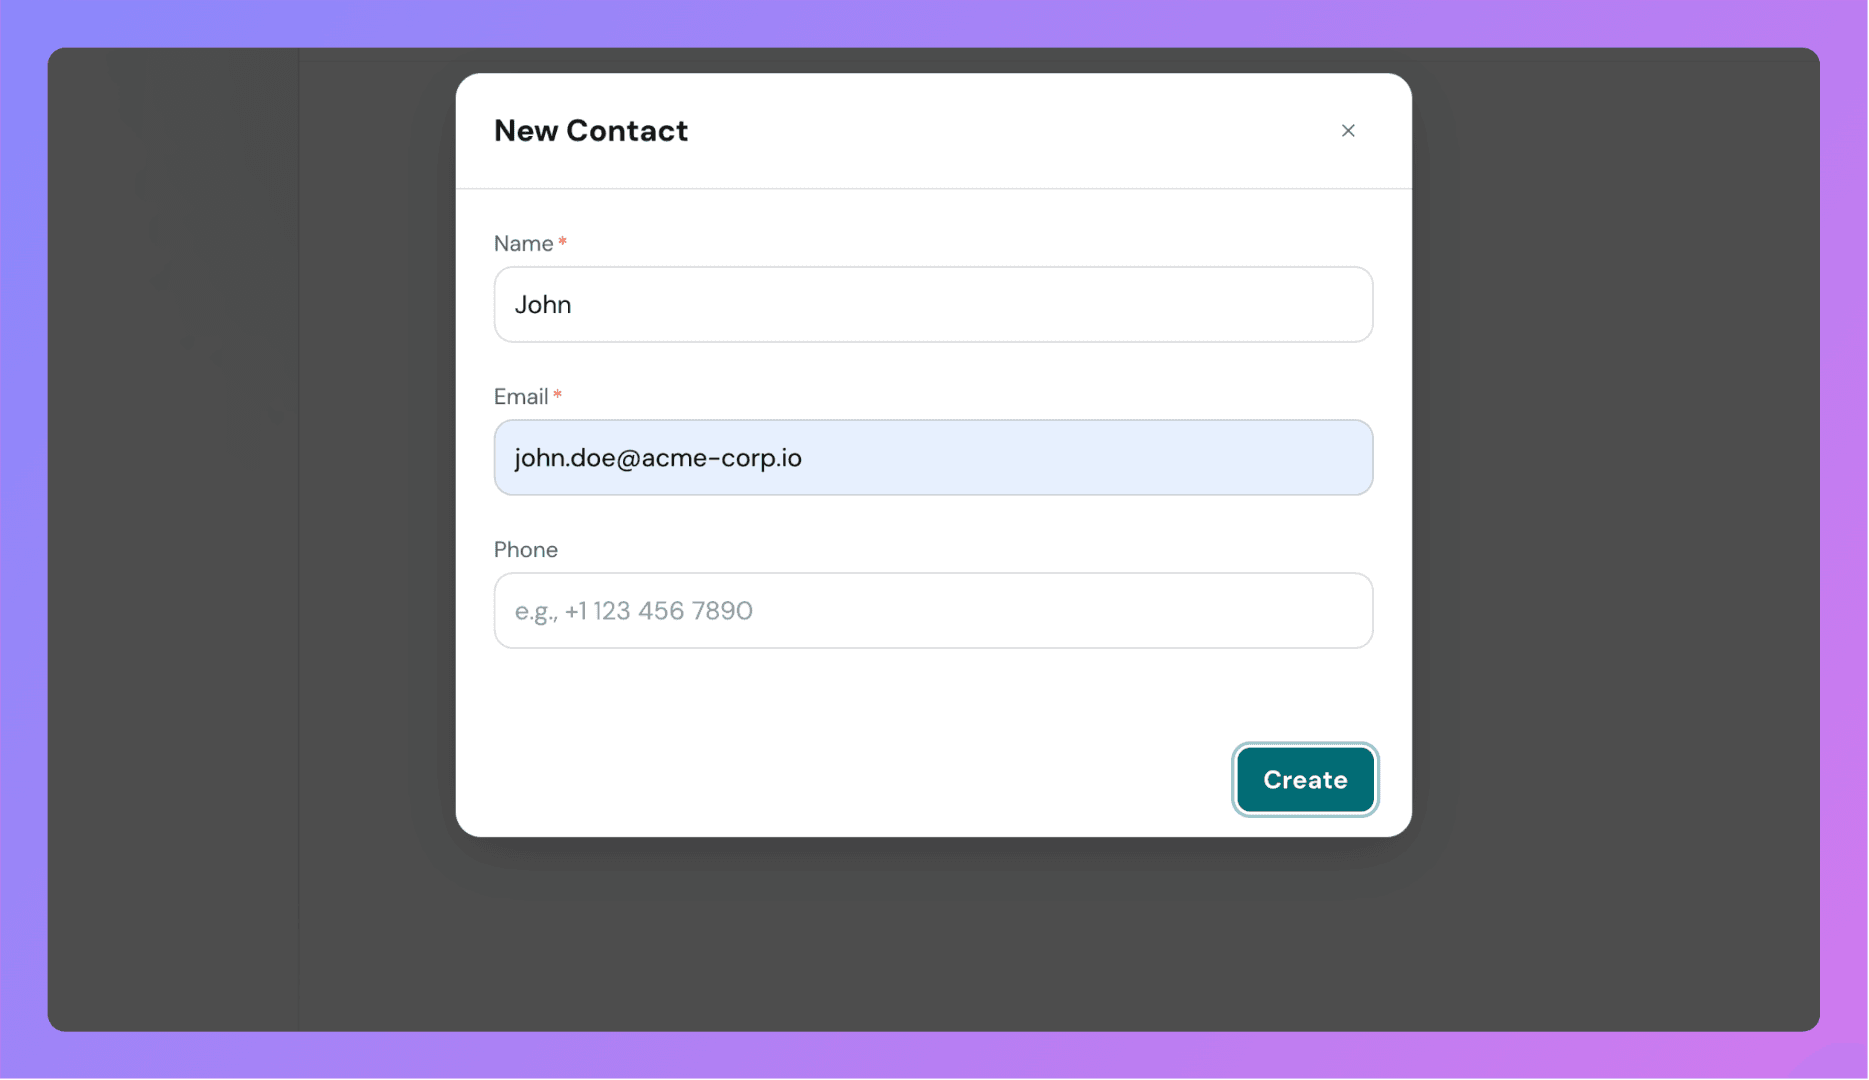
- Enter your contact details and click on Create button to submit the form.
3. Via API or Integrations
- Use SparrowDesk's API to create or update contacts.
- Integrate with CRMs like HubSpot or Salesforce to sync contacts.
4. Import from CSV
- Upload a CSV file with contact data.
- Map the columns to SparrowDesk fields (like name, email, company, etc.).
- Review and import the list in bulk.
5. Mapped from a website visitor
When someone browsing your site or chat widget is anonymous at first and later identifies themselves for example, by sharing their email in chat- SparrowDesk maps their earlier activity to a contact record. Their session is linked to the identified contact instead of being left as a separate anonymous visitor.
How to Access Contacts
You can view and manage all your contacts in two easy ways:
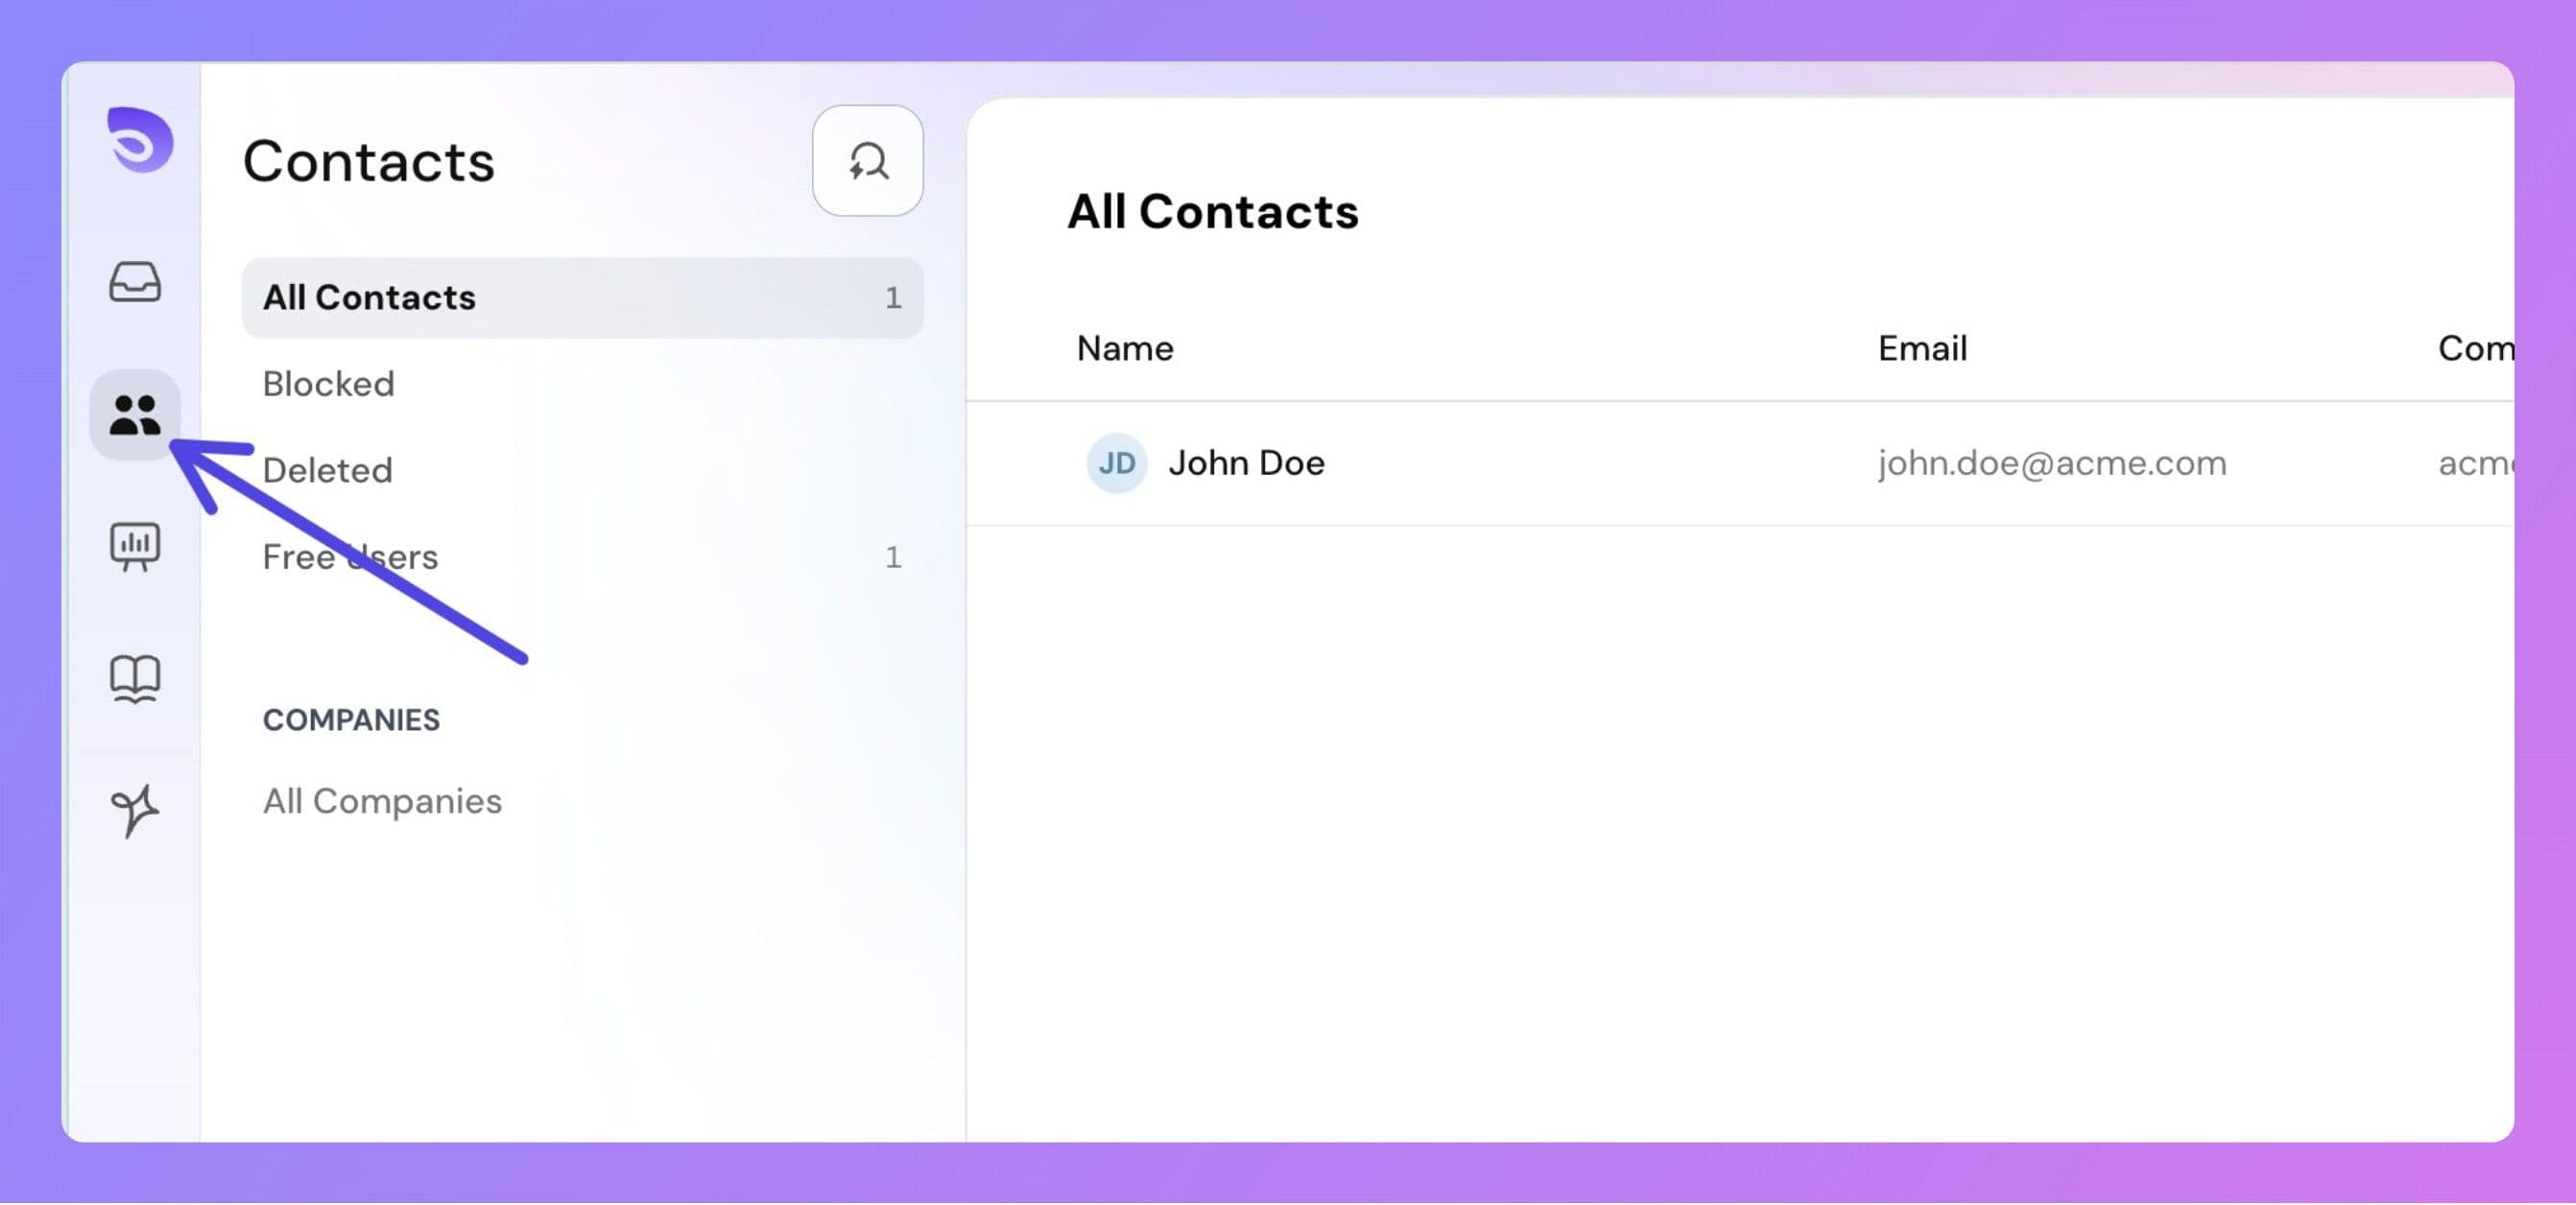
From the Sidebar
Click the Contacts icon on the left sidebar.
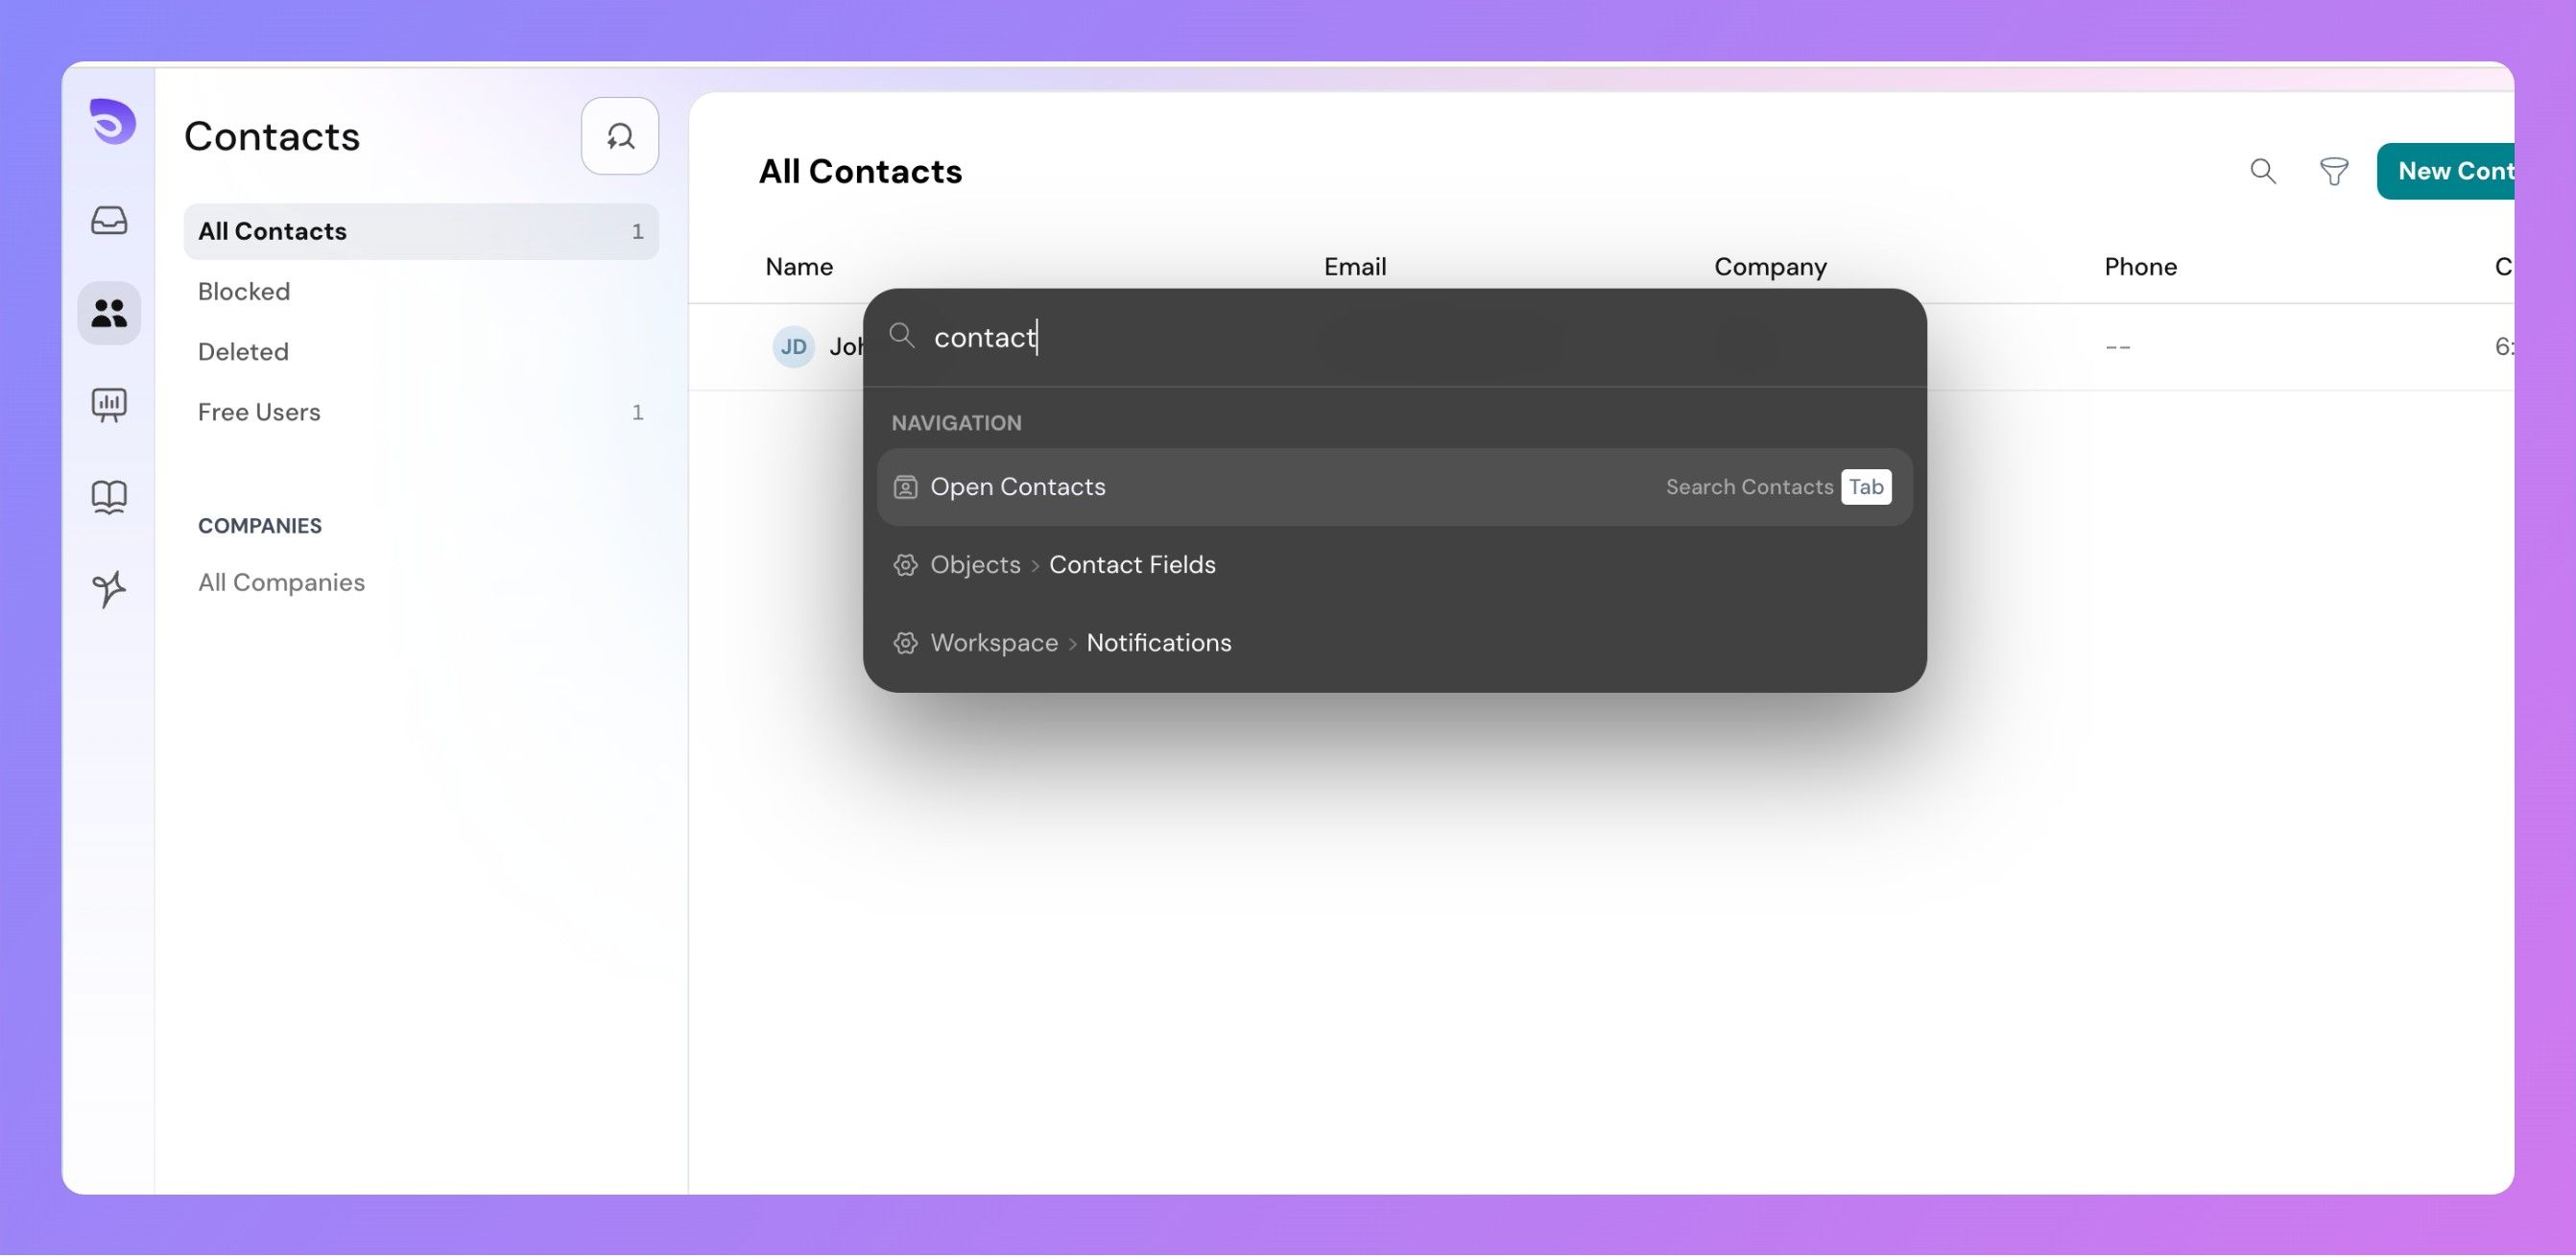
Using Compass (Command Menu)
- Press Cmd + K (Mac) or Ctrl + K (Windows).
- Search for Contacts and select it from the list.
Tag a Contact
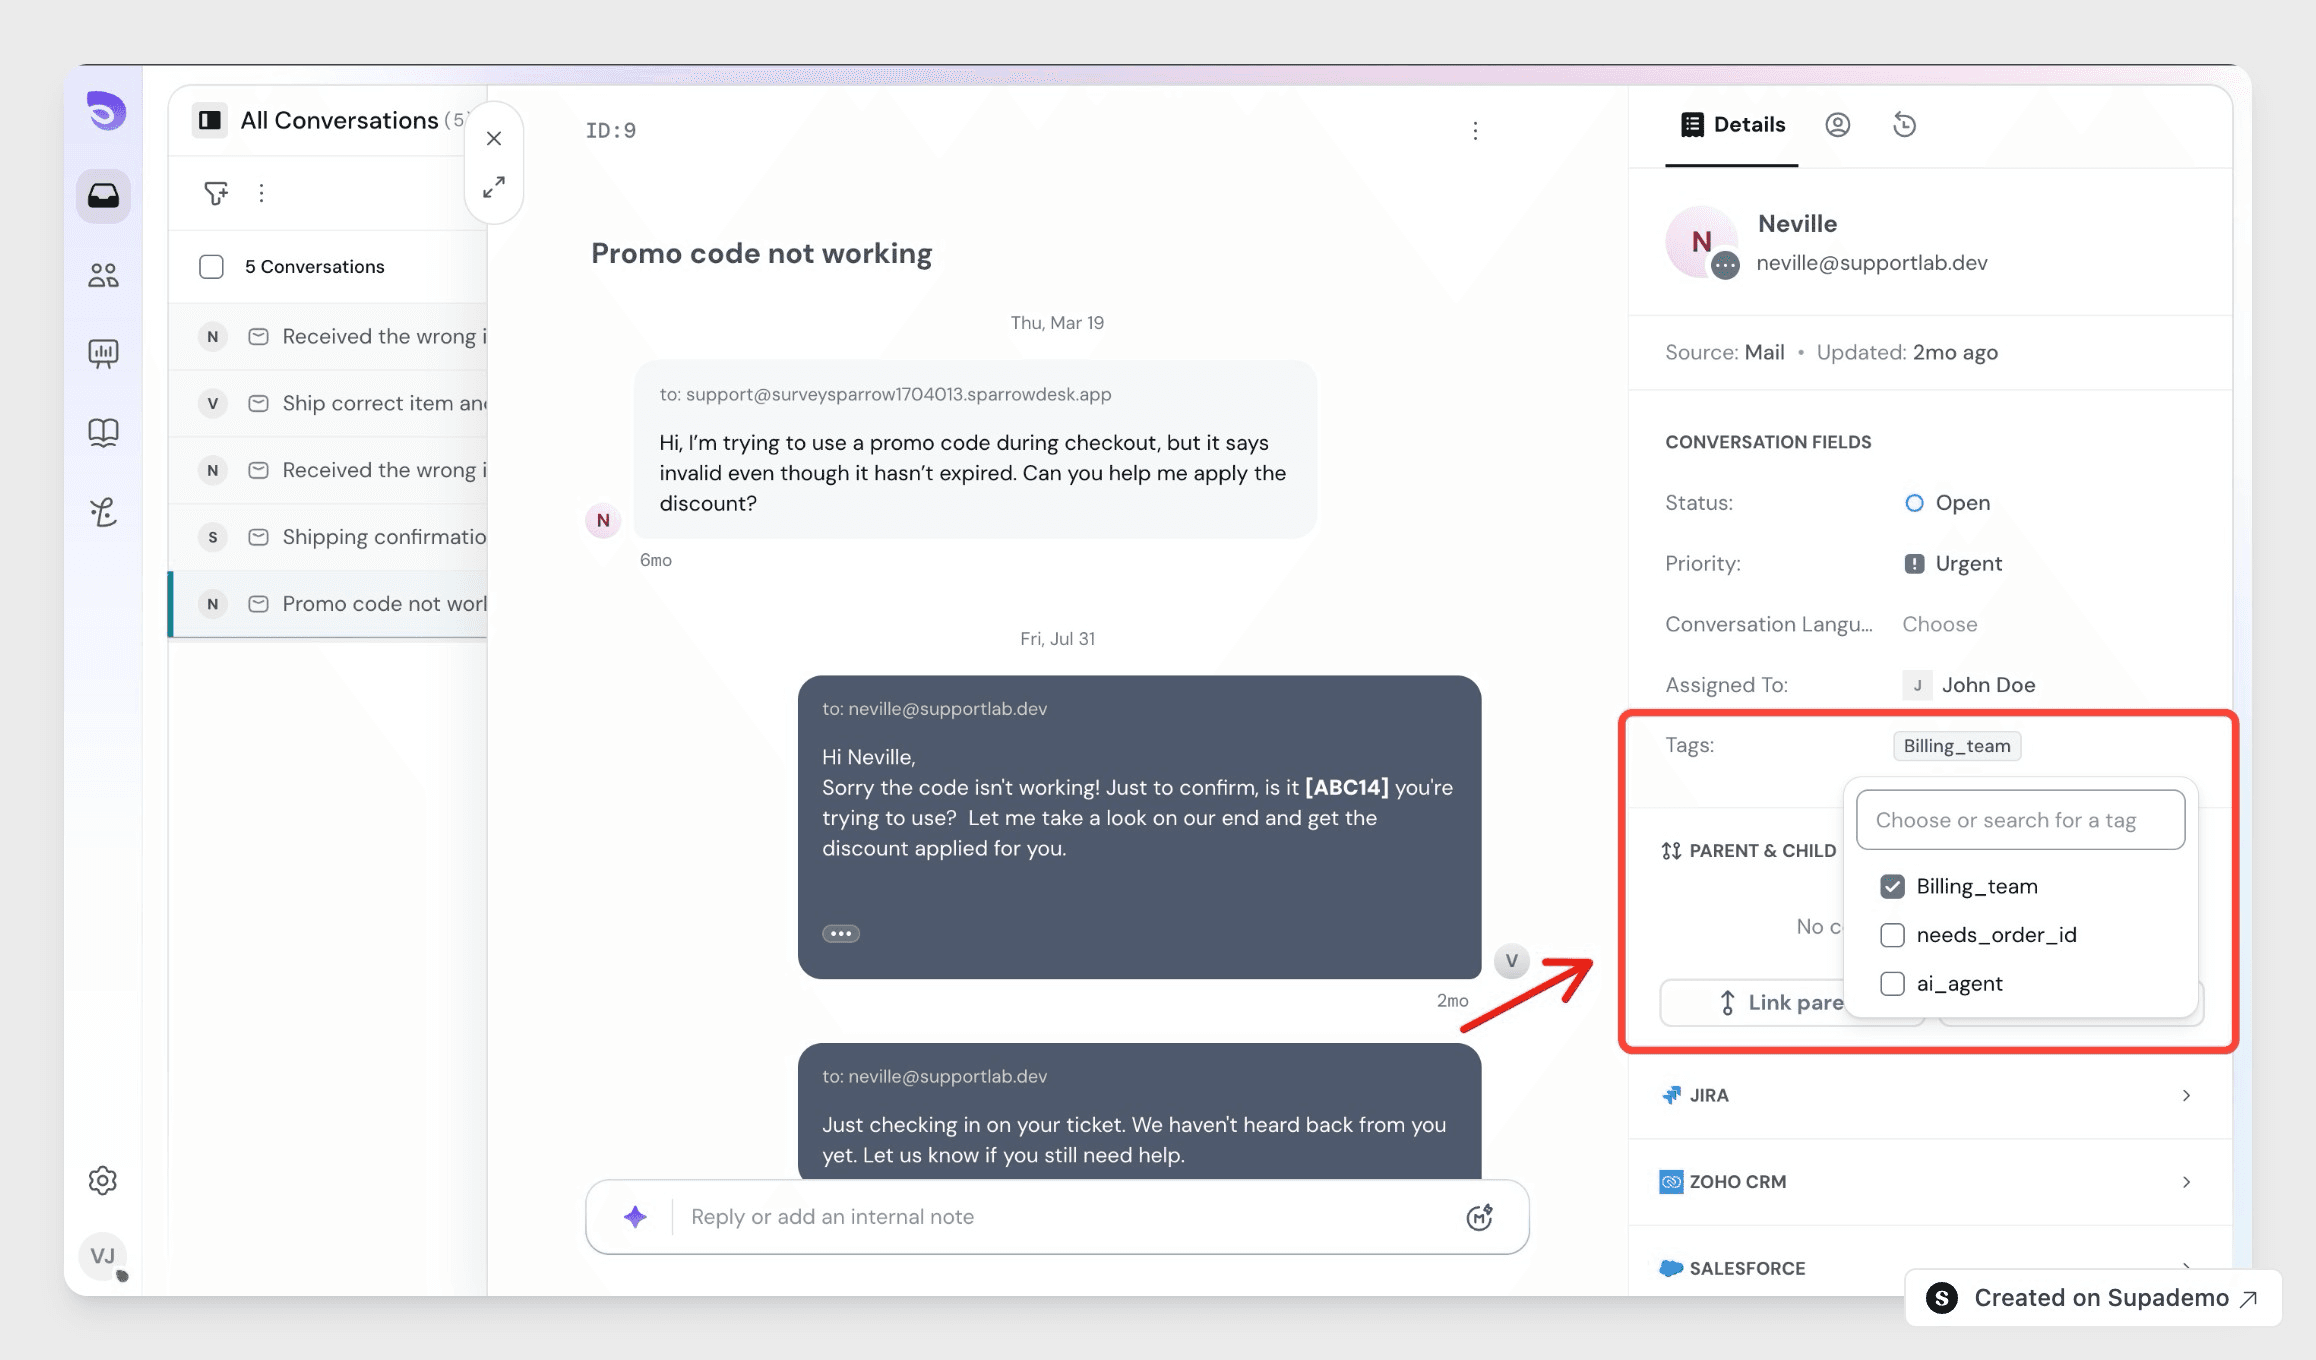
Tags label contacts so you can find and group them quickly. Contact tags are separate from conversation tags.
- Open the contact's profile, for example Nora Lee.
- Click Tags.
- Type a tag name.
- Press Enter. Choose an existing tag, or create a new one by typing a name that doesn't exist yet.
Remove a tag
- Click Tags.
- Untick the box next to the tag.
Use tags to group contacts
You can filter the contact list by tag and save the result as a segment. See How to manage contact segments.
Contact Segments
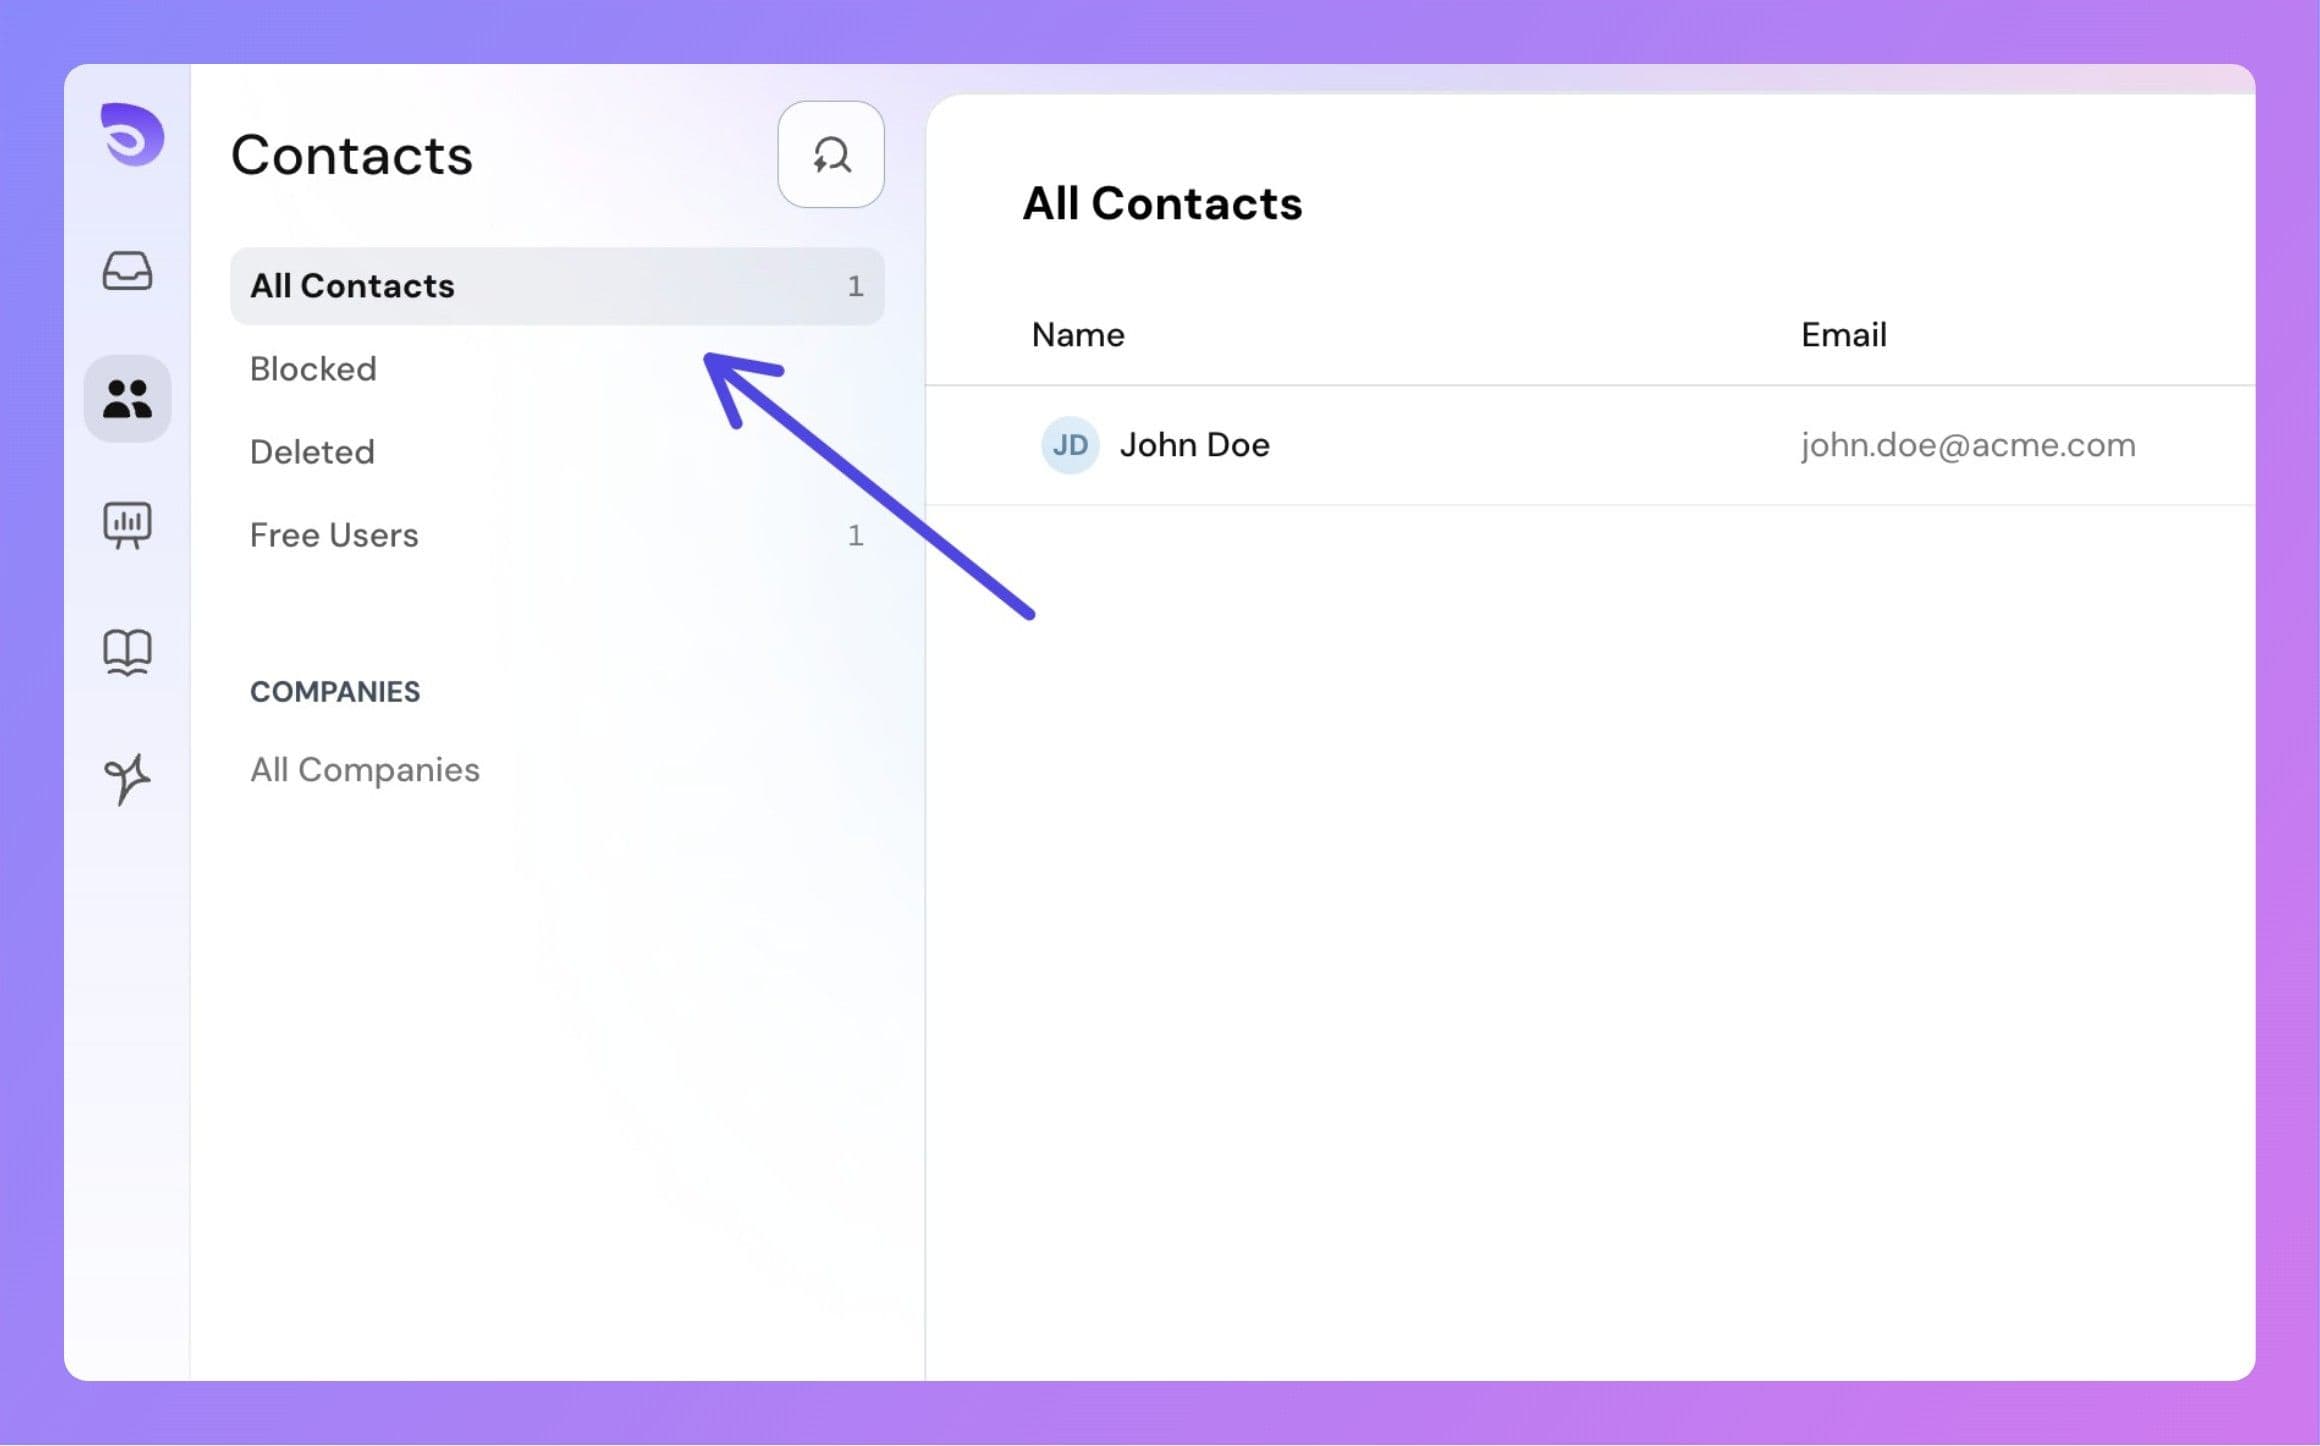
Contacts are grouped into default segments to help you navigate and manage them effectively:
- All Contacts: All active contacts that are not deleted or blocked.
- Blocked: Contacts that have been manually marked as blocked by agents.
- Deleted: Contacts that are soft-deleted and either pending or marked for permanent deletion.
Creating Custom Segments
You can create your own contact segments by applying filters on the contact list. This helps you quickly find and organize contacts based on specific criteria, such as plan type, activity, or onboarding status.
To create a custom segment:
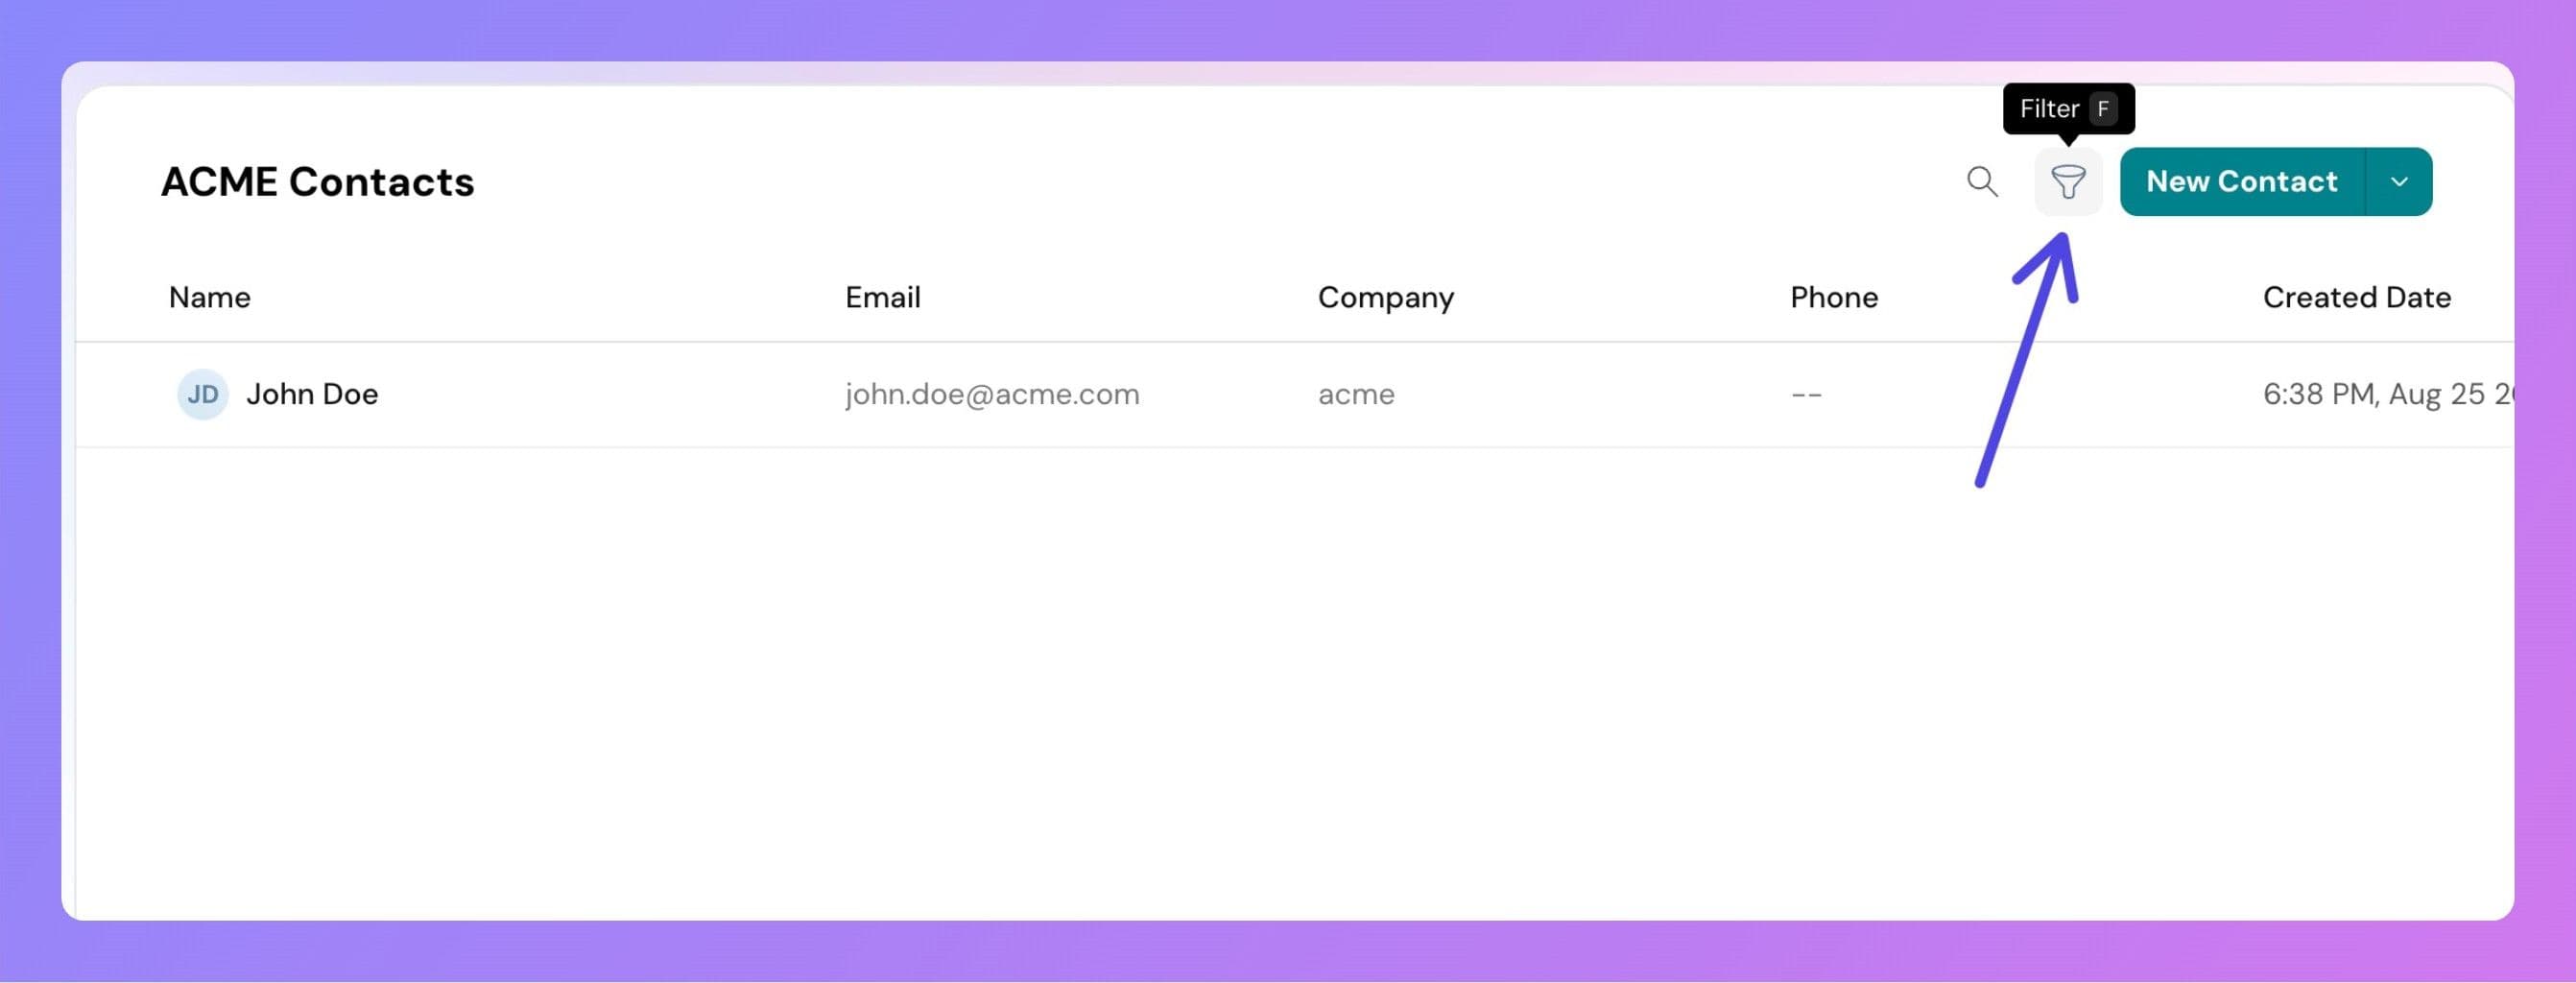
- Go to the Contacts page.
- Click on the Filter button at the top.
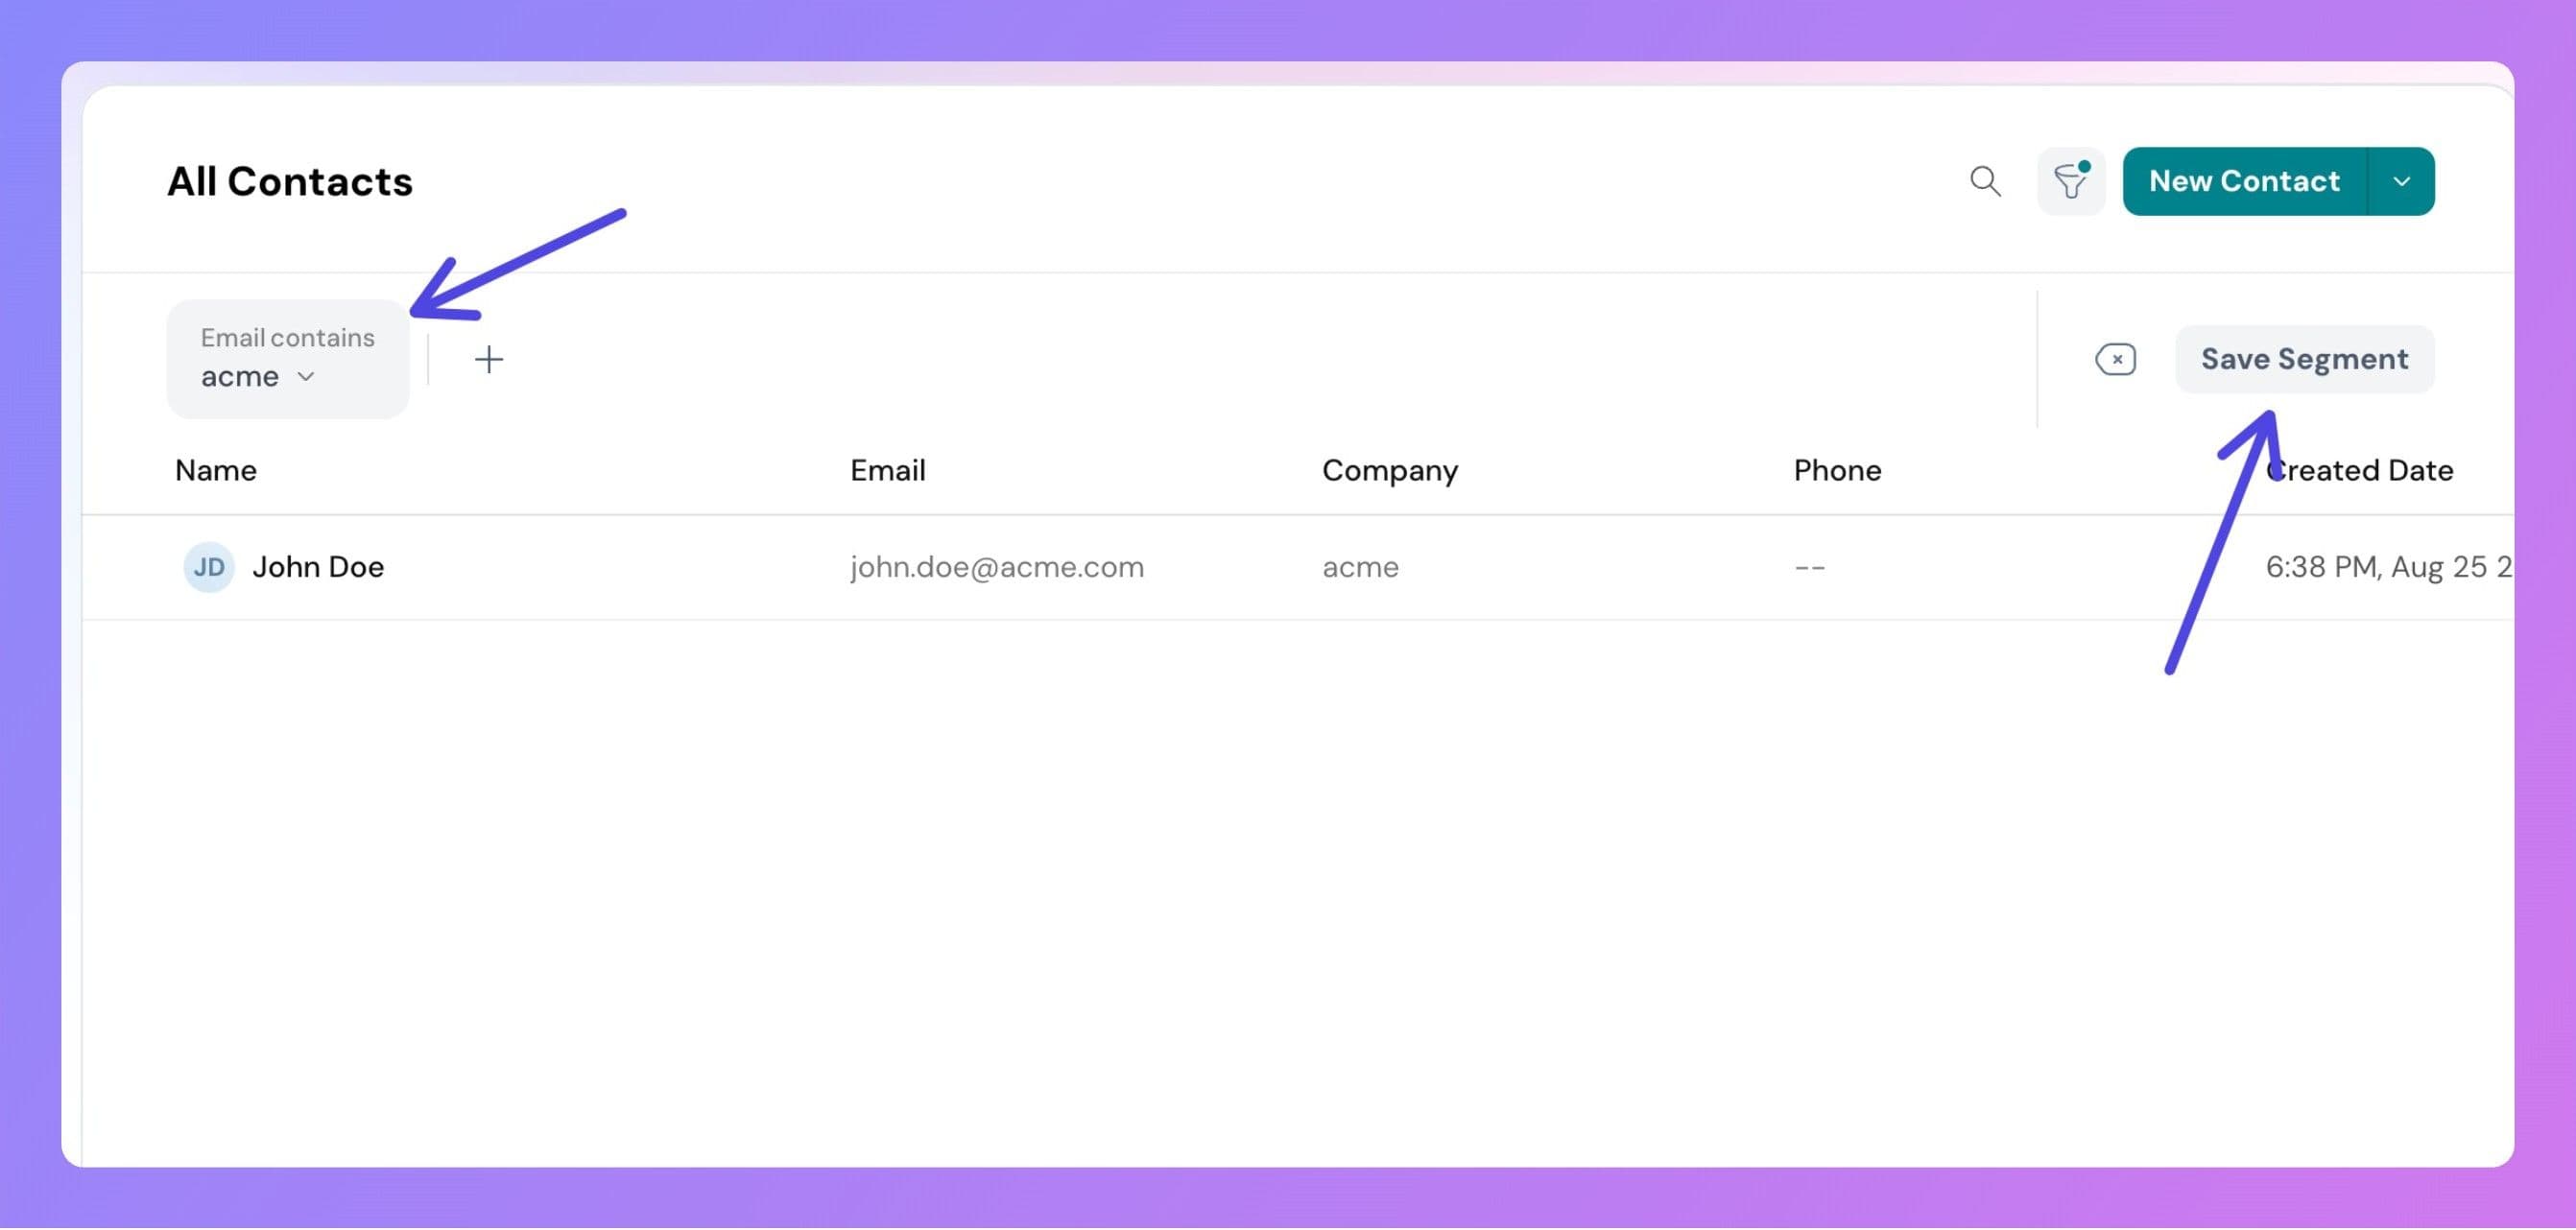
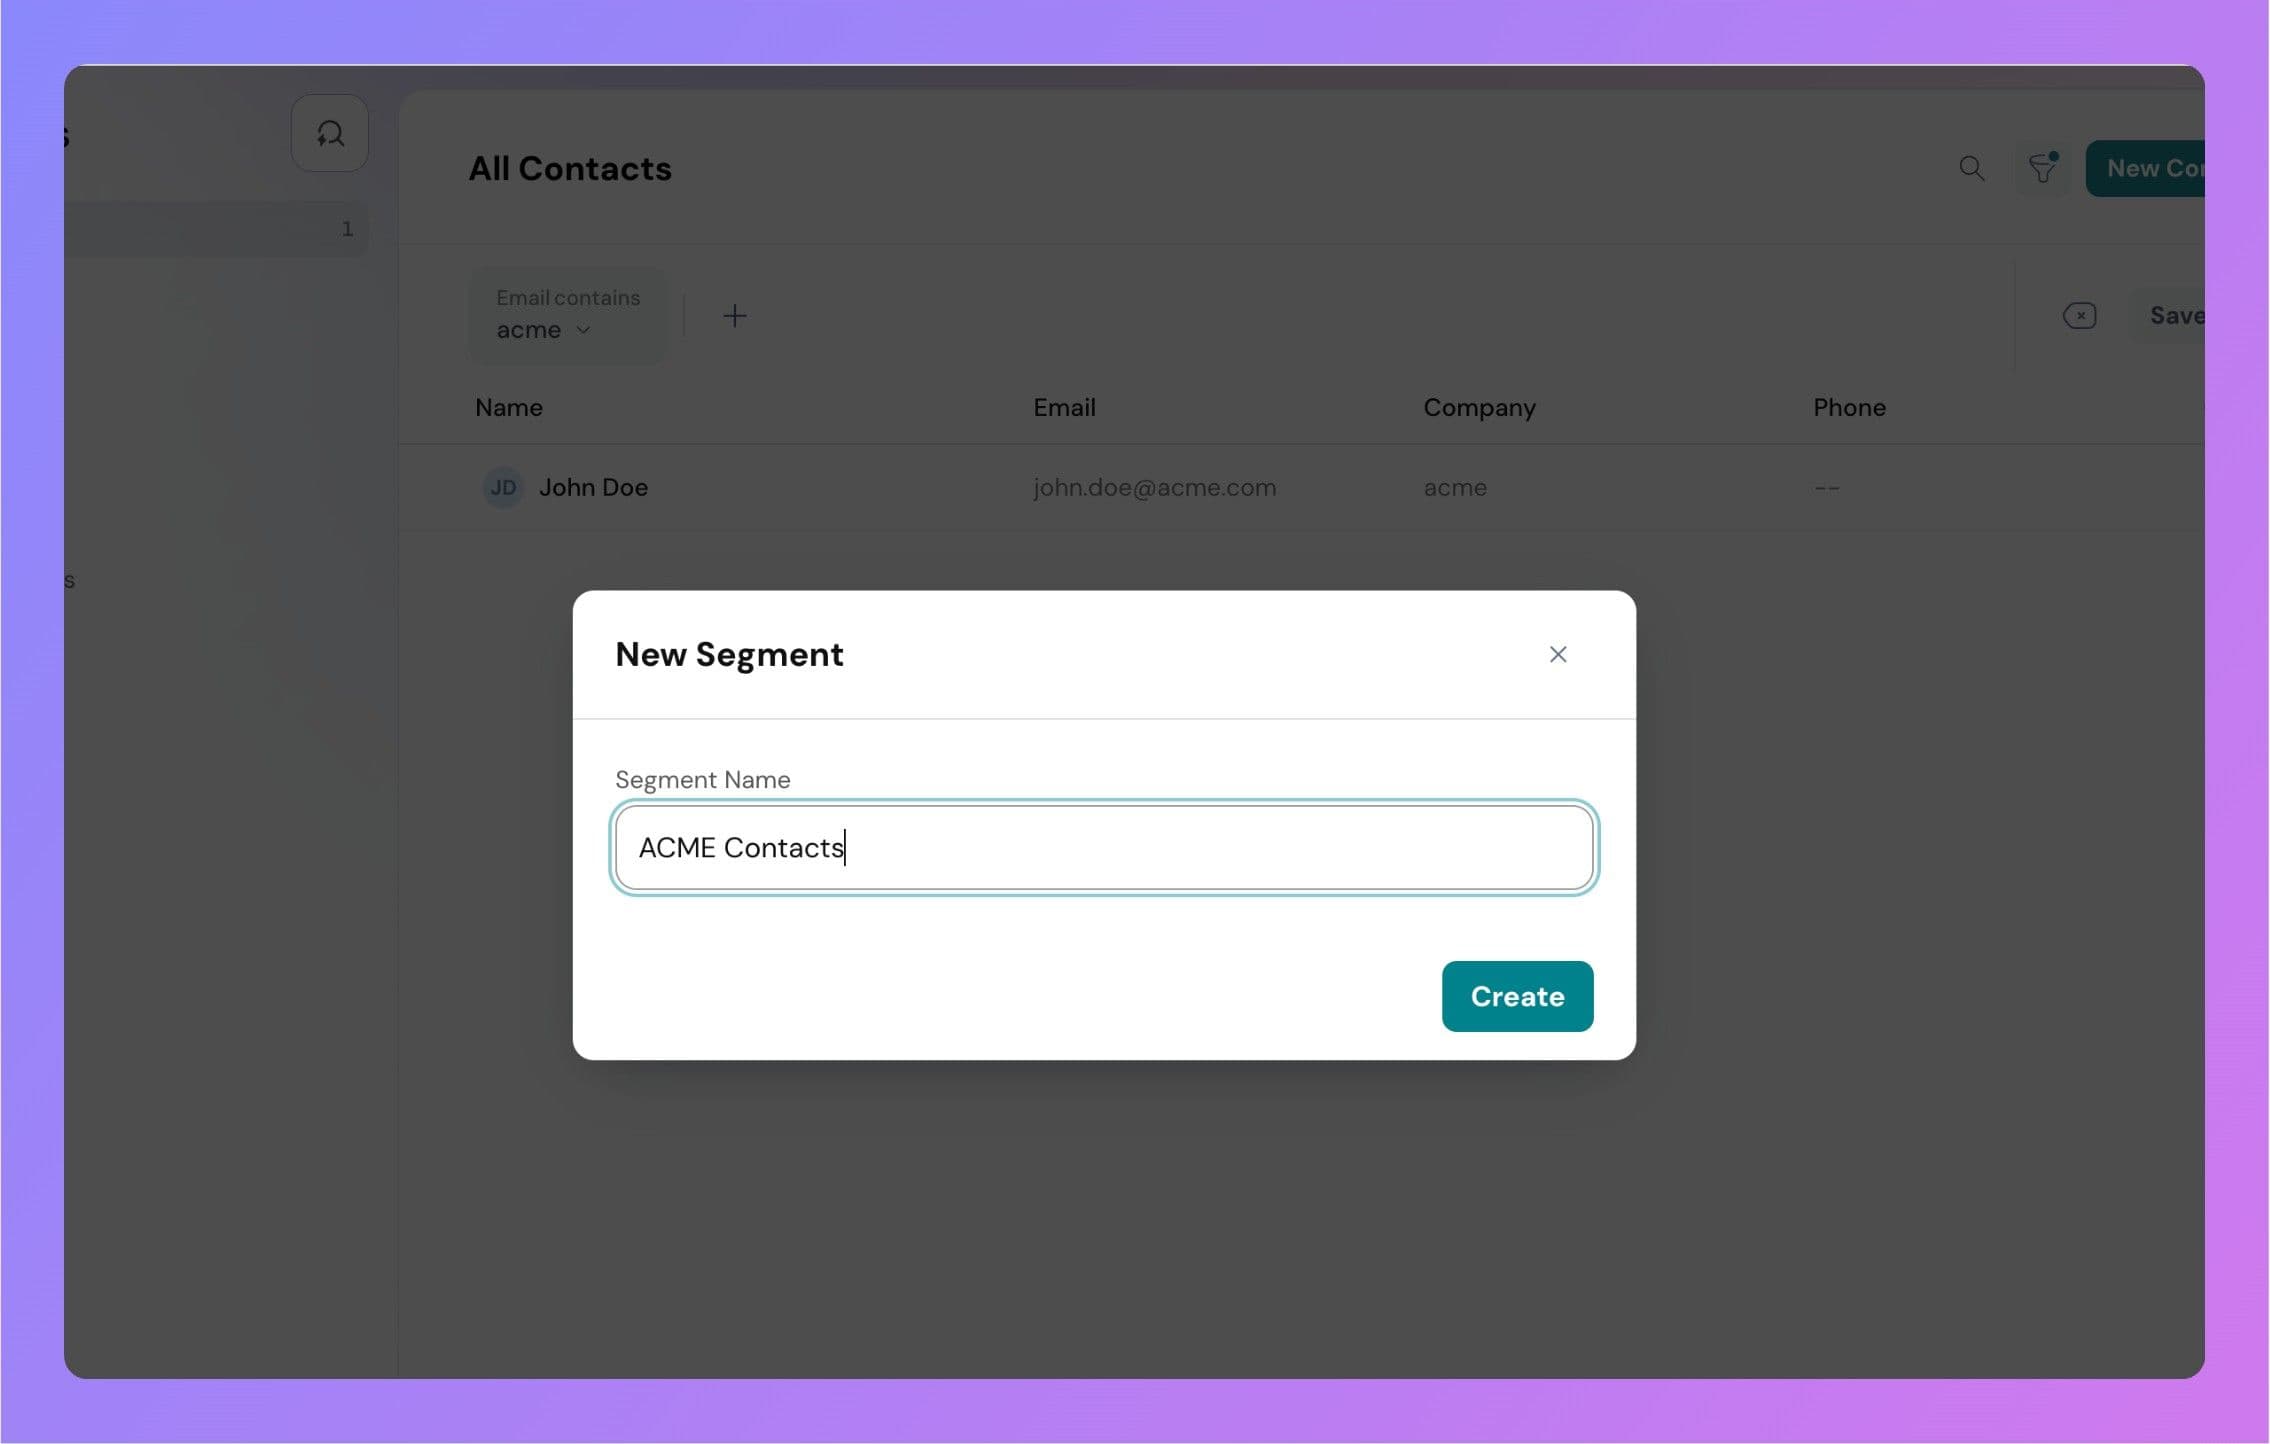
Once you've added the necessary filter conditions, click the Save button.
Give your segment a name and save it.
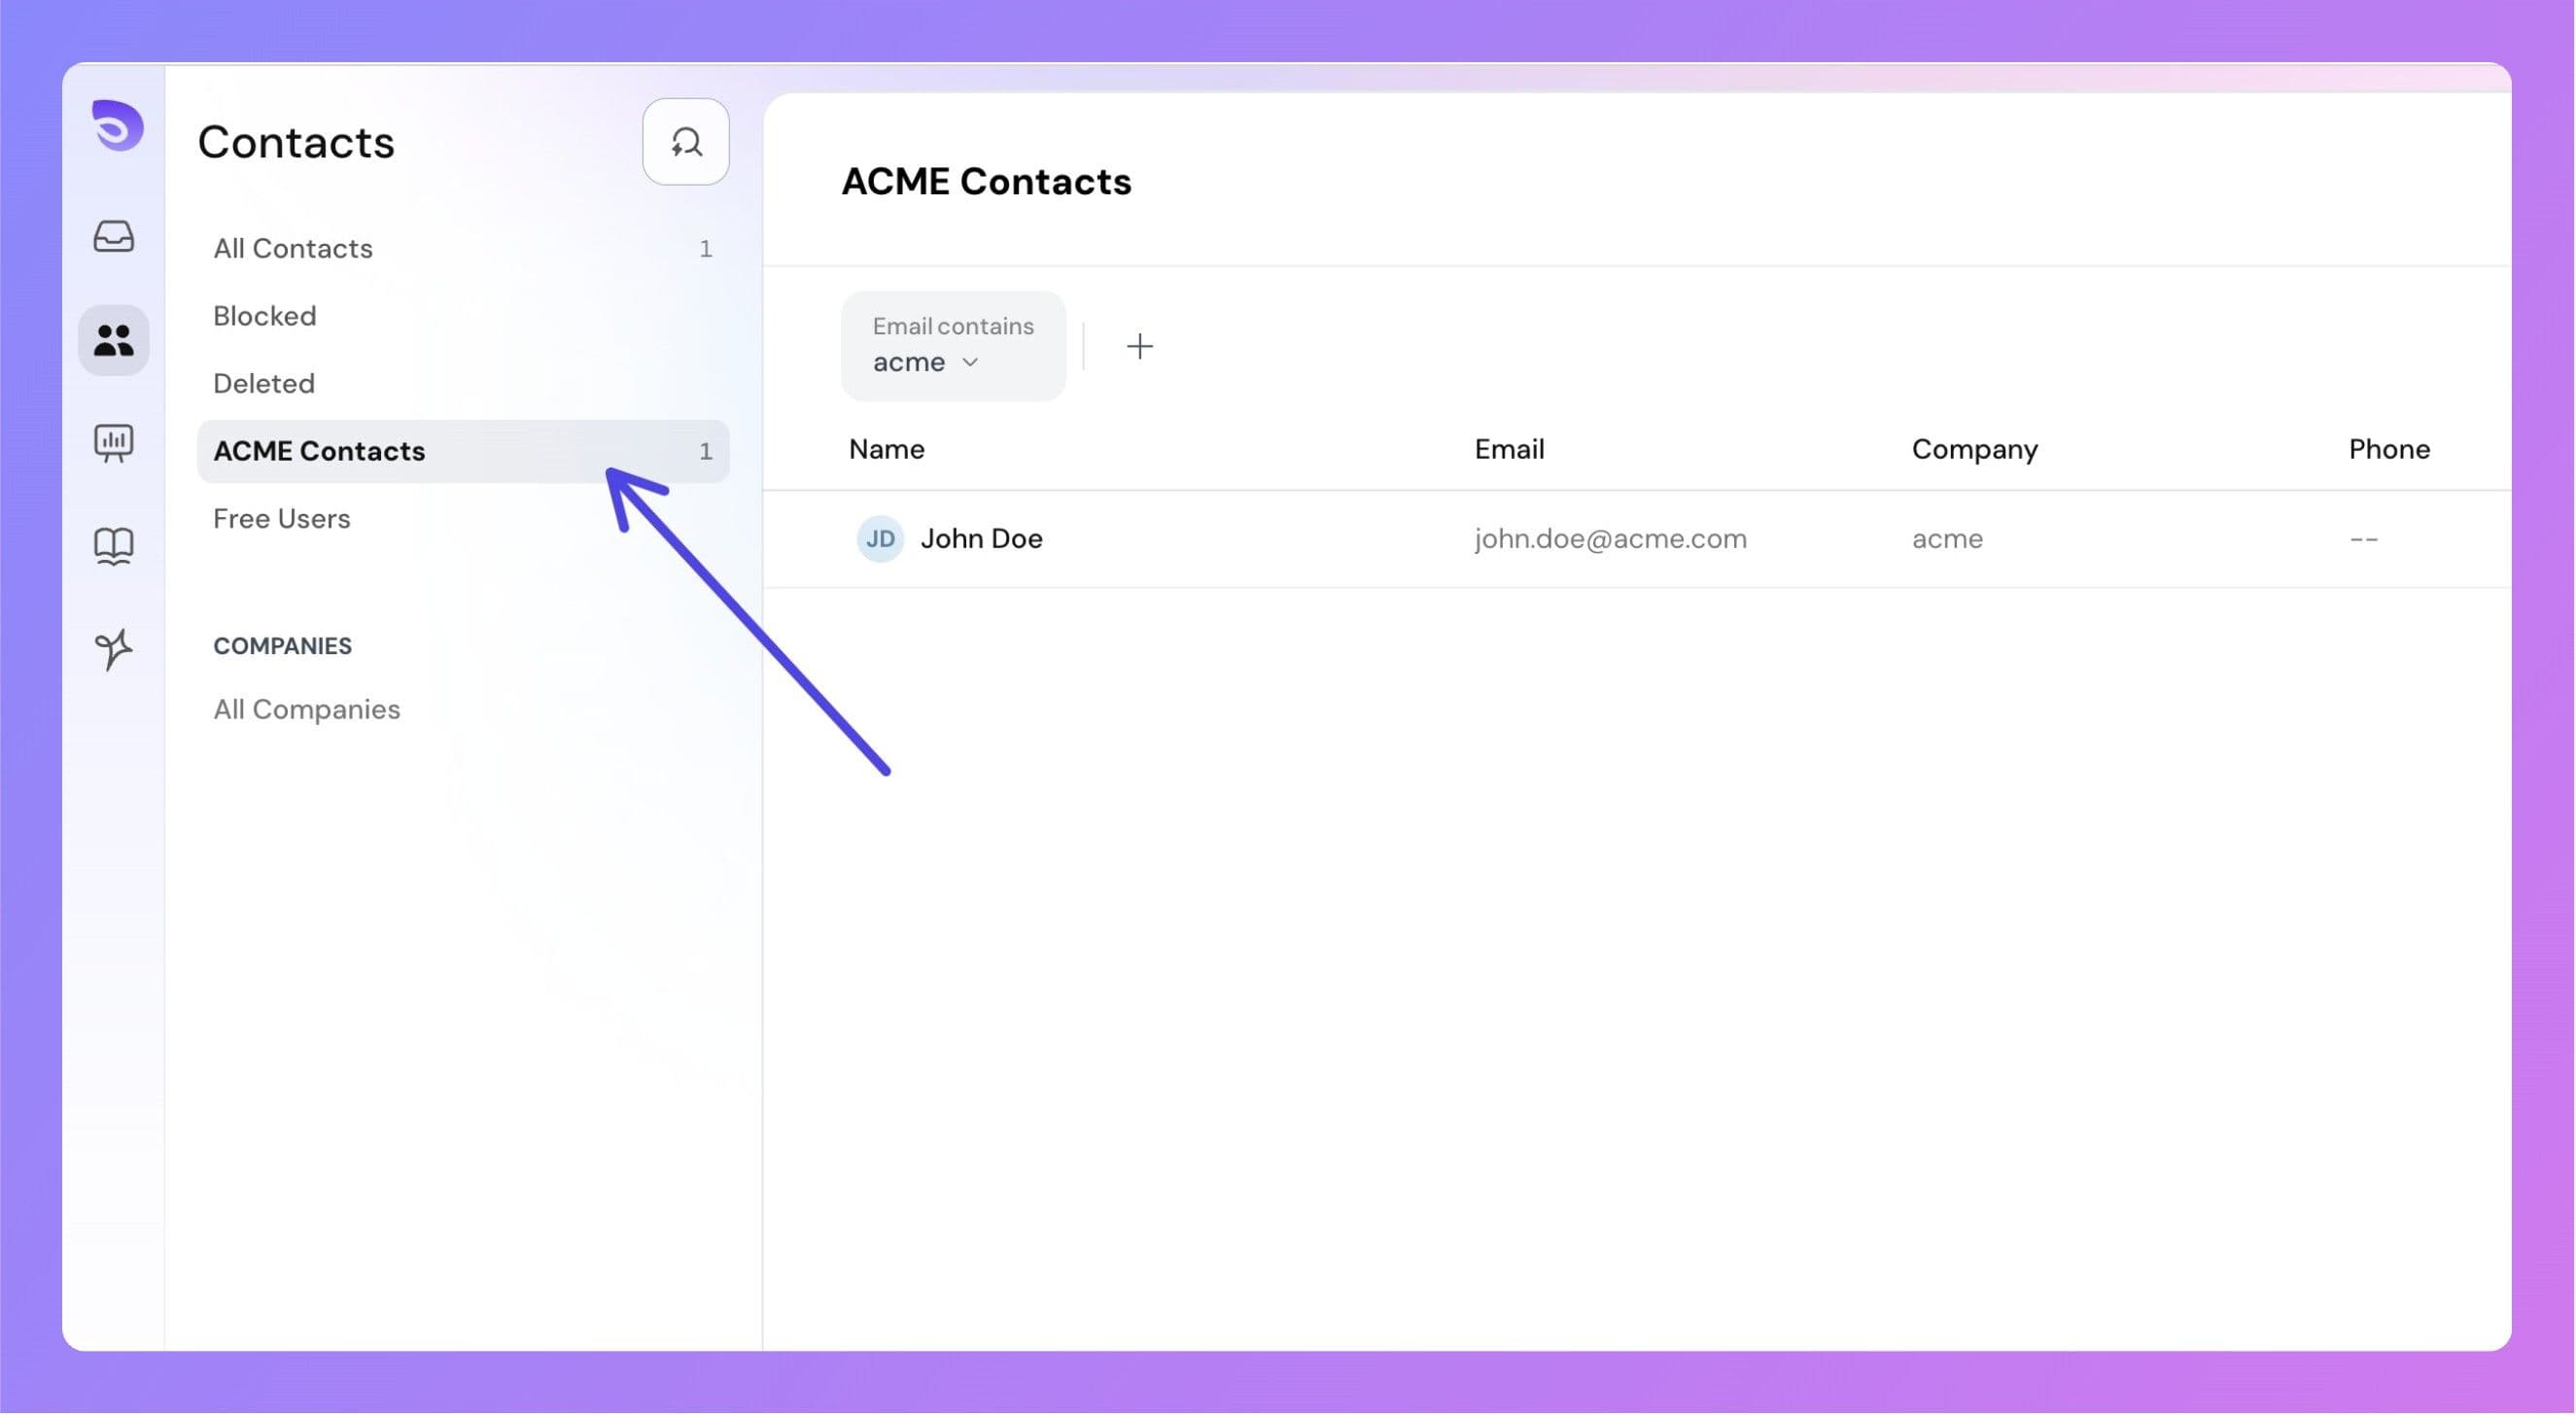
Your custom segment will now appear in the contact listing for easy access.
Contact Permissions
SparrowDesk provides permission controls to restrict or allow access to contact information:
- View Contacts: Allows users to view contact details and interaction history.
- Manage Contacts: Allows users to edit and delete contact records.
These permissions ensure that contact data is accessed and modified only by the right team members.