Installing Chat Widget
To let customers chat with your team via SparrowDesk, you'll need to add a small code snippet to your website. This article walks you through how to install, test, and secure the widget.
Setting up chat widget can be little bit technical , connect with the technical person in your company if you need help.
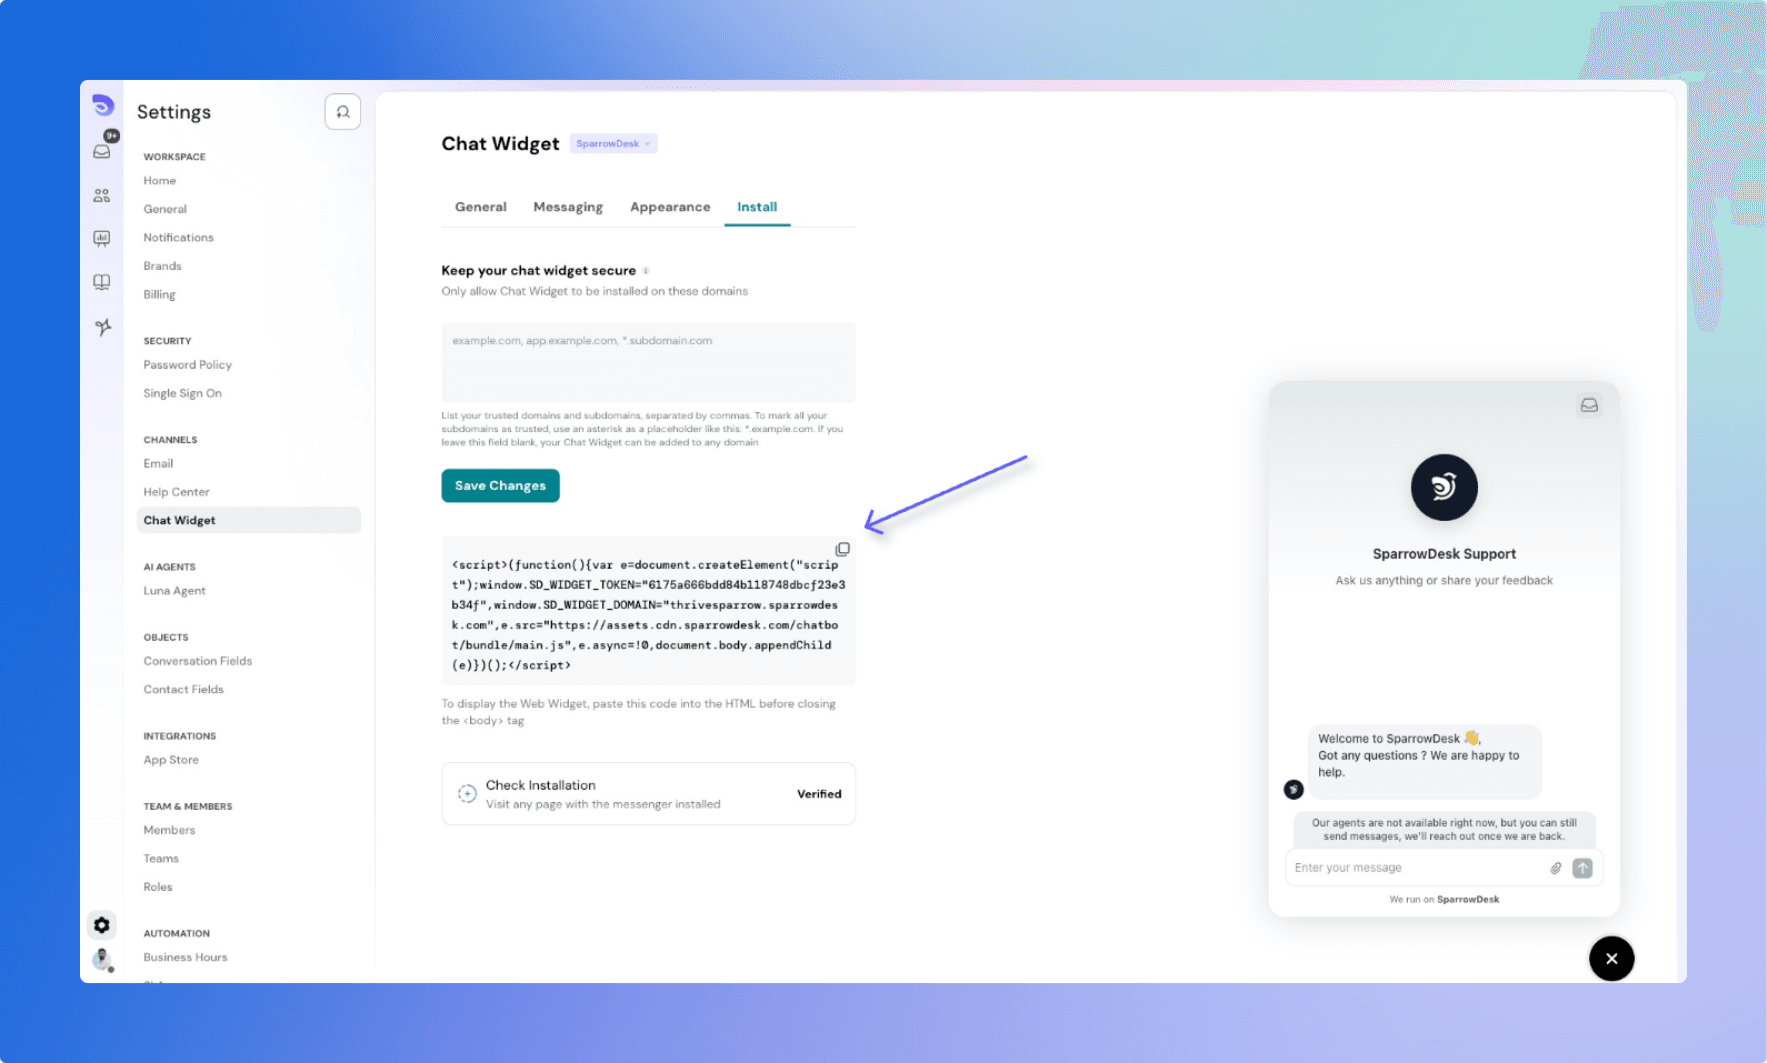
1. Find and Copy Your Chat Widget Code
You can find your widget installation code in your SparrowDesk account:
- Go to Settings → Chat Widget → Installation
- Click “Copy Code” to copy the JavaScript snippet to your clipboard
- The same code can be reused across different websites or domains.
2. Embed the Code into Your Website
To show the chat widget on your website:
- Paste the code just before the closing
</body>tag on every page where you want the widget to appear. - If your website has a common header or footer place the snippet there so it appears across all pages.
💡 Need help? Ask your web developer to place the code in your site’s HTML correctly.
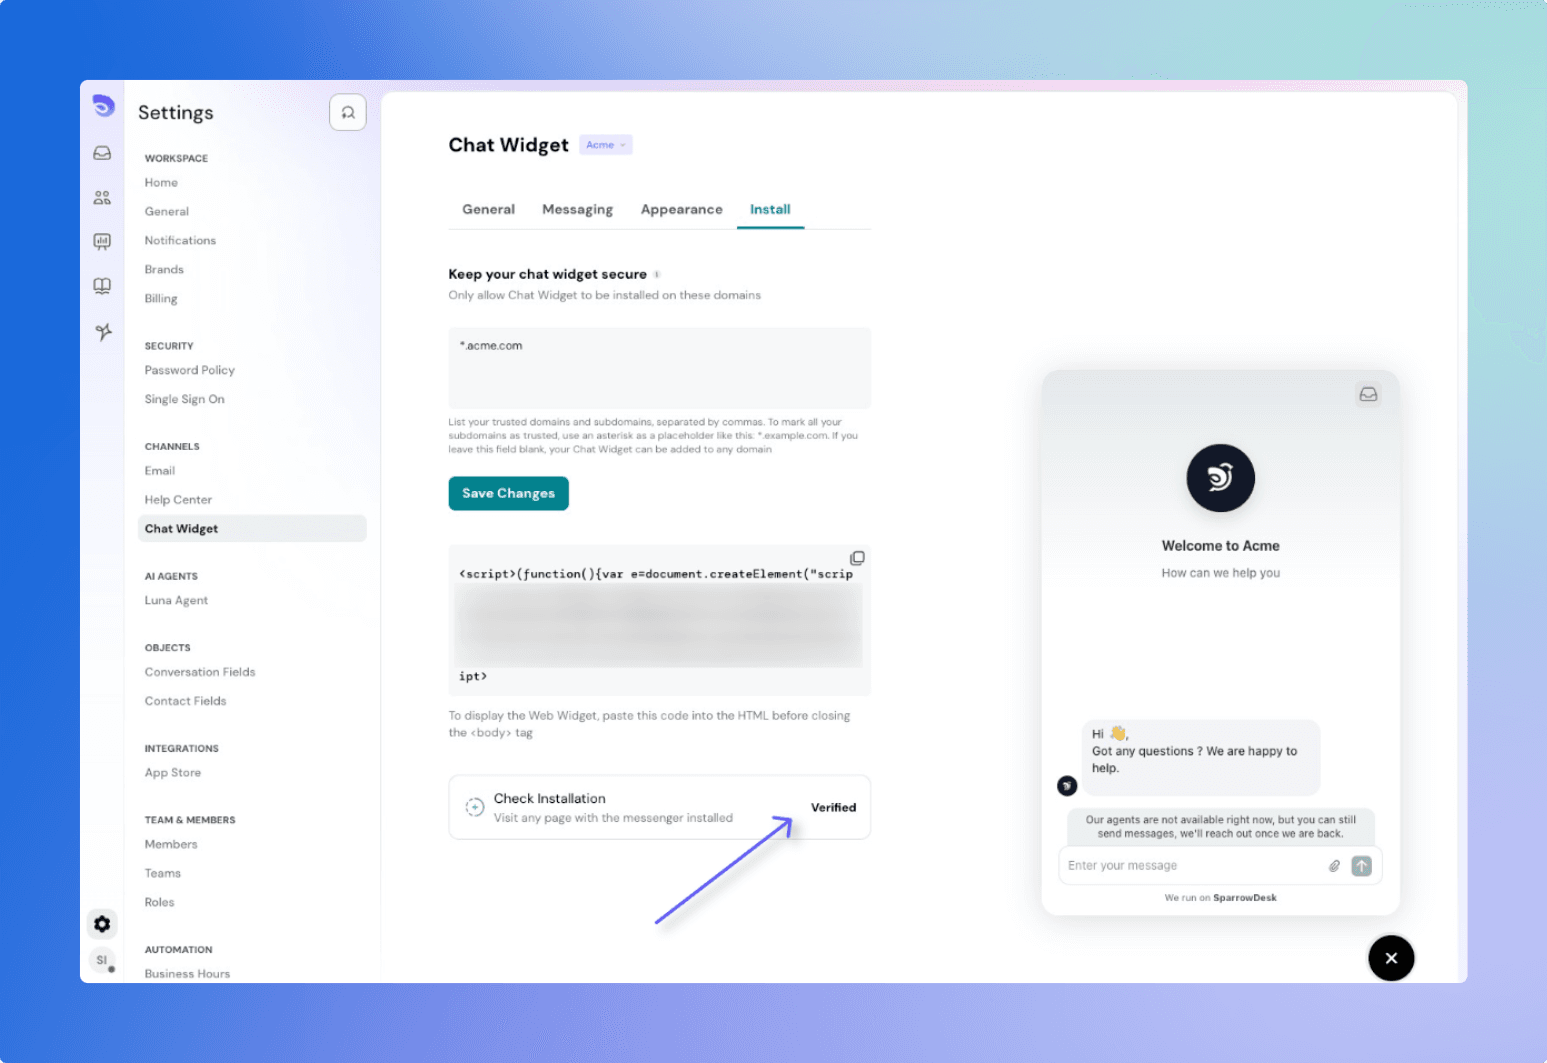
3. Verify the Installation
Once you've embedded the code:
- Return to Settings → Chat Widget → Installation
The system will check if the widget has been loaded. If successful: You’ll see “Widget Installed”
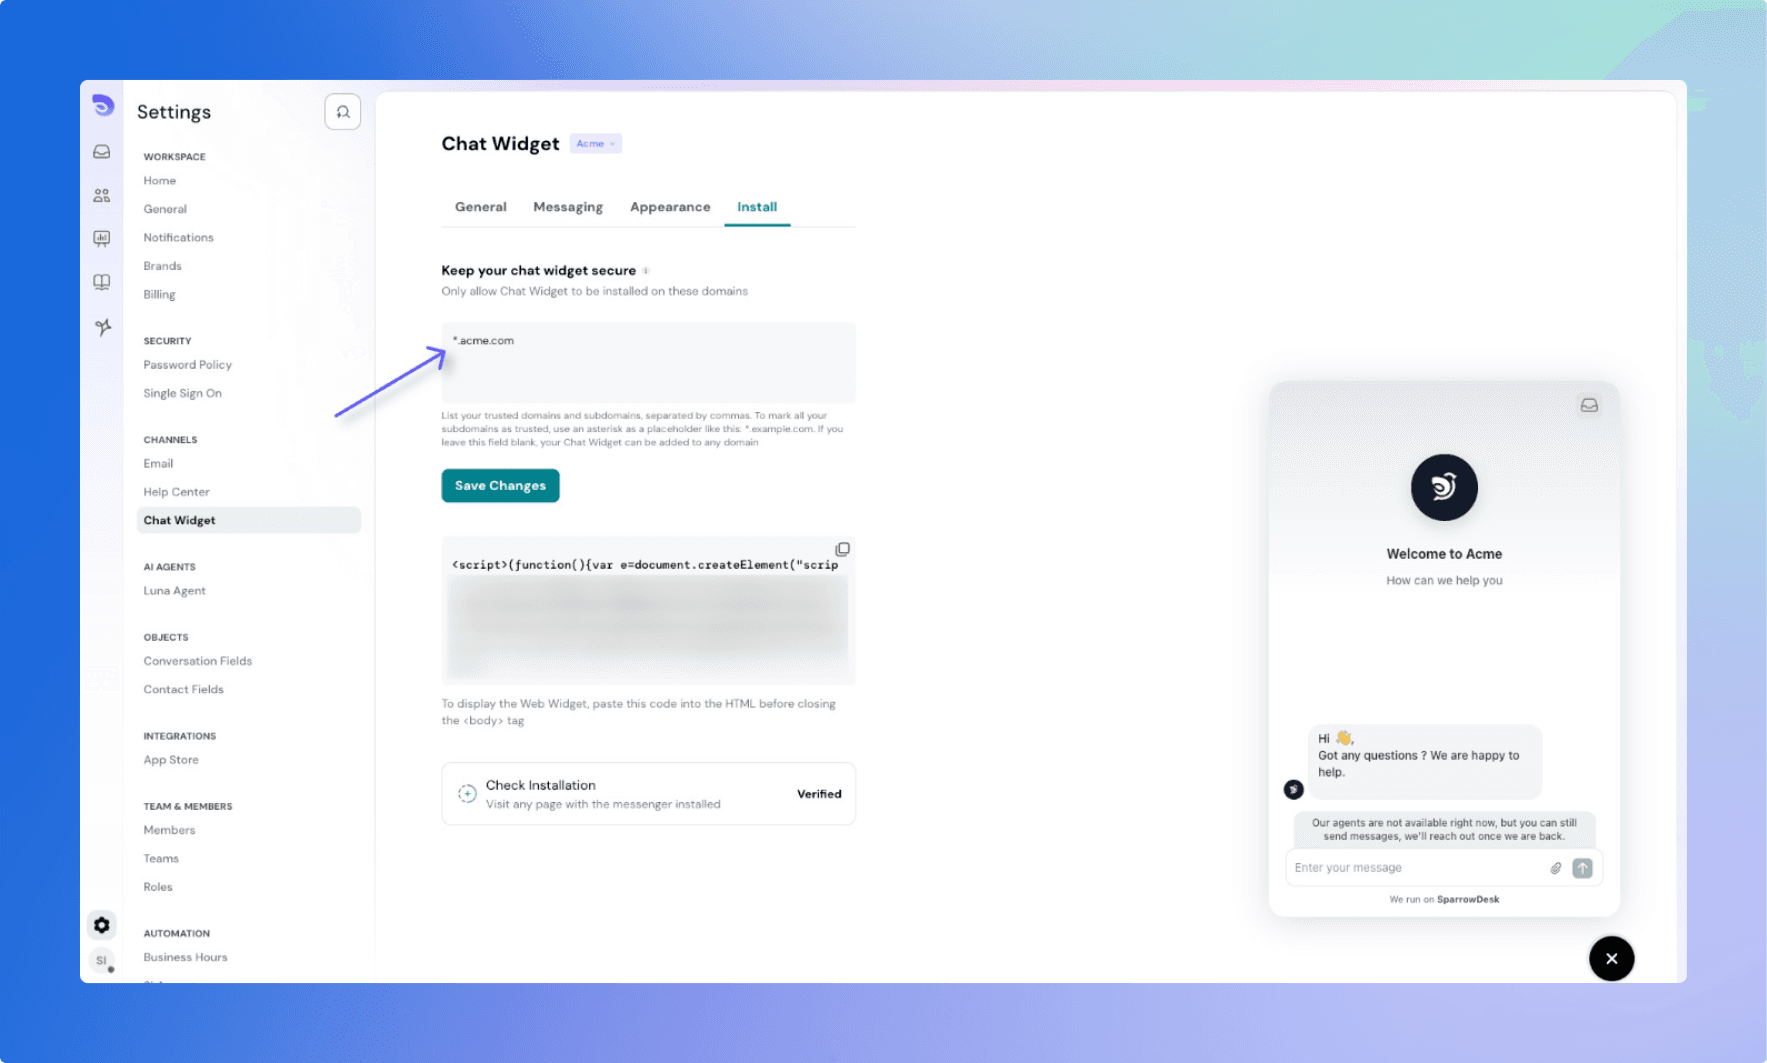
Allowlist (Trusted Domains)
To prevent others from misusing your widget code, restrict it to trusted domains:
How to Allowlist Domains:
- Go to Settings → Chat Widget → Make your Chat Widget Secure
- Add full domains (e.g.,
support.example.com,help.example.com) - Use wildcards to allow subdomains (e.g.,
*.example.com) - Separate multiple entries with commas
Example:
help.example.com,support.example.com,*.example.com
What to Know:
- You don't have to include
https://or a trailing slash (/) - If no domain is added, your widget will be publicly usable on any website — we strongly recommend allowlisting
- There is no limit to the number of domains you can allow