
Send Proactive Messages to Website Visitors

A proactive message is a chat message you send to website visitors before they contact support, such as a greeting, a helpful tip, or an invitation to book a demo. You create and manage proactive messages in Settings → Proactive Messages, under Outbound.
Account Owners and Admins can create and manage proactive messages. On the Enterprise plan, custom roles can too, as long as they have the General permission under Account Settings, which custom roles have by default.
What You Need First
- The chat widget installed on your website. Proactive messages reach visitors through it.
- A bot identity for your brand. Proactive messages are sent using your brand’s bot identity.
Create a Proactive Message
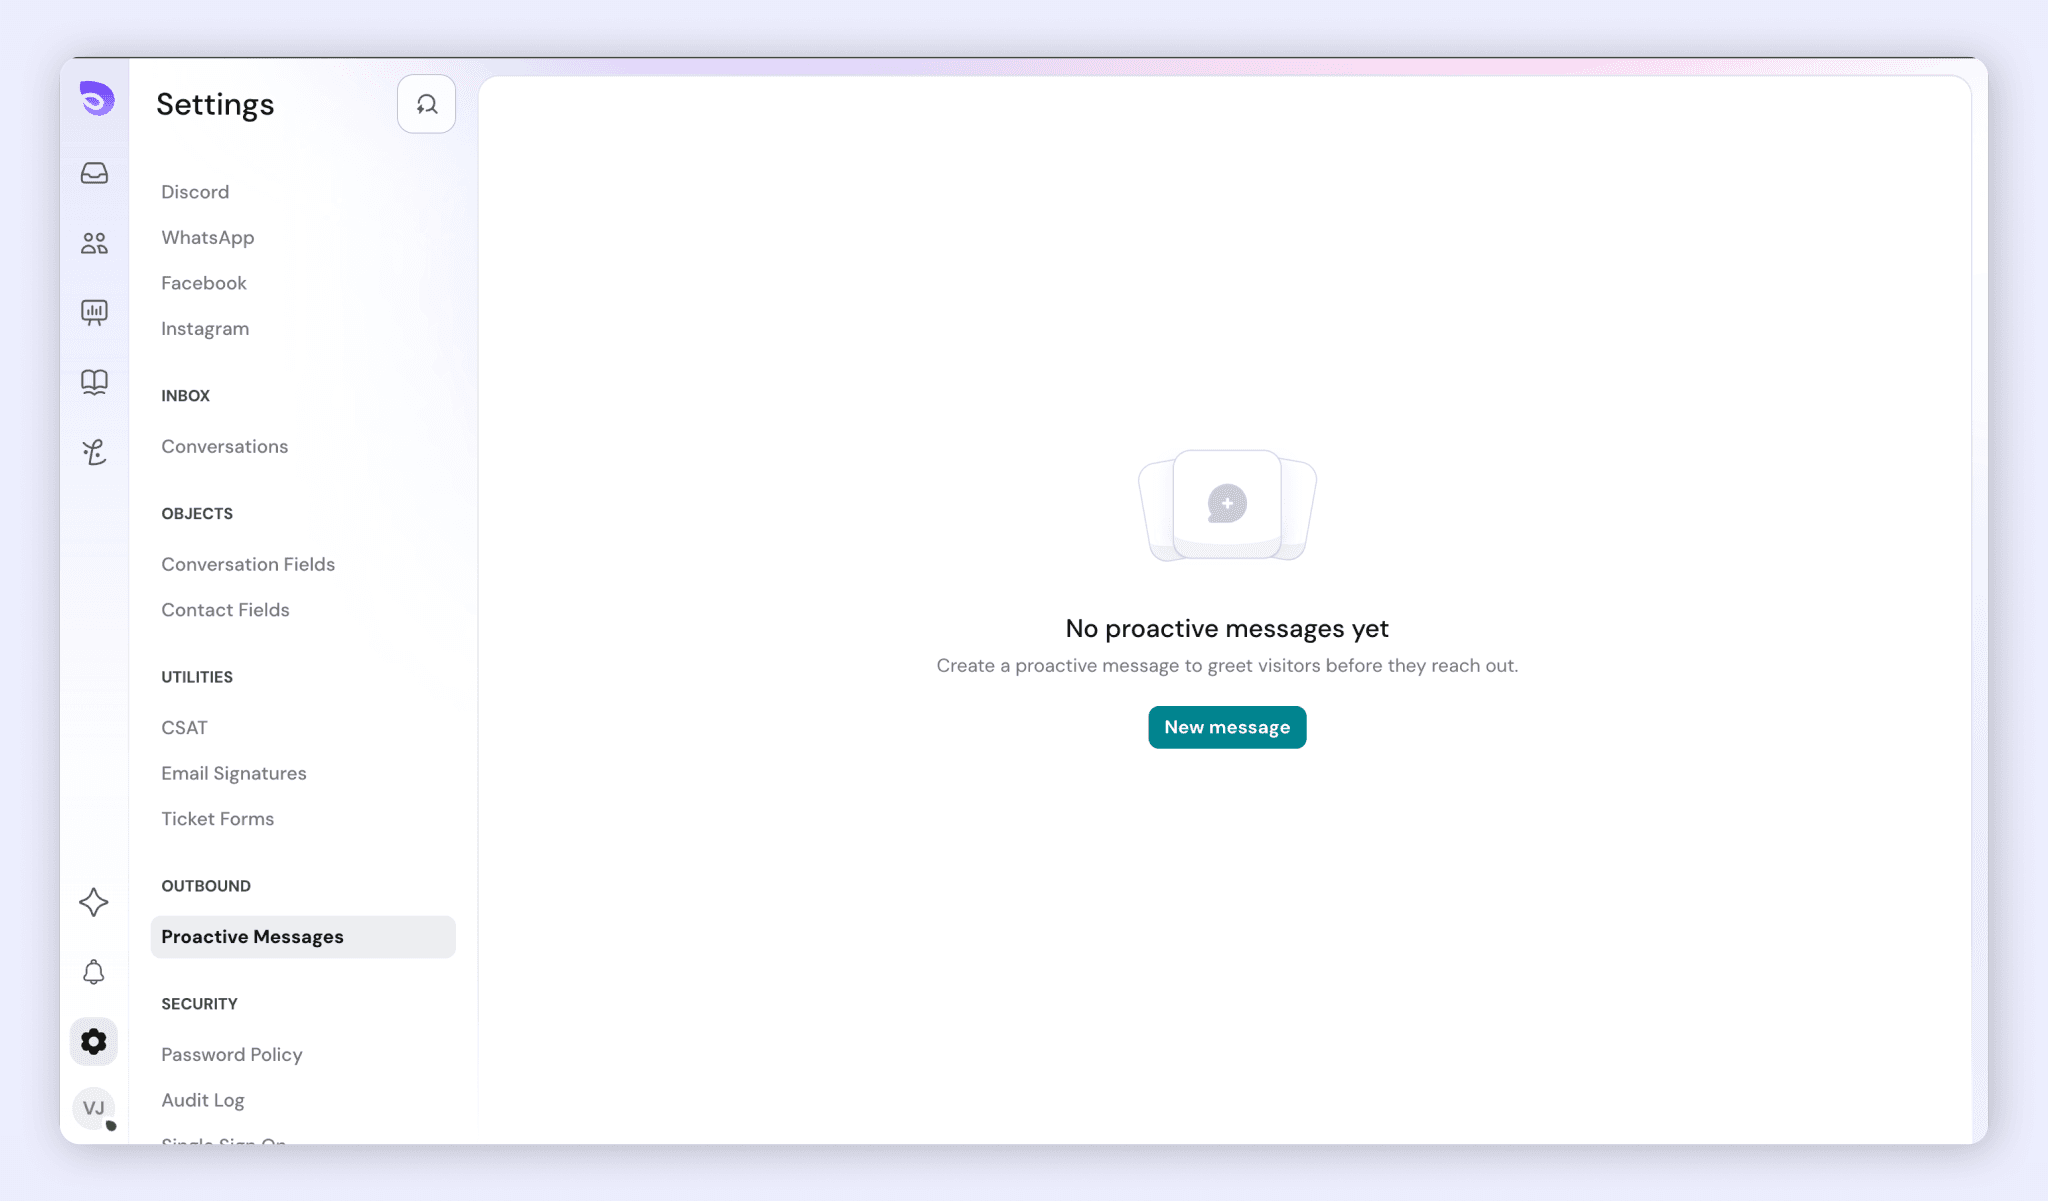
- Go to Settings → Proactive Messages, under Outbound.
- Click New message.
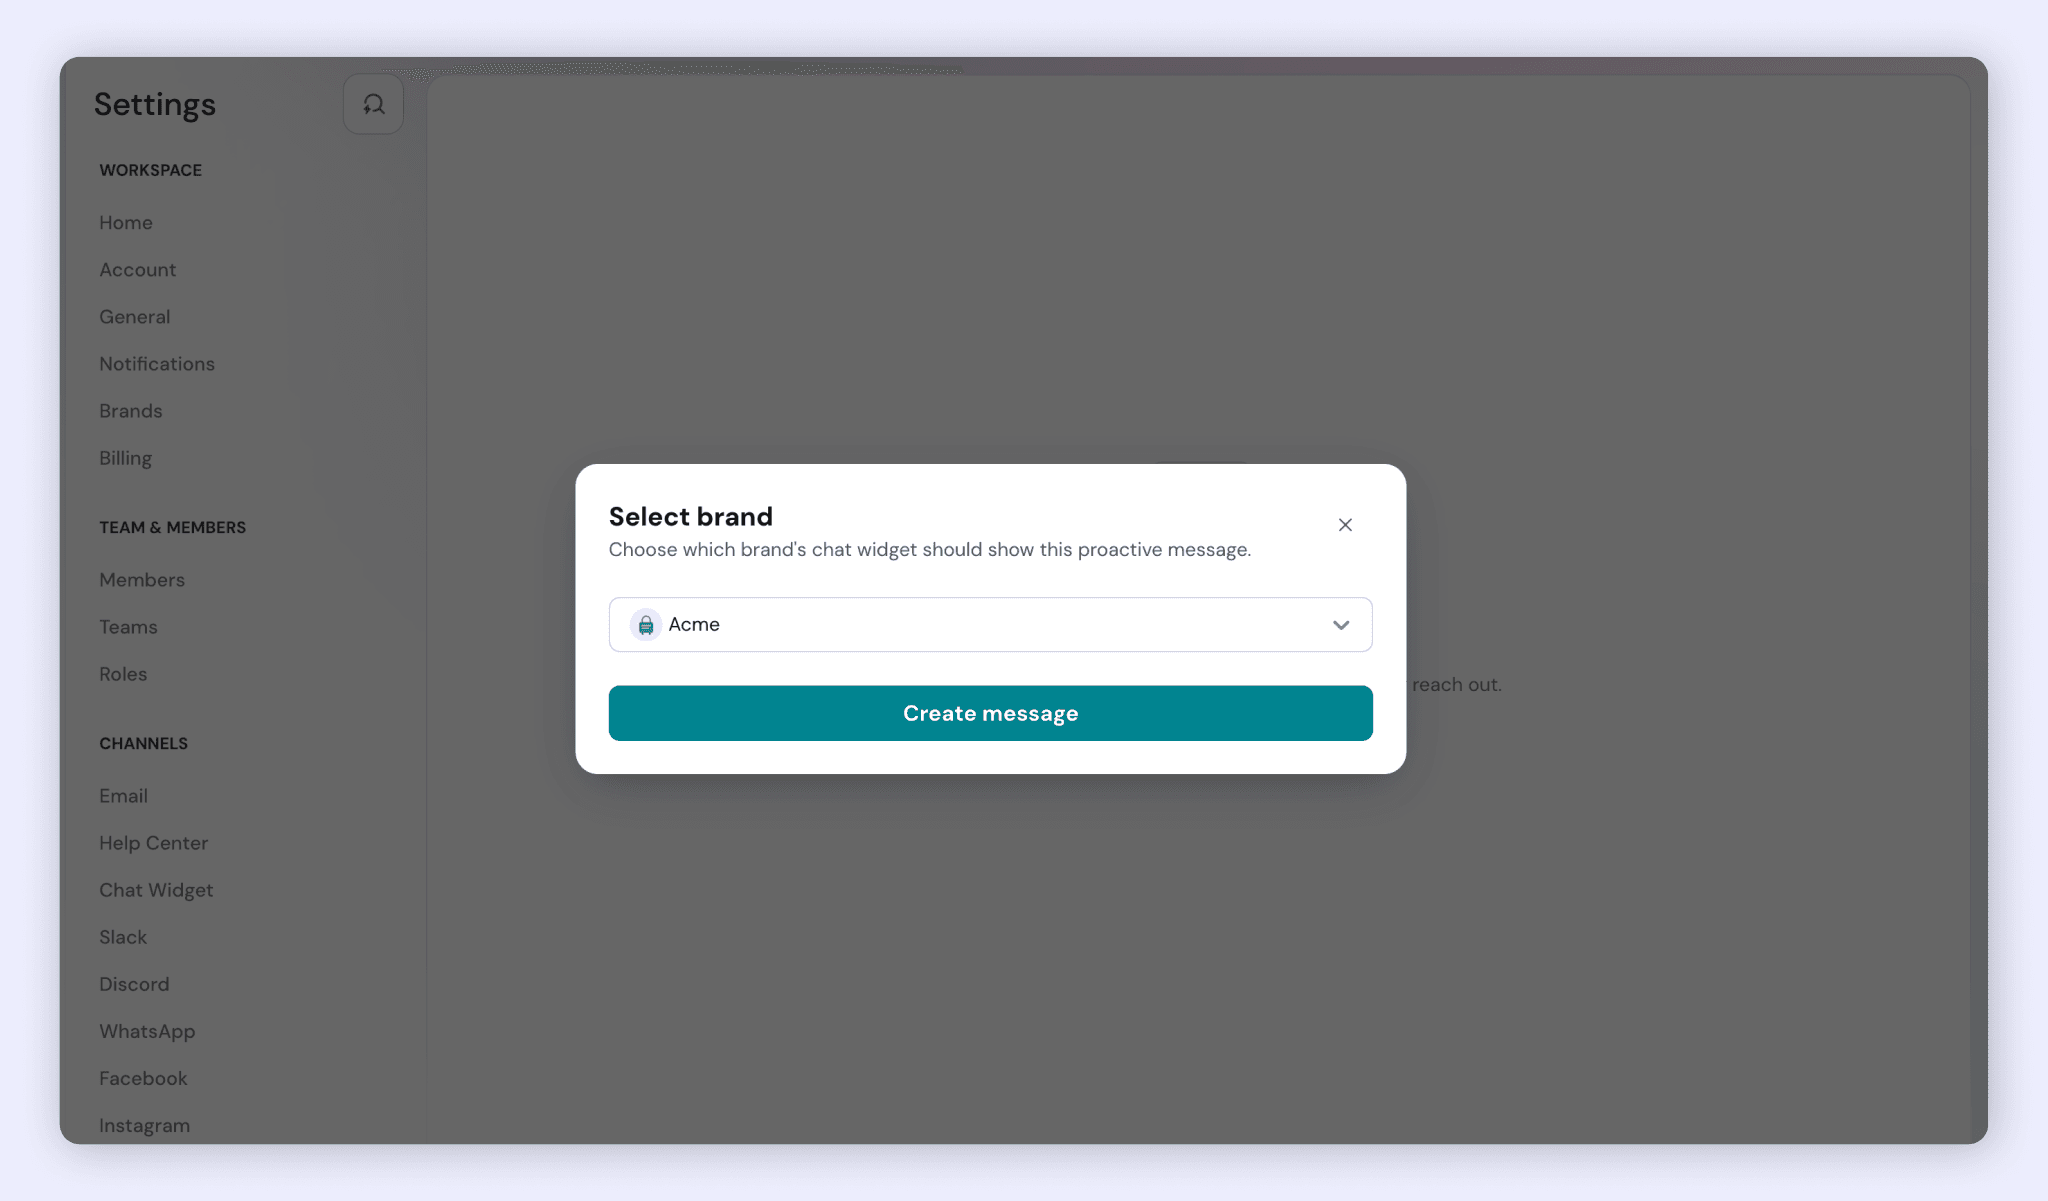
- Select the brand the message is for. The message is sent using that brand’s bot identity.
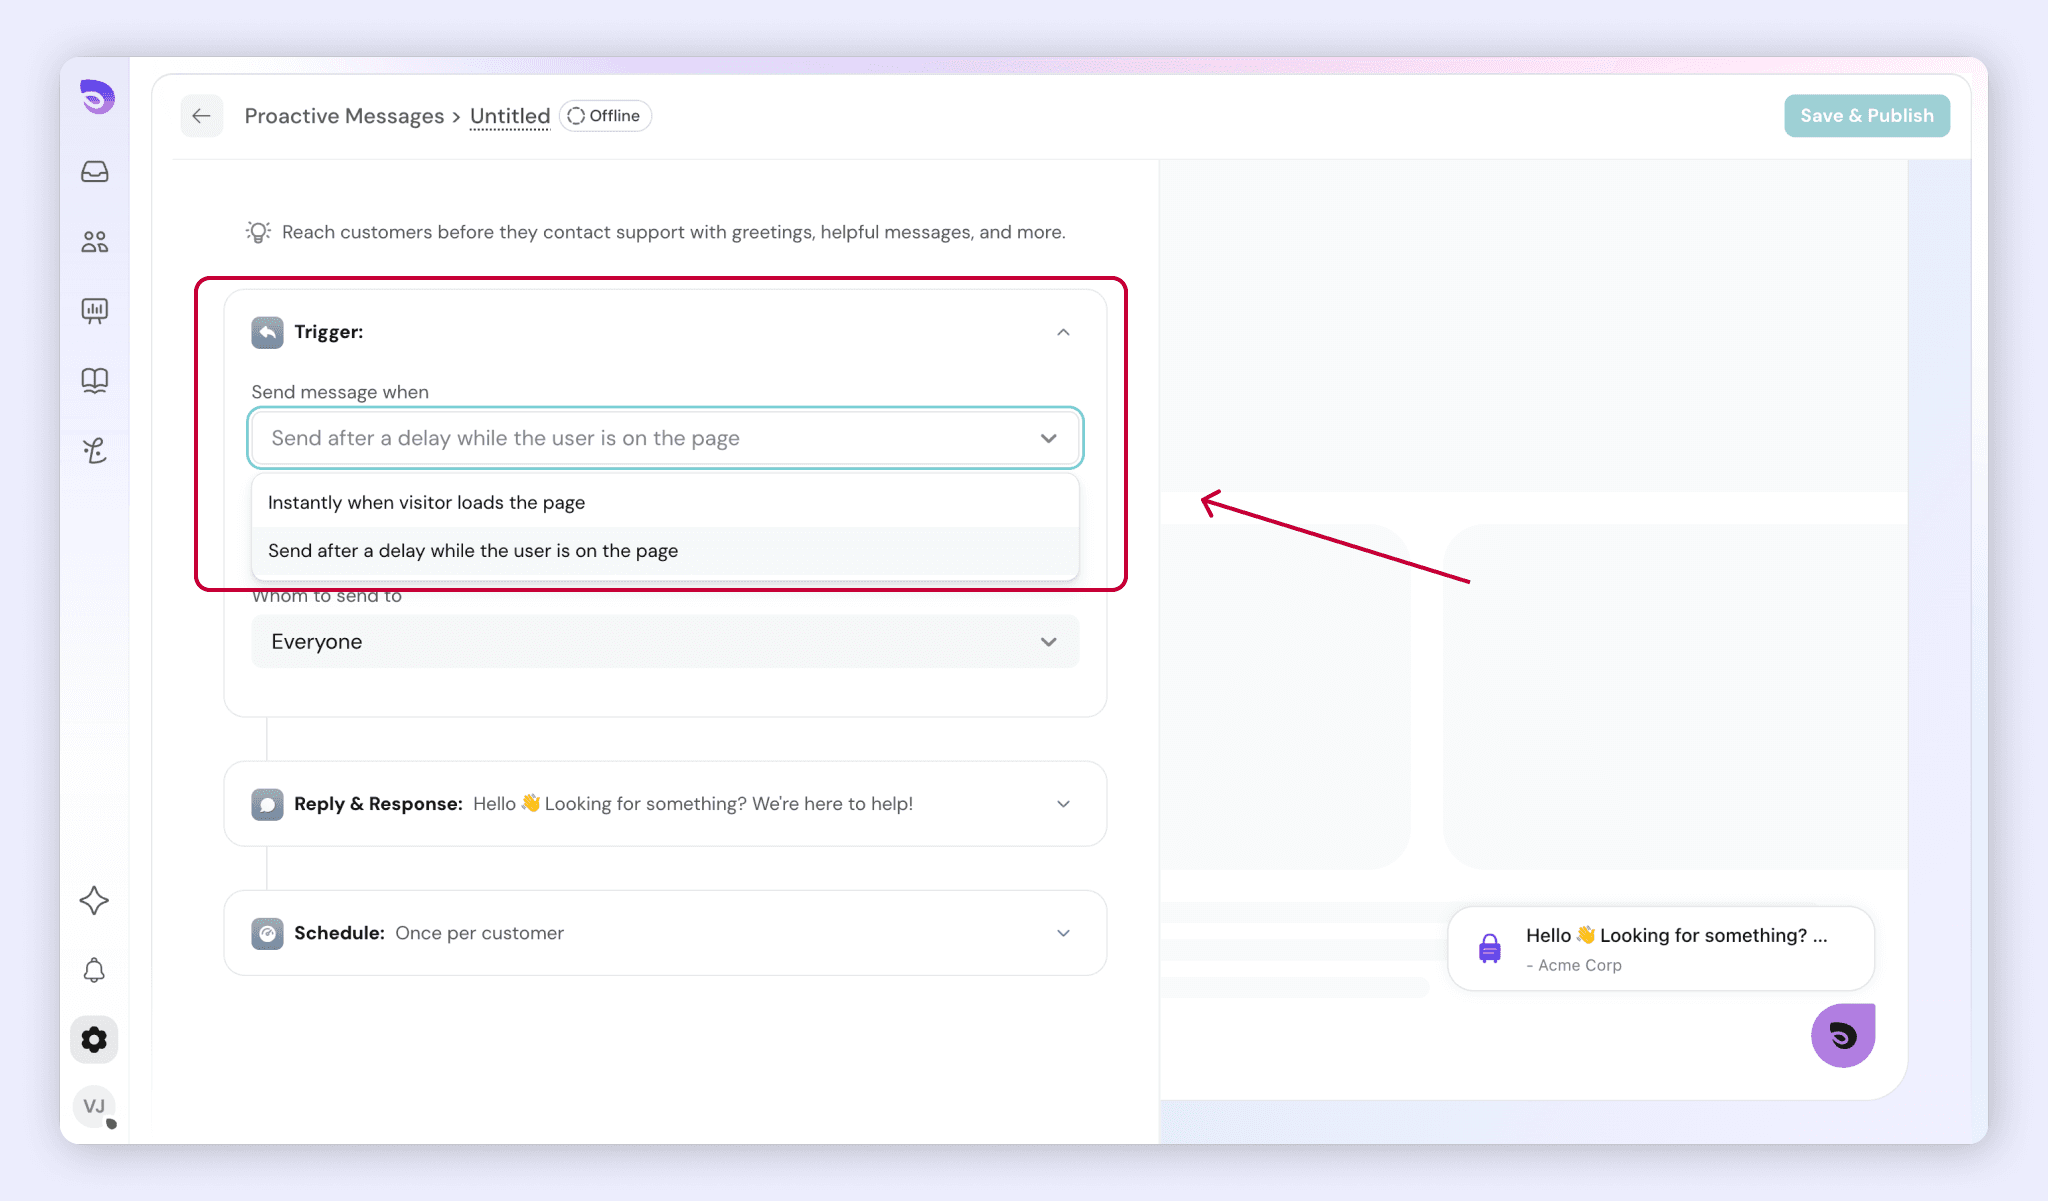
The message builder opens with three sections: Trigger, Reply & Response, and Schedule. A new message starts as Offline and isn’t shown to visitors until you publish it. As you set it up, the preview on the right shows how the message will appear to visitors.
Set the Trigger
The Trigger section controls when the message is sent and who receives it.
- Under Send message when, choose one of these:
- Instantly when a visitor loads the page: the message appears as soon as the page loads. This is the default.
- Send after a delay while the user is on the page: the message appears after the visitor has spent some time on the page.
- Under Whom to send to, choose who receives the message. The default is Everyone. You can set it to specific users as well.
- Under Whom to send to, choose one of these:
- Everyone: every visitor receives the message. This is the default.
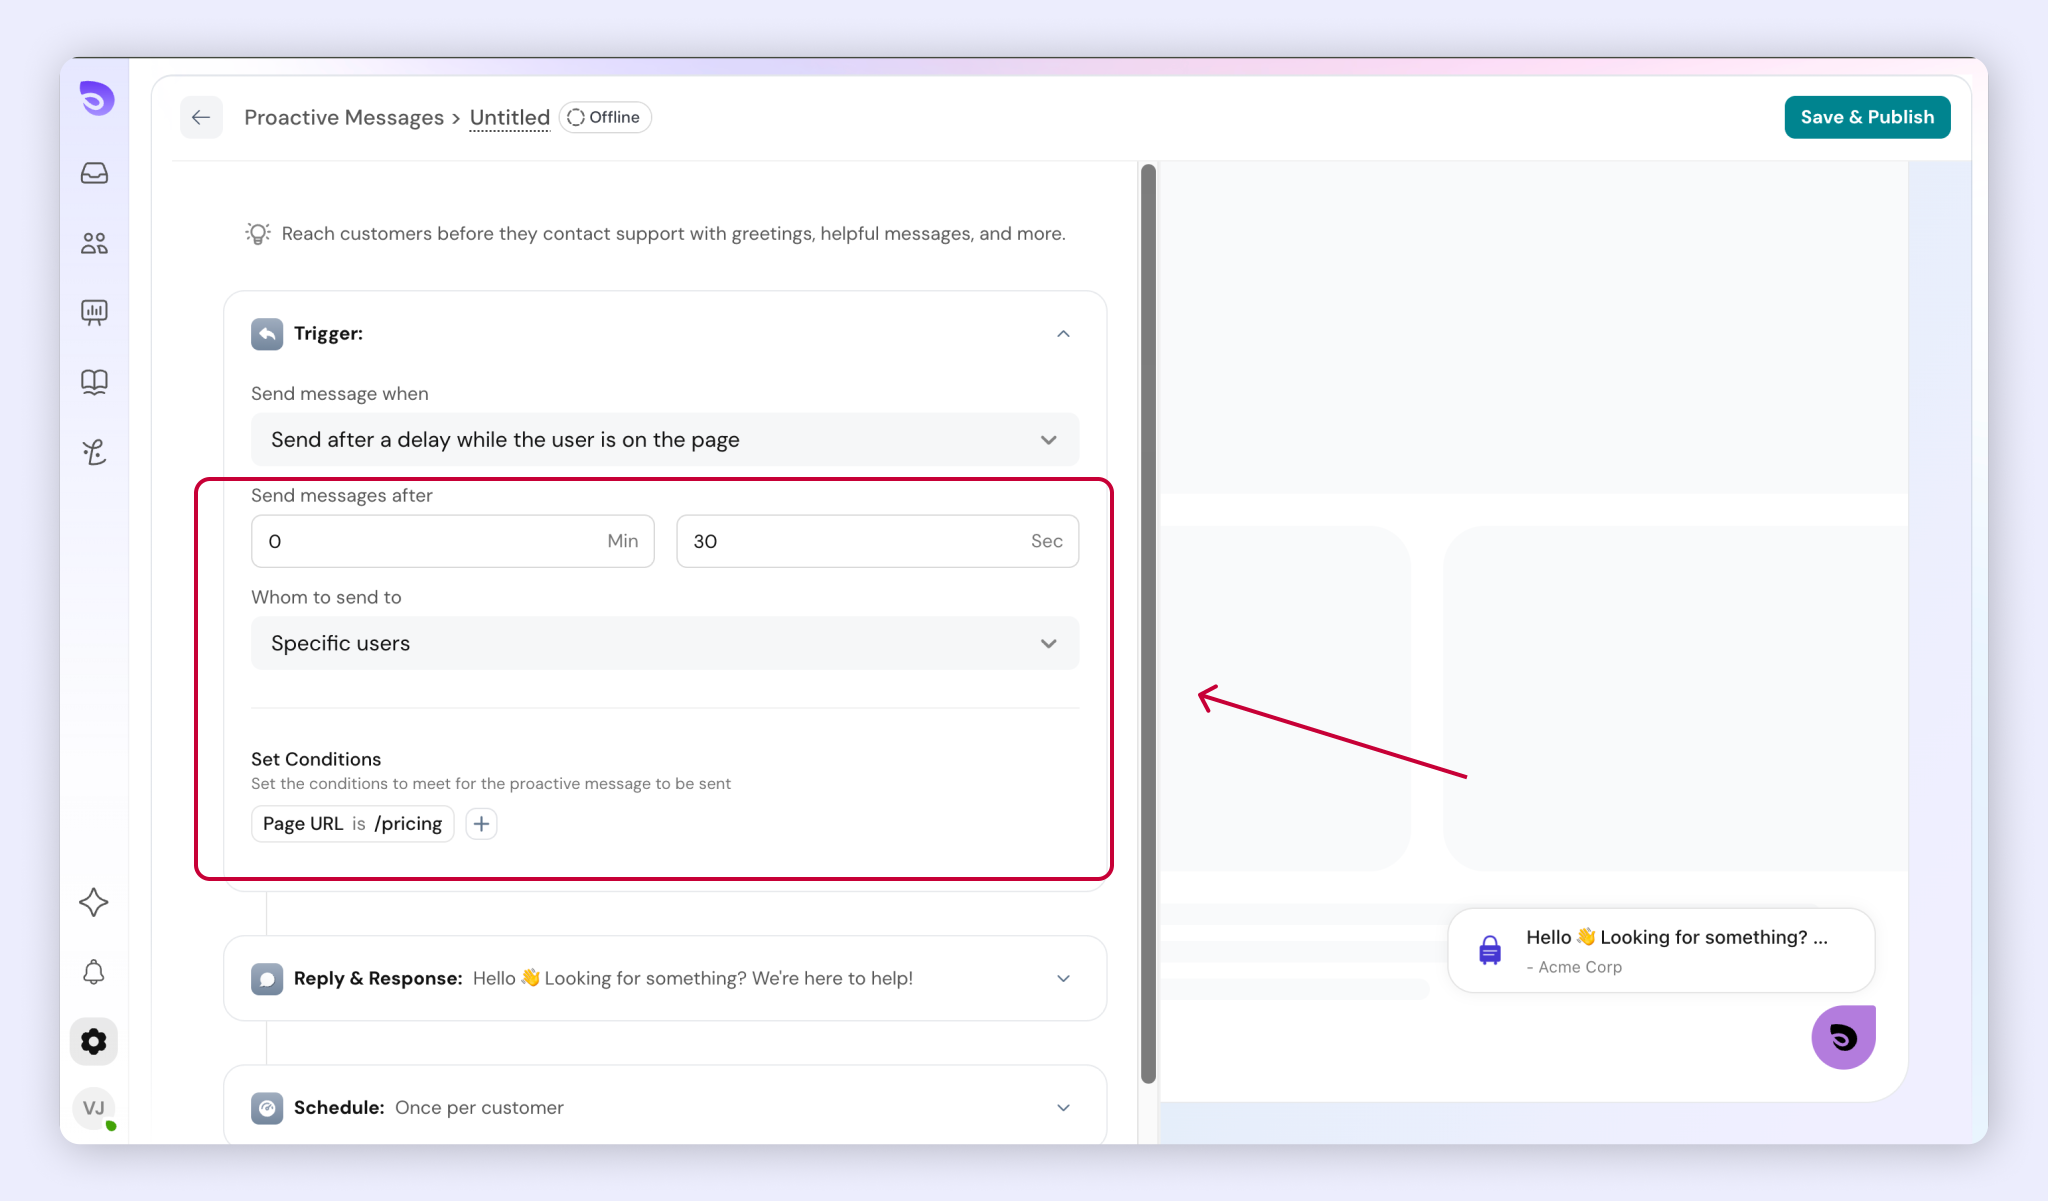
- Specific users: only visitors who match the conditions you set receive the message. See Choose Who Sees a Proactive Message.
Choose Who Sees a Proactive Message
When Whom to send to is set to Specific users, a Set Conditions area appears in the Trigger section. The message is sent only to visitors who meet these conditions.
- Click Add condition.
- Choose Page properties or Contact.
- Choose the property you want to use.
- Set the value the visitor must match.
Page properties include:
- Page URL: the page the visitor is on.
- Referrer: the site the visitor came from.
- Browser
- Language
- Country
- UTM source, UTM medium, and UTM campaign: the campaign tags in the link the visitor followed.
Contact uses details from the visitor’s contact record.
For example, use Page URL to show a message only on your pricing page, or UTM campaign to greet visitors arriving from a specific ad campaign.
Write the Message
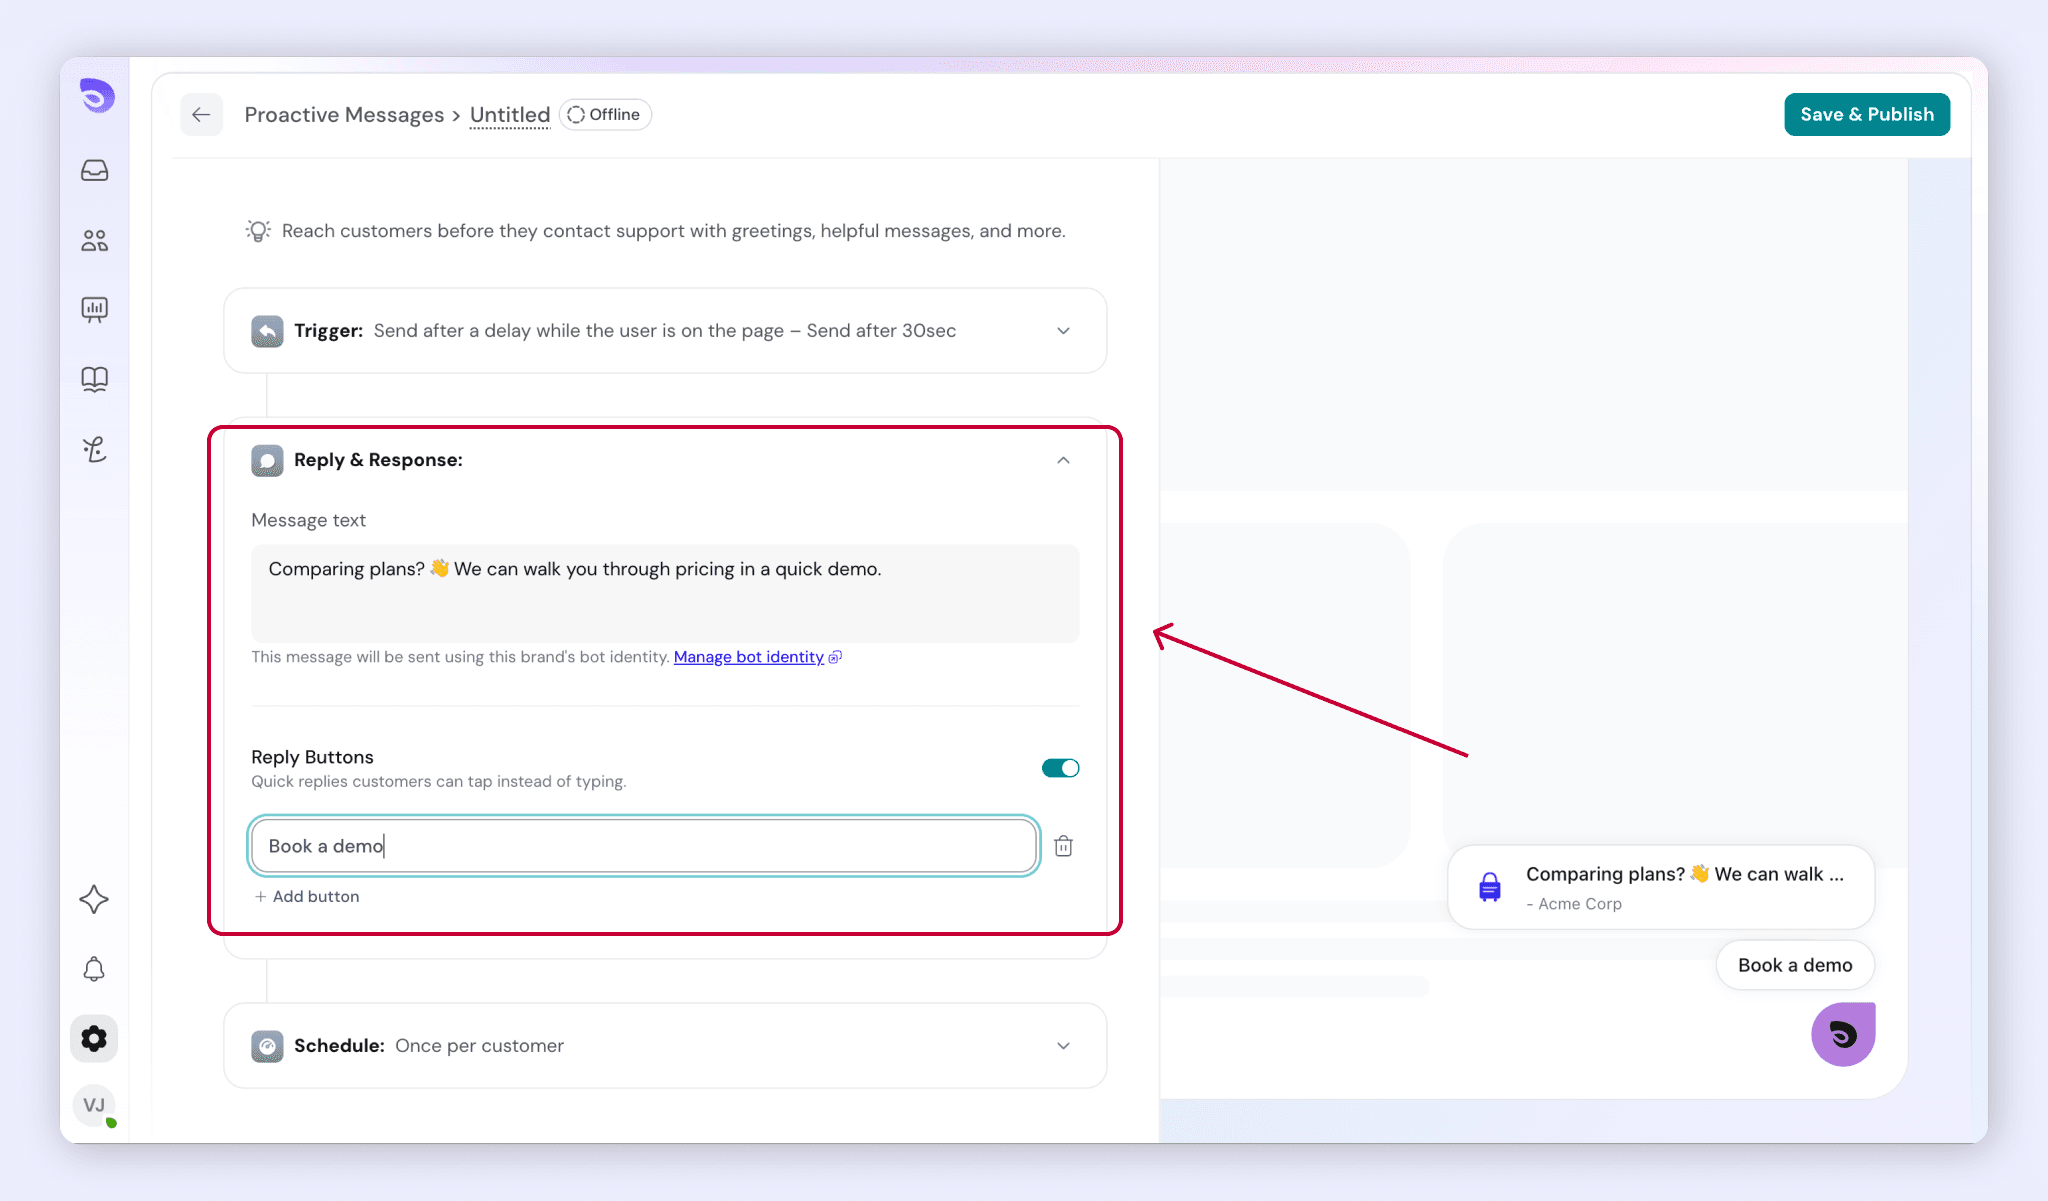
The Reply & Response section holds the message your visitors see.
- Under Message text, enter your message. New messages start with a sample greeting, which you can replace with your own.
- Optional: turn on Reply Buttons to give customers quick replies they can tap instead of typing. Reply buttons are off by default.
The message is sent using your brand’s bot identity. To change the bot identity, click Manage bot identity below the message field.
Add Reply Buttons
Reply buttons are quick replies that customers can tap instead of typing. They make it easier for a visitor to respond to your message, which matters because a conversation only starts once the visitor replies.
- In the Reply & Response section, turn on Reply Buttons.
Reply buttons are off by default. If you leave them off, visitors reply by typing in the chat widget.
Set the Schedule
The Schedule section controls when the message can go out and how often each customer gets it.
- Under Set when to send the message based on your schedule, choose one of these:
- Any time: the message can be sent at any hour. This is the default.
- During Business Hours: the message is sent only during your business hours.
- Under Set how often customers will get the message, choose one of these:
- Once per customer: each customer gets the message once. This is the default.
- Every visit: the message is sent each time a customer visits.
Publish the Message
- You can name the message and click Publish.
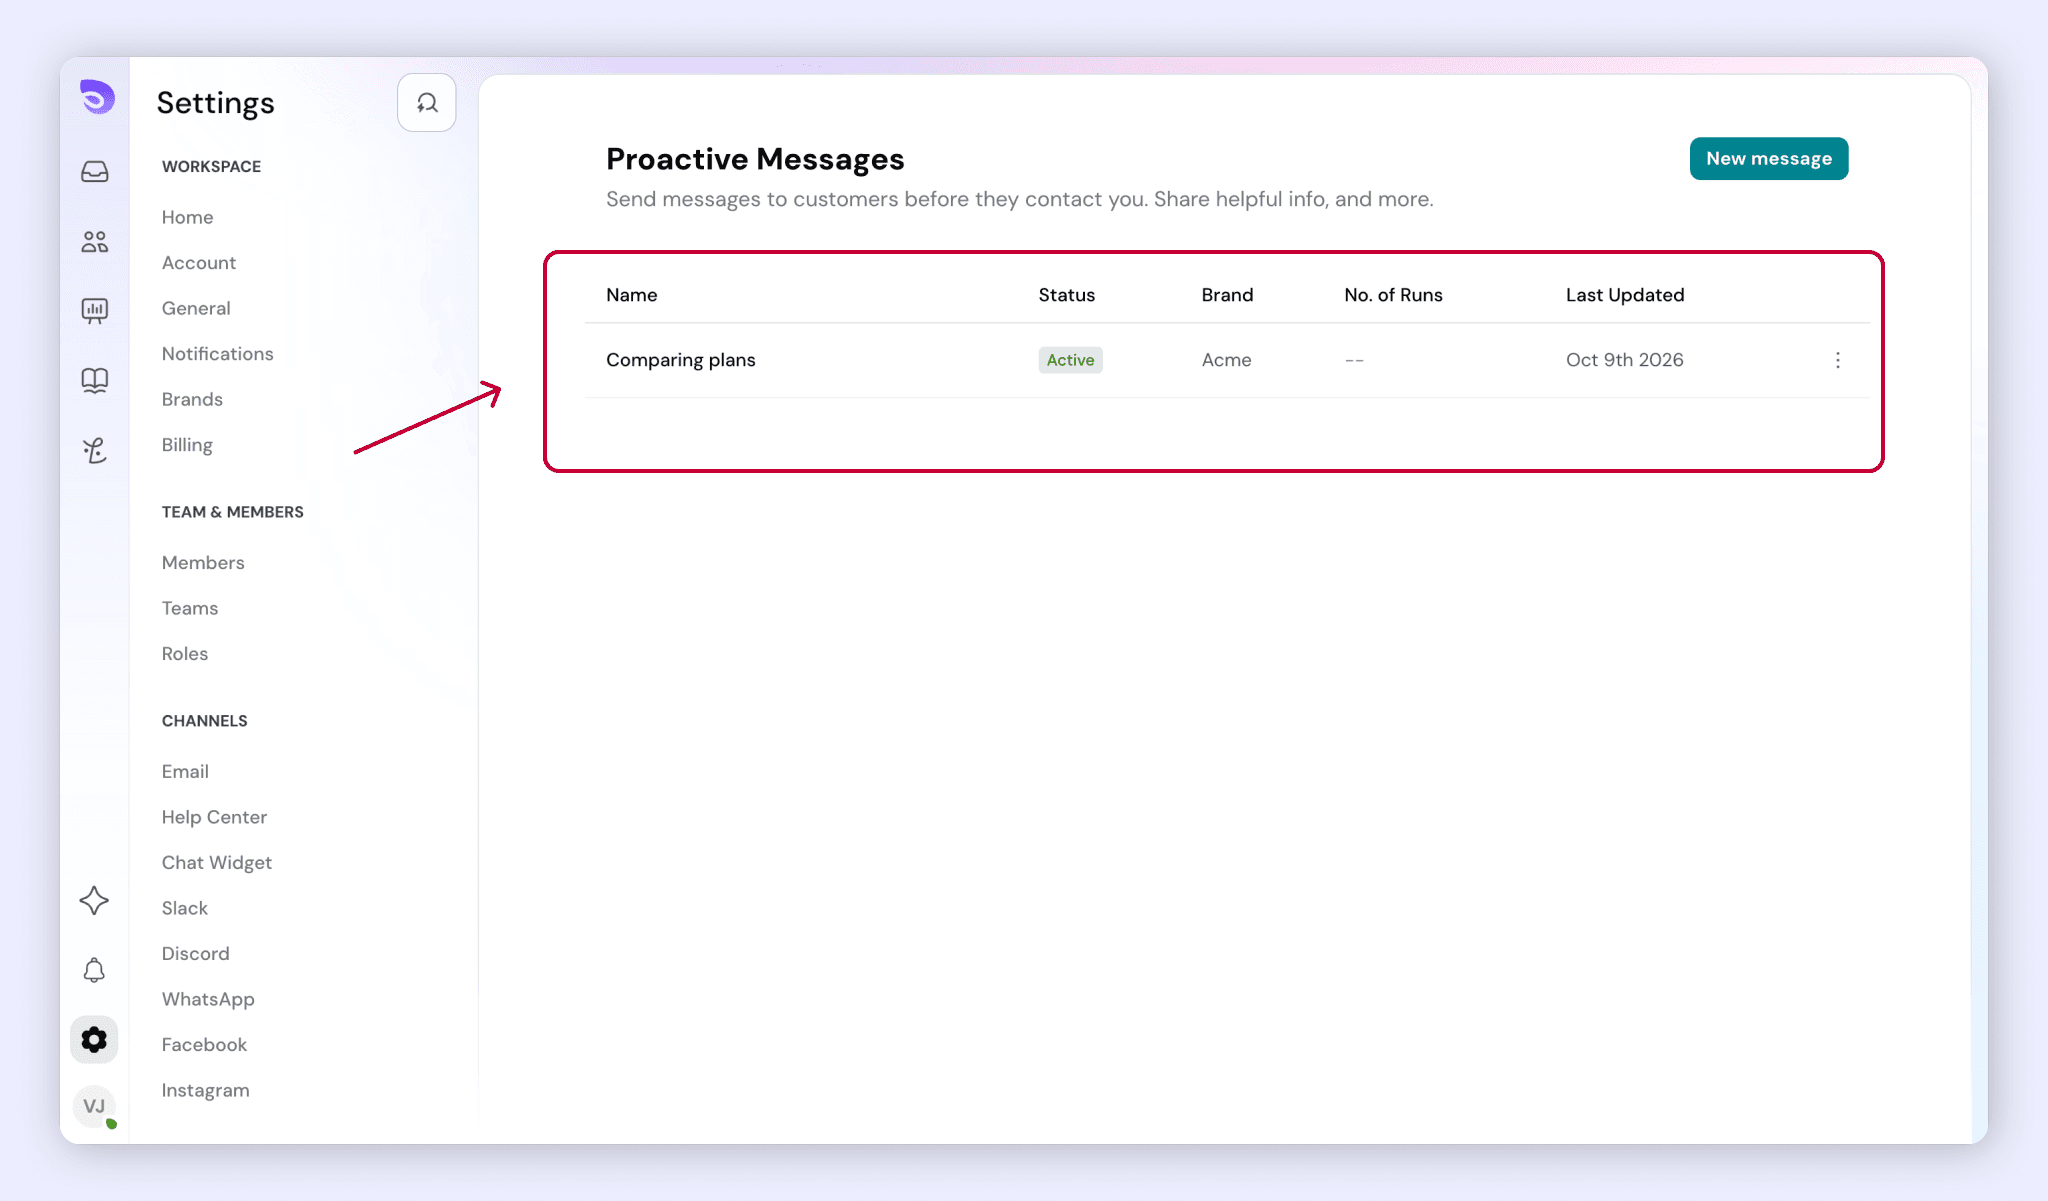
The status next to the message name changes from Offline to Live, and visitors who match your settings start seeing the message.
Edit or Unpublish a Proactive Message
Edit a message
- Go to Settings → Proactive Messages.
- Click the message you want to change.
- Update the Trigger, Reply & Response, or Schedule section.
Unpublish a message
- Go to Settings → Proactive Messages.
- Click the message.
- Click Unpublish.
Visitors stop seeing the message once it’s unpublished.
FAQ
- Where do I create proactive messages?
Go to Settings → Proactive Messages, under Outbound, and click New message. - Do I need to select a brand?
Yes. After you click New message, select the brand the message is for. The message is sent using that brand’s bot identity. - Can I send the message after a visitor has been on the page for a while?
Yes. In the Trigger section, set Send message when to Send after a delay while the user is on the page. - Can I send proactive messages only during business hours?
Yes. In the Schedule section, set Set when to send the message based on your schedule to During Business Hours. - How often does a customer see a proactive message?
That depends on Set how often customers will get the message in the Schedule section. Choose Once per customer or Every visit. The default is Once per customer. - Who is shown as the sender?
Your brand’s bot identity. To change it, click Manage bot identity in the Reply & Response section. - How do I stop a proactive message?
Open the message from Settings → Proactive Messages and click Unpublish.