
Setting Up and Customizing Your Help Center

Your Help Center is the public-facing space where customers can browse support articles, find answers, and reach out to you. This guide walks you through the key steps—from turning it on to customizing how it looks.
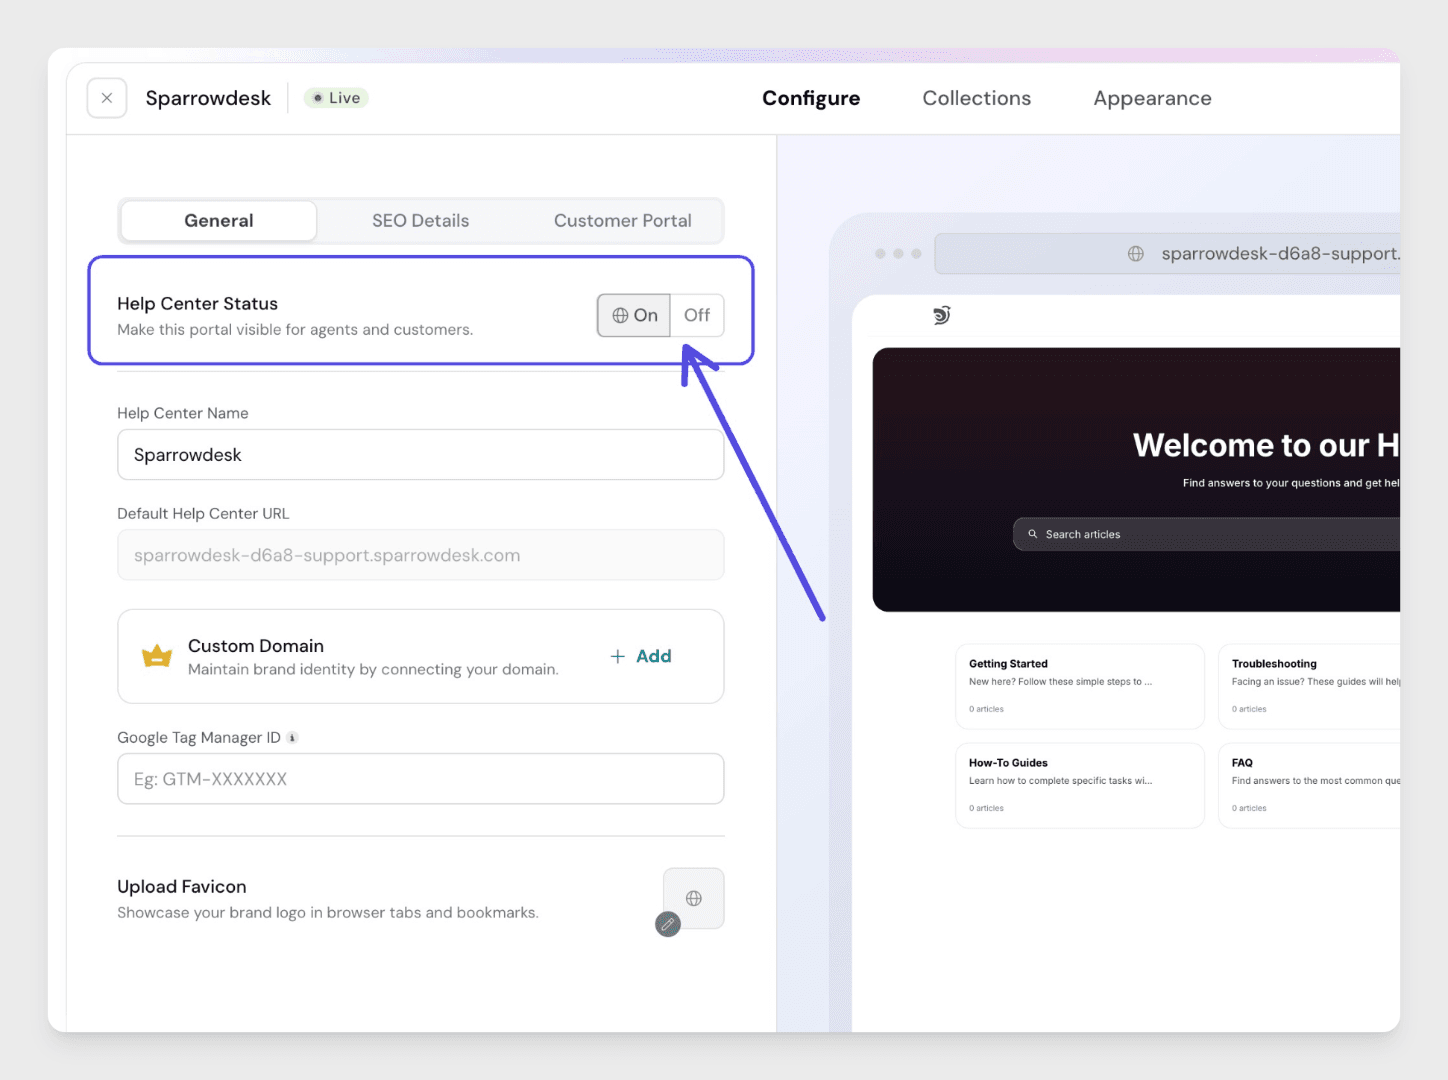
To make your Help Center live:
- Go to your workspace’s Help Center settings.
- Use the toggle switch to enable the Help Center for your brand.
- Once enabled, your Help Center becomes publicly accessible through its unique URL.
Adding Articles and Collections
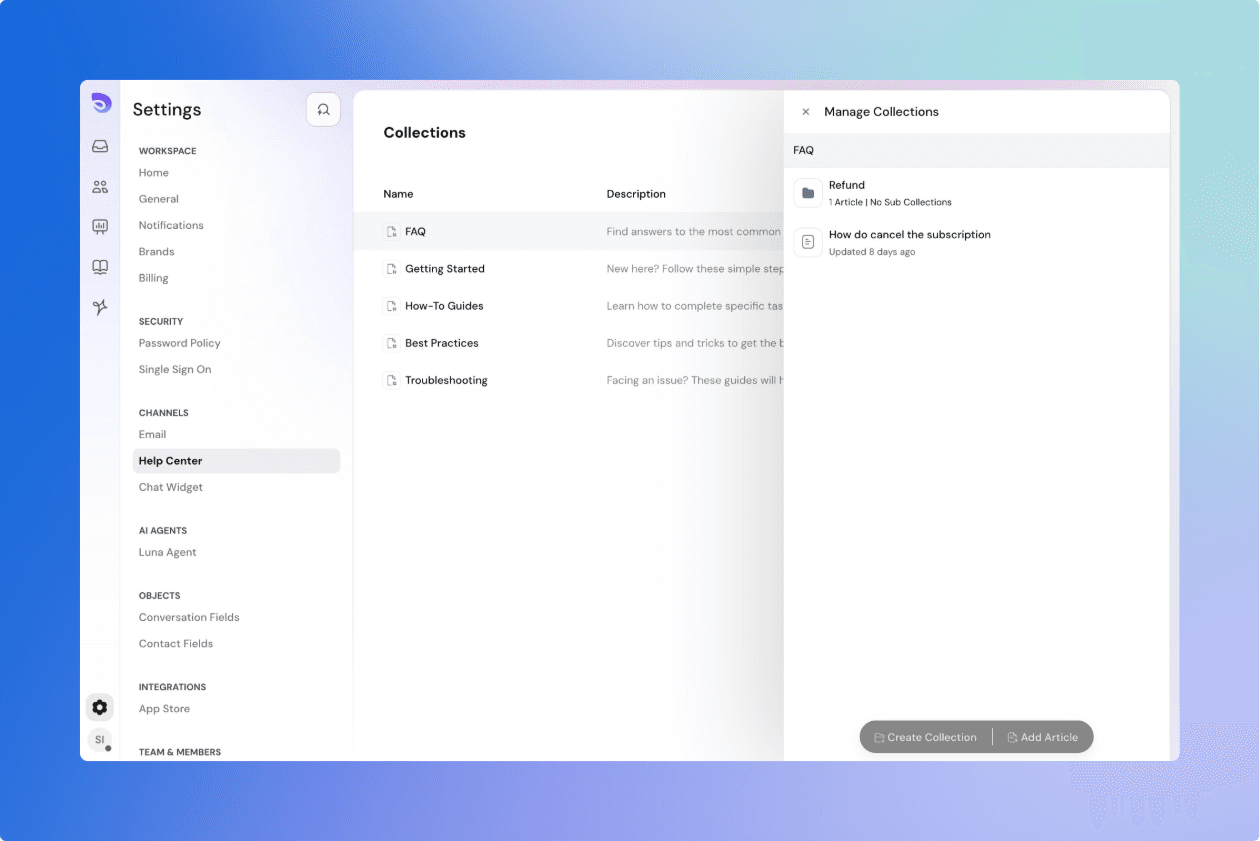
The content of your Help Center is organized in two layers:
Collections
- These are like folders or categories (e.g., “Getting Started,” “Billing,” “Troubleshooting”).
- You can create as many collections as needed to group similar articles together.
Articles
- These are the individual pages your customers read.
- Every article must belong to a collection to be shown in the Help Center.
- Articles display the author’s image, last updated date, and are fully searchable by title and content.
Customizing the Look and Feel
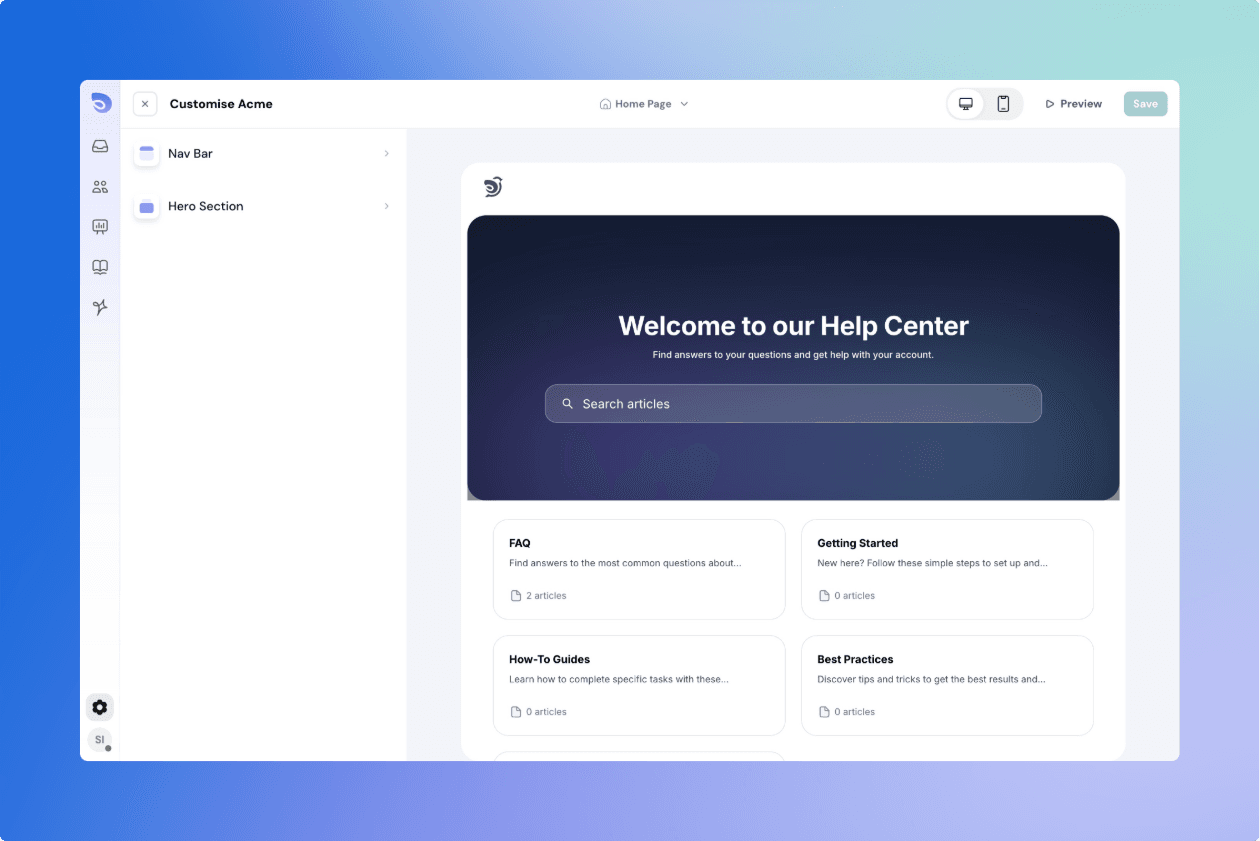
You can personalize your Help Center’s design to match your brand. Here's what you can customize in the first version:
Navigation Bar
- Upload your logo to appear in the top left.
- Add up to 4 navigation links (e.g., Home, Contact, About).
Note: You cannot change the link colors or styles in this version.
Hero Section (Top of Home Page)
Customize the main banner that customers see when they visit your Help Center:
Text: Set a clear and helpful title (e.g., “Welcome to our Help Center”) and a brief description.
Text Color: Choose a color that matches your branding.
Right-to-left languages: SparrowDesk supports right-to-left (RTL) text across the product and Help Center. When content is in an RTL language, the layout adjusts to read right to left.
Background:
- Select a solid color or a fade effect.
- Upload a background image, and choose whether it should fit or fill the space.
Search Bar
- The search bar helps users find answers faster by searching across article titles and article content.
- It comes in two styles: a dark version and a light version.
- The search bar will automatically adjust based on your background color to ensure readability.
These customization options allow you to align your Help Center with your brand while keeping the experience simple and helpful.
Control who can access your Customer Portal
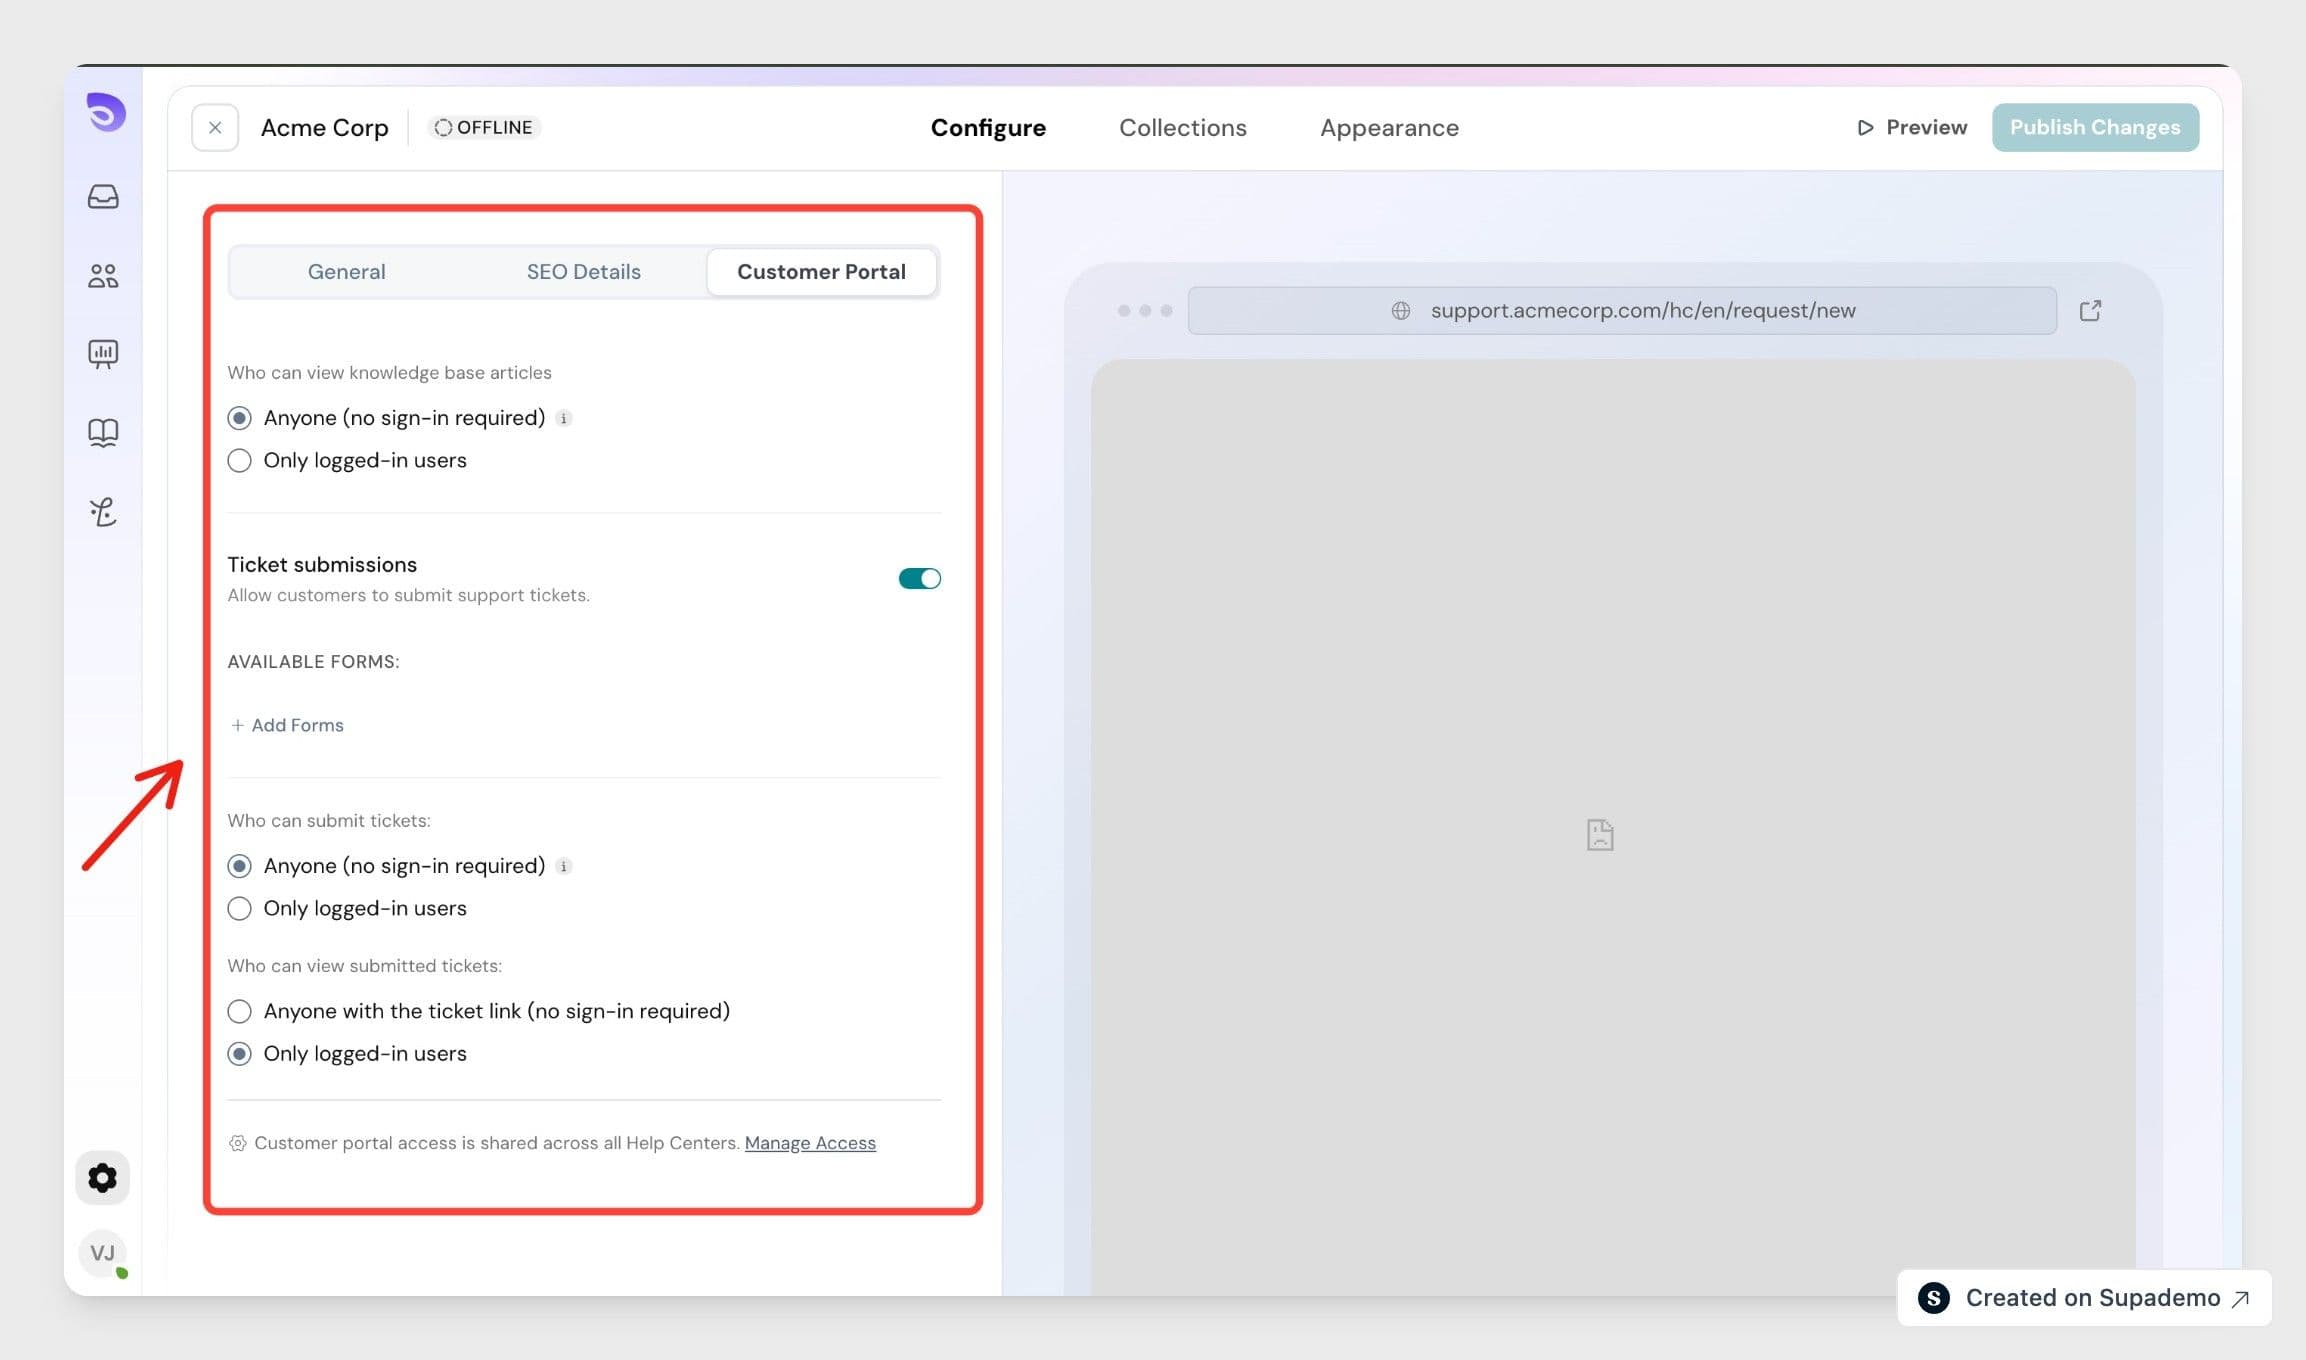
The Customer Portal is the customer-facing side of your Help Center, where people read articles and submit tickets. You control access to it from Help Center, open the Configure tab, then Customer Portal. These settings are shared across all your Help Centers.
Who can view knowledge base articles
- Anyone (no sign-in required) — the default; articles are public.
- Only logged-in users — visitors must sign in before they can read articles. Those who aren't signed in see a login screen instead.
Ticket submissions — turn this on to let customers submit support tickets, and choose which forms are available.
- Who can submit tickets — Anyone, or Only logged-in users.
- Who can view submitted tickets — Anyone with the ticket link, or Only logged-in users.
Select Publish Changes to apply. To manage sign-in methods for the portal, use Manage Access.
Help Center and Chat Widget
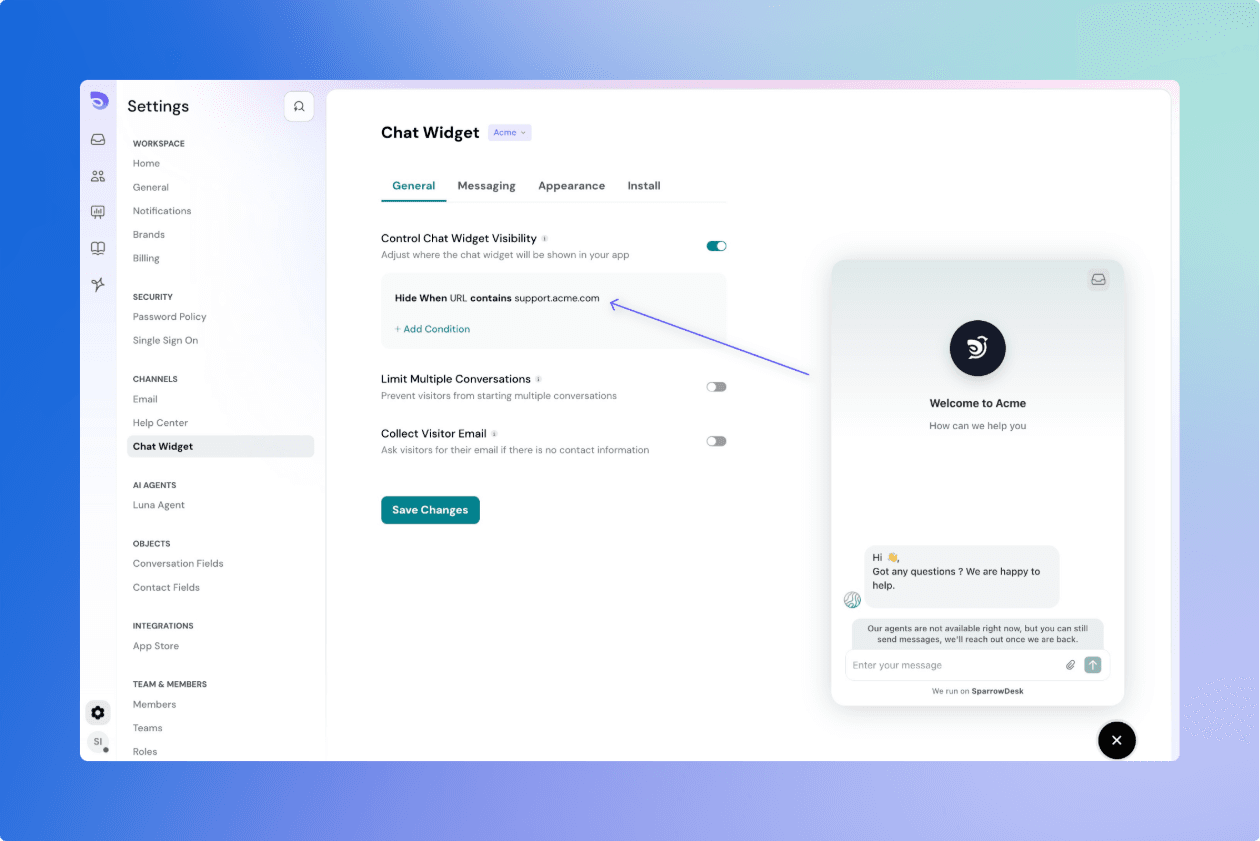
By default, the chat widget connected to your brand will automatically appear in the Help Center. This allows customers to start a live conversation while browsing articles.
However, if you don’t want the chat widget to appear in the Help Center:
- Go to Widget Settings.
- Under Visibility Rules, you’ll see an option to control where the widget appears.
- Add a rule to hide the widget from the Help Center page by entering the Help Center path (e.g.,
/help) into the visibility filter.
This gives you control over when and where real-time support is offered.
Adding Google Tag Manager
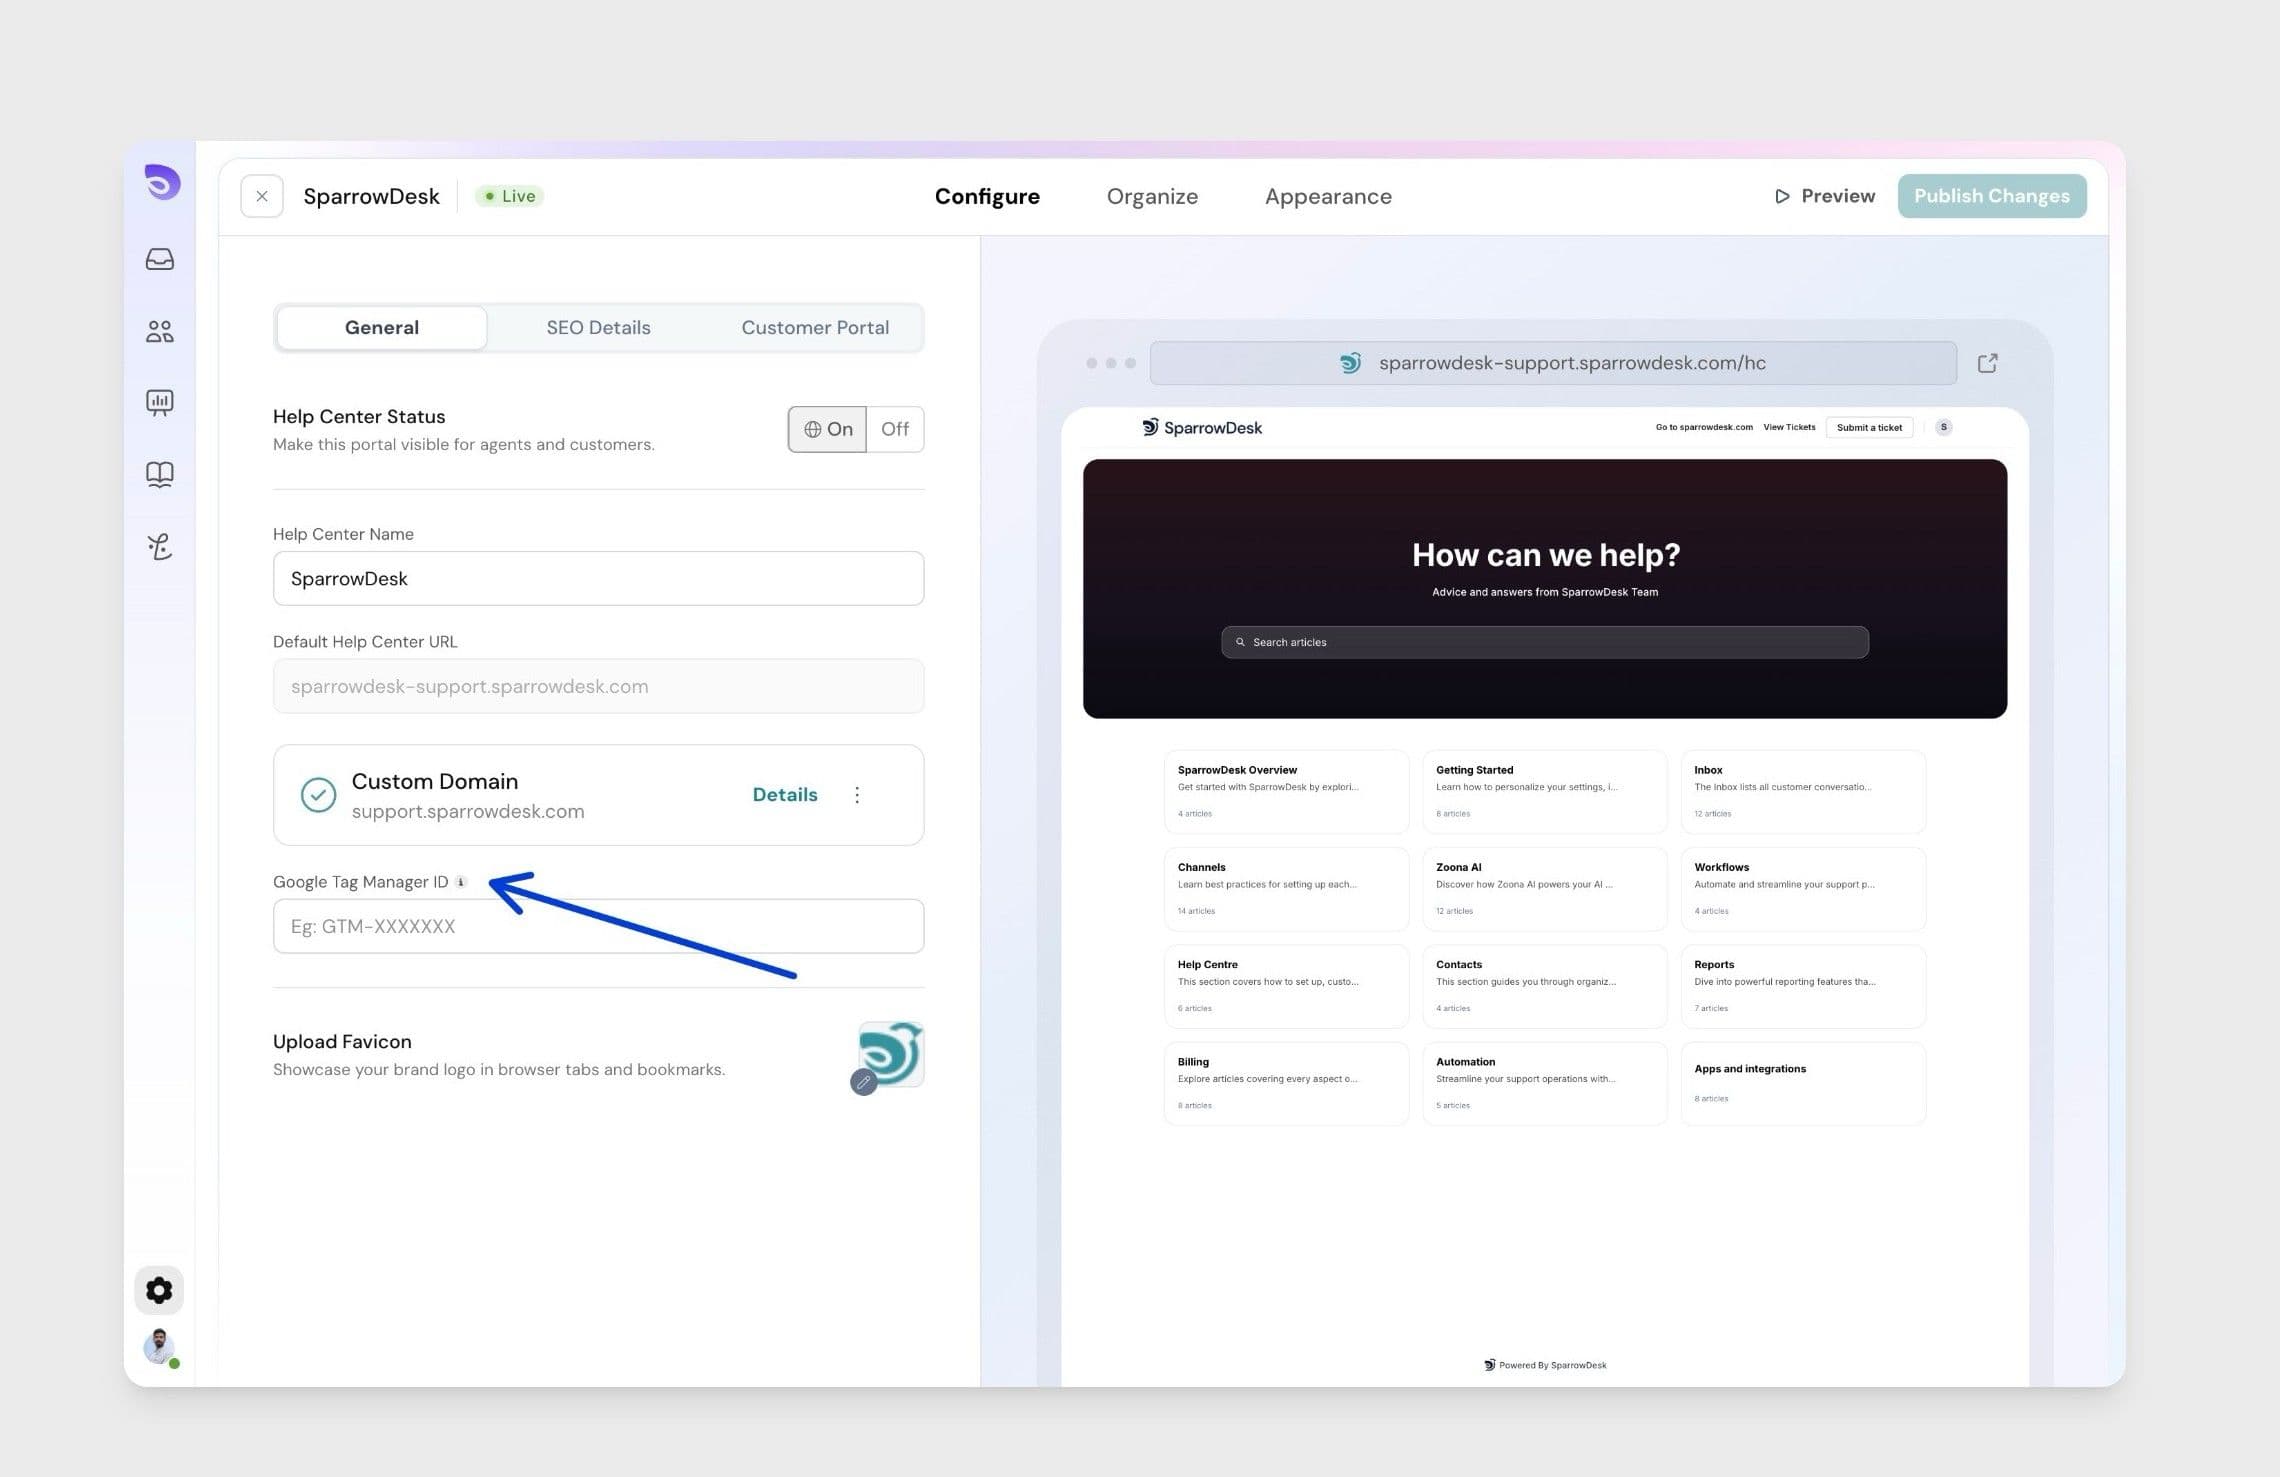
You can connect Google Tag Manager to your Help Center to manage tracking and marketing scripts without updating code directly.
This makes it easier to track visitor behaviour, add analytics tags, and manage tools like analytics, conversion tracking from one place.
Deleting the Help Center
If you no longer wish to use the Help Center:
- Navigate to Help Center settings.
- Scroll to the bottom and select Delete Help Center.
- Confirm the deletion.
Important: This action is permanent. All articles, collections, and customizations will be permanently removed. Make sure to back up any important content before proceeding.