
Conversation Fields in SparrowDesk
Conversation fields (also called ticket fields) store key contextual information related to each support ticket. These fields help support teams efficiently categorize, track, report, and act on conversations.
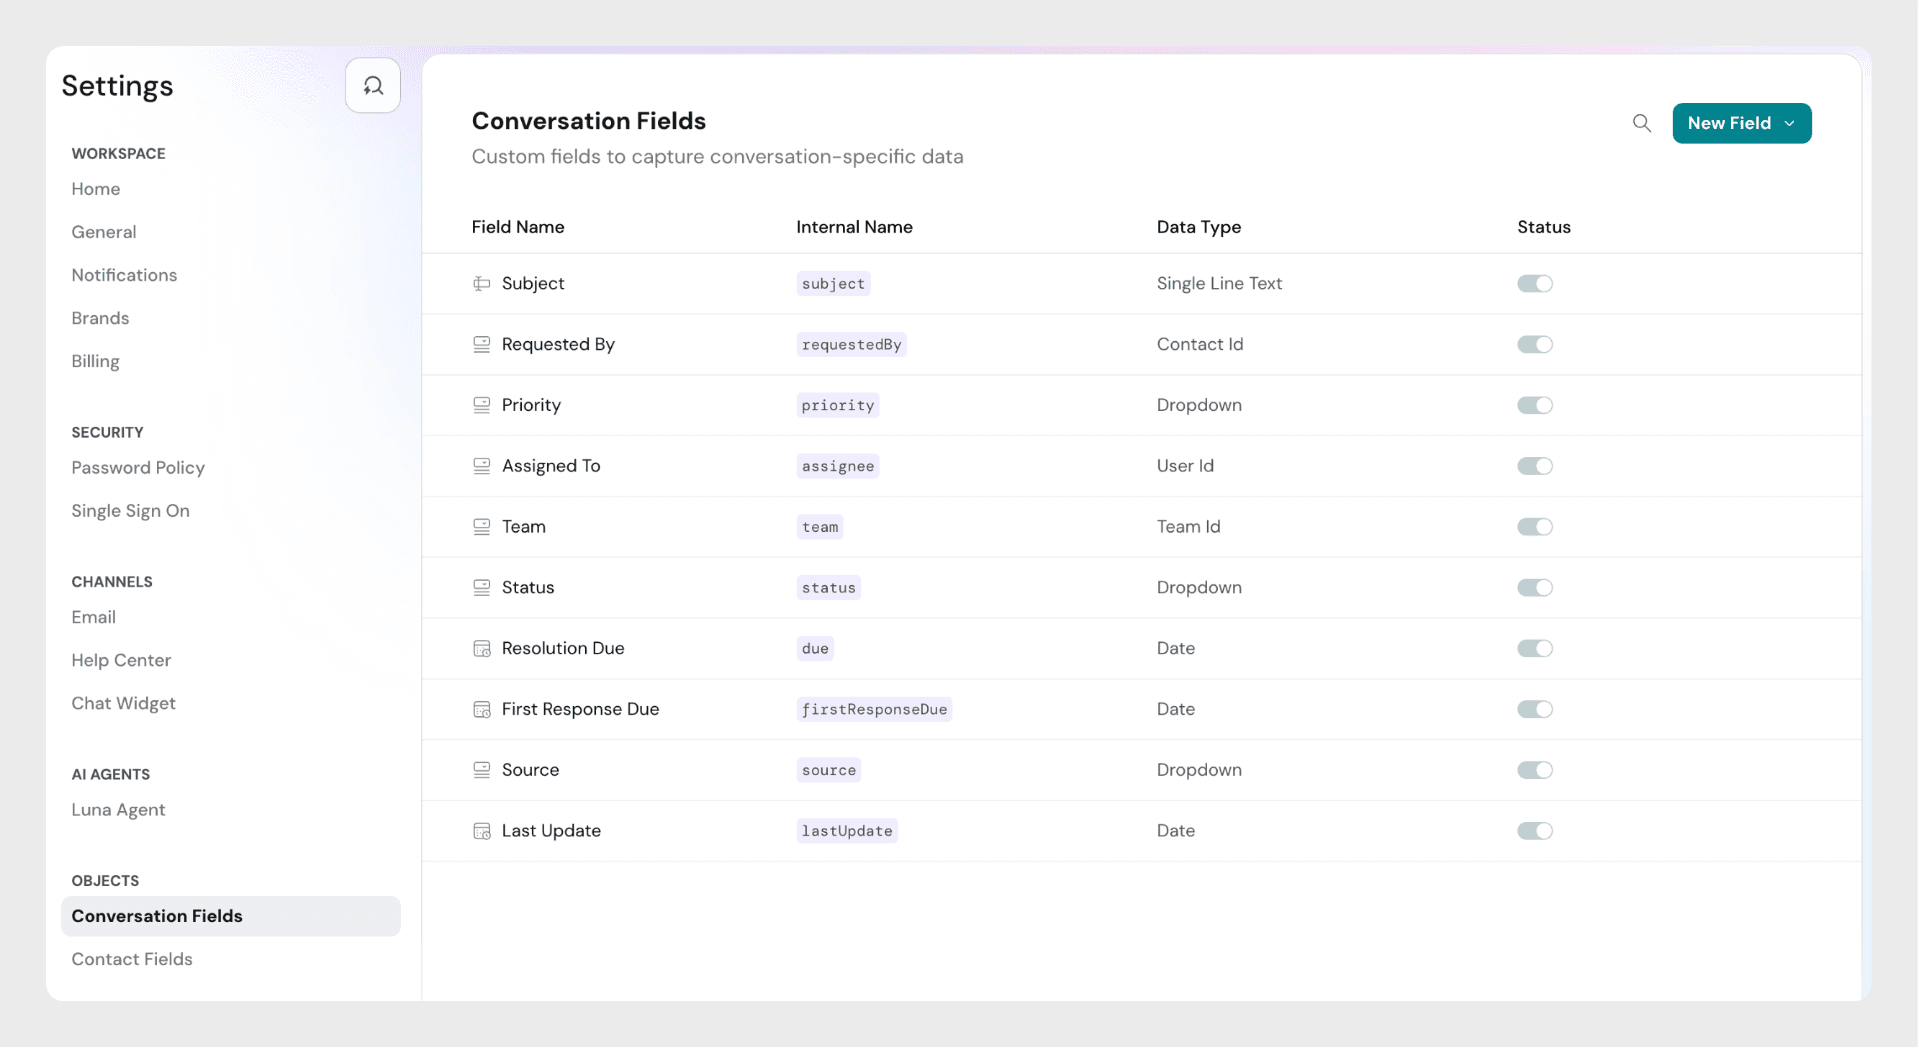
Default Fields
Every SparrowDesk account comes with a set of predefined ticket fields. These fields cannot be disabled or deleted. You can edit a default field's customer label- the name customers see- to match your terminology. The field's behavior stays the same.
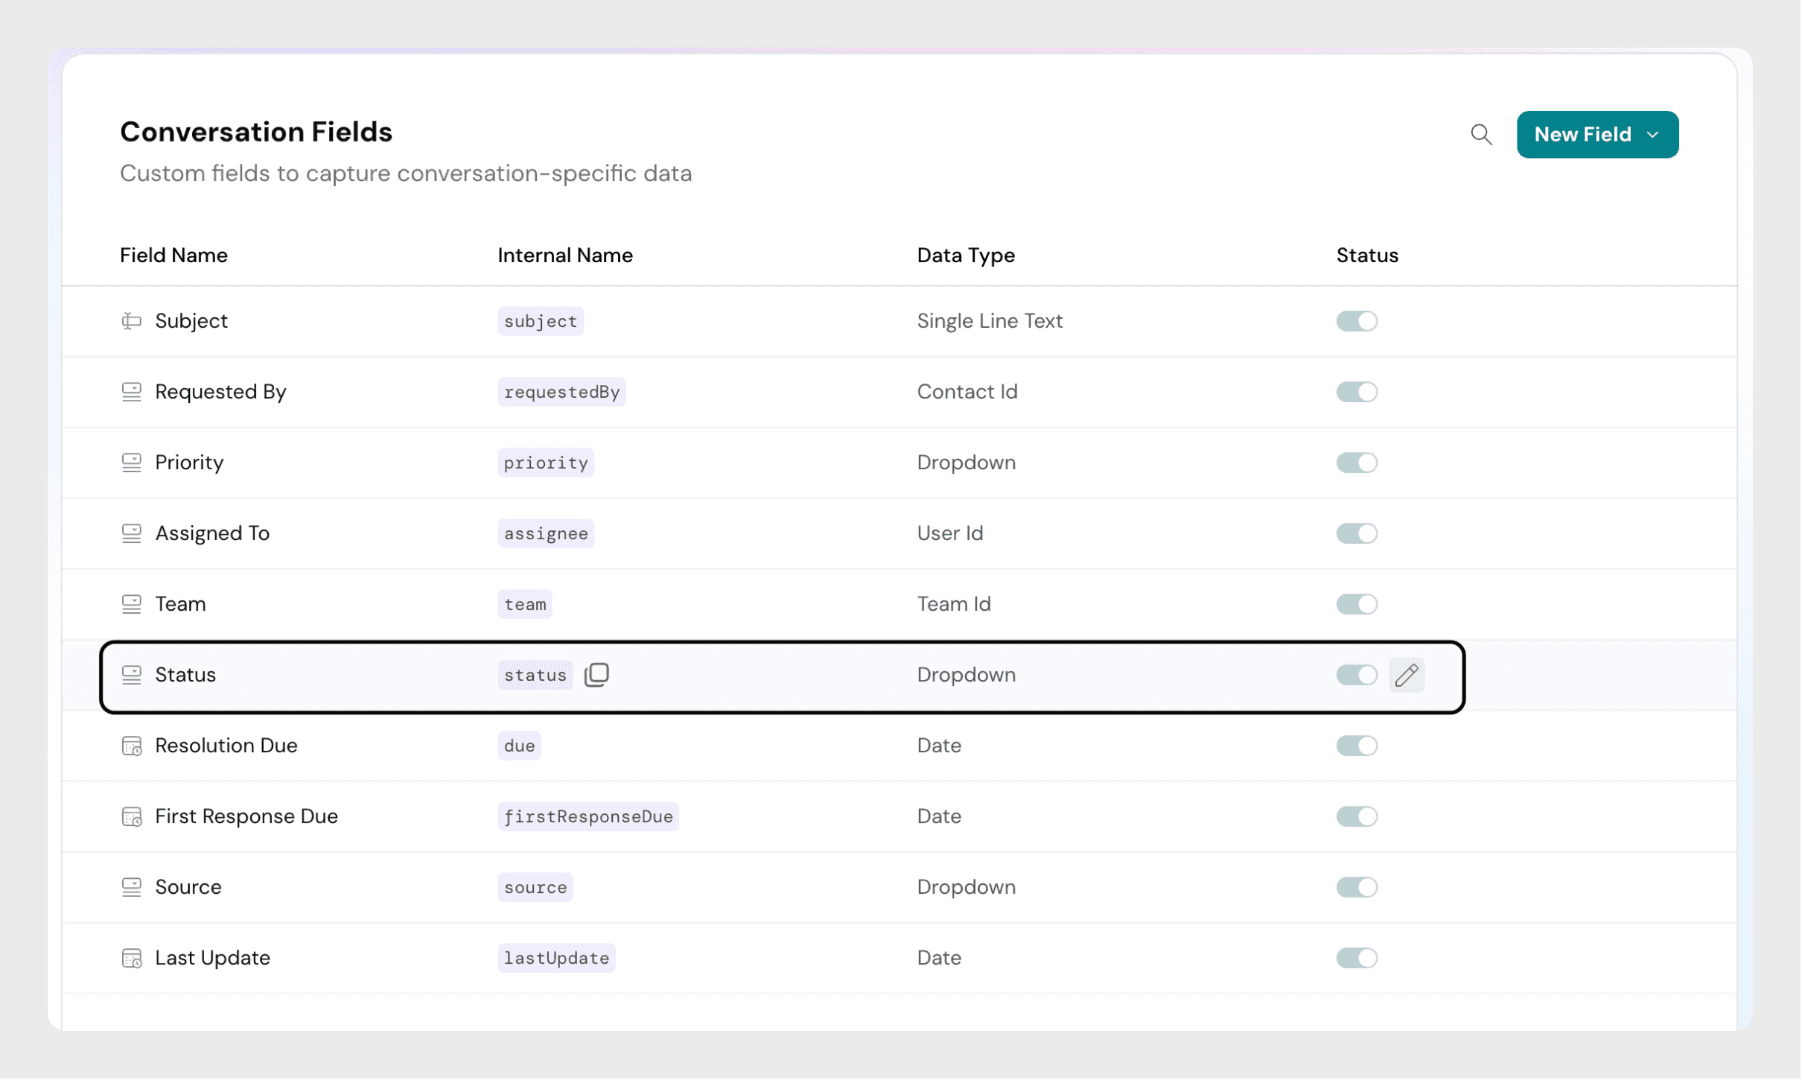
- Status: Indicates the current state of the ticket (e.g., Open, Pending, Resolved, Closed)
- Subject: Short description of the customer issue
- Description- A free-text field holding the details of a conversation. It behaves the same way as Subject.
- Requested by: The customer who created the ticket
- Priority: Level of urgency (e.g., Low, Medium, High and Urgent)
- Assigned to: Agent assigned to the ticket
- Team: Team handling the ticket
- Resolution due: SLA-based deadline for resolving the ticket
- First response due: SLA-based deadline for the first agent response
- Source: The channel through which the ticket was received (e.g., chat, email)
- Last Updated at: Timestamp indicating when the ticket was last modified
Status Field Explained
The Status field is one of the most important system fields. It shows the current stage of the ticket lifecycle.
Default Status Values
- Open: Ticket has been created and needs attention.
- Pending: Waiting for input from the customer or a third party. (SLA timers are paused in this state.)
- Resolved: The issue is considered fixed. If the customer replies, the ticket reopens automatically.
- Closed: The ticket is permanently closed. If a customer replies, a new ticket is created.
Custom Status Values
You can extend the default set by adding your own statuses to match your workflow:
Step 1: Click the Edit button next to the Status field.

Step 2: Click on Create New Status in the opened dialog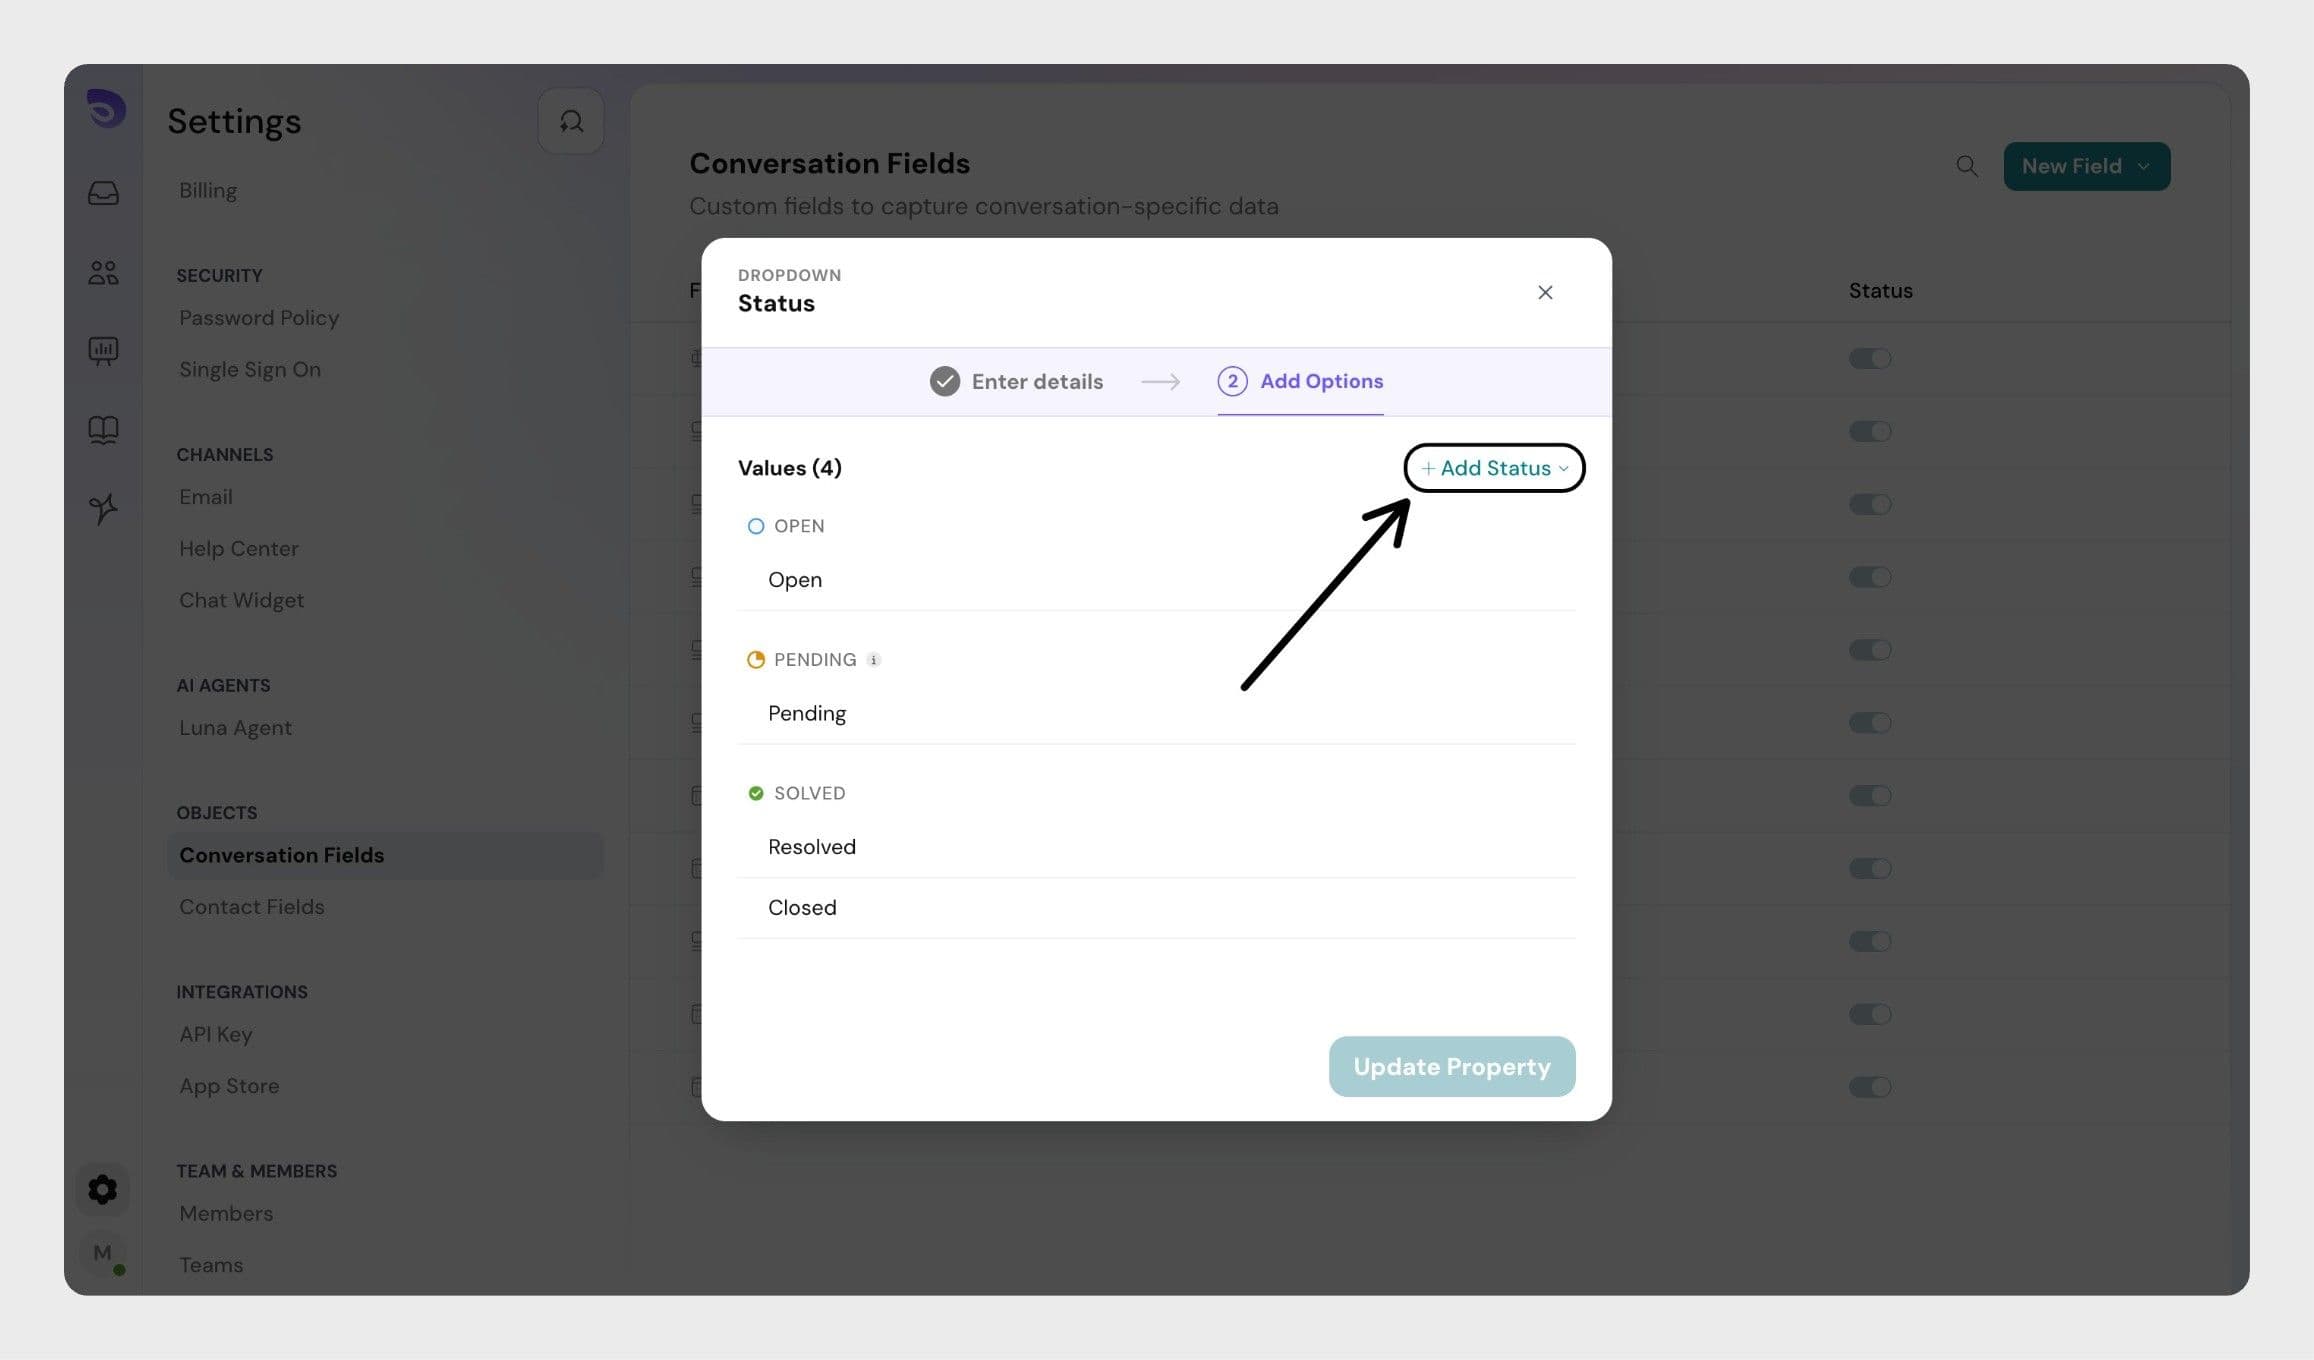
Step 3: Select the status type under which you want to add the new status. The status type dictates the behavior of the status
The following status types are available:
Open: Use this type for any status that indicates the ticket is being worked on with no external blockers—where the agent is expected to take the next action and SLA timers should continue running.
E.g., New, In Progress, Assigned, Under Review
Pending: Use this type for statuses that signal a pause in agent action, such as waiting for a customer response or an internal dependency, where SLA timers should be temporarily paused.
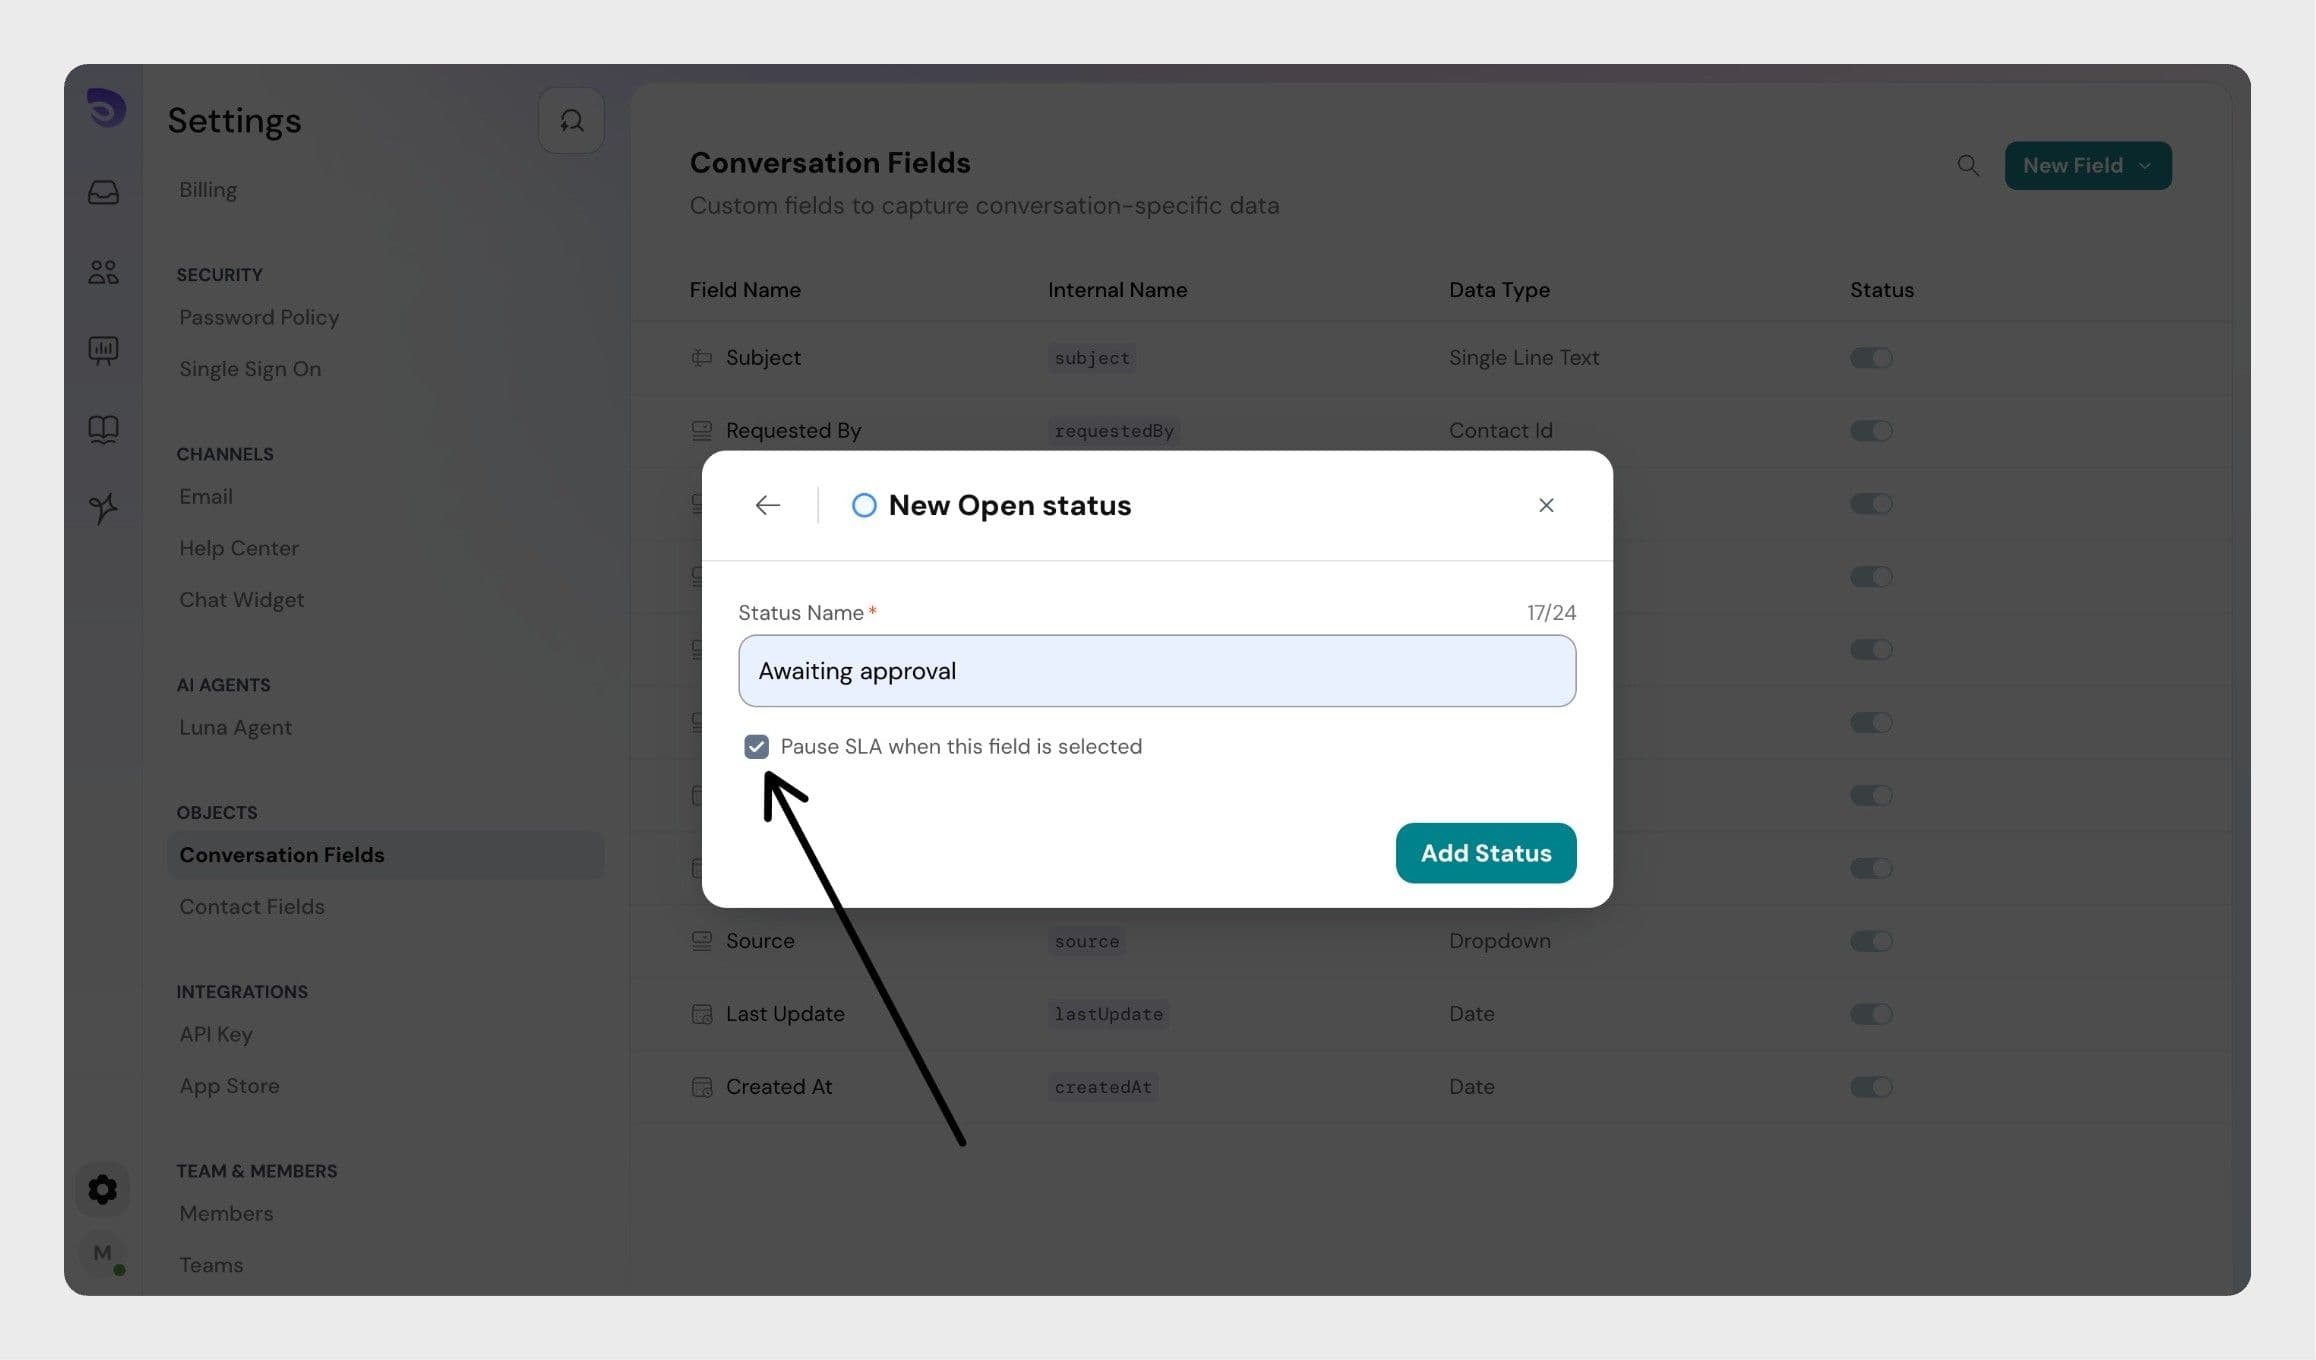
E.g., Waiting on Customer, On Hold, Awaiting Approval, Blocked
Resolved: Use this type when a solution has been provided and the issue is considered resolved, but the conversation may still reopen if the customer replies or needs clarification.
E.g., Resolved, solution provided, competed
Step 4: Enter the custom status name in the text field.
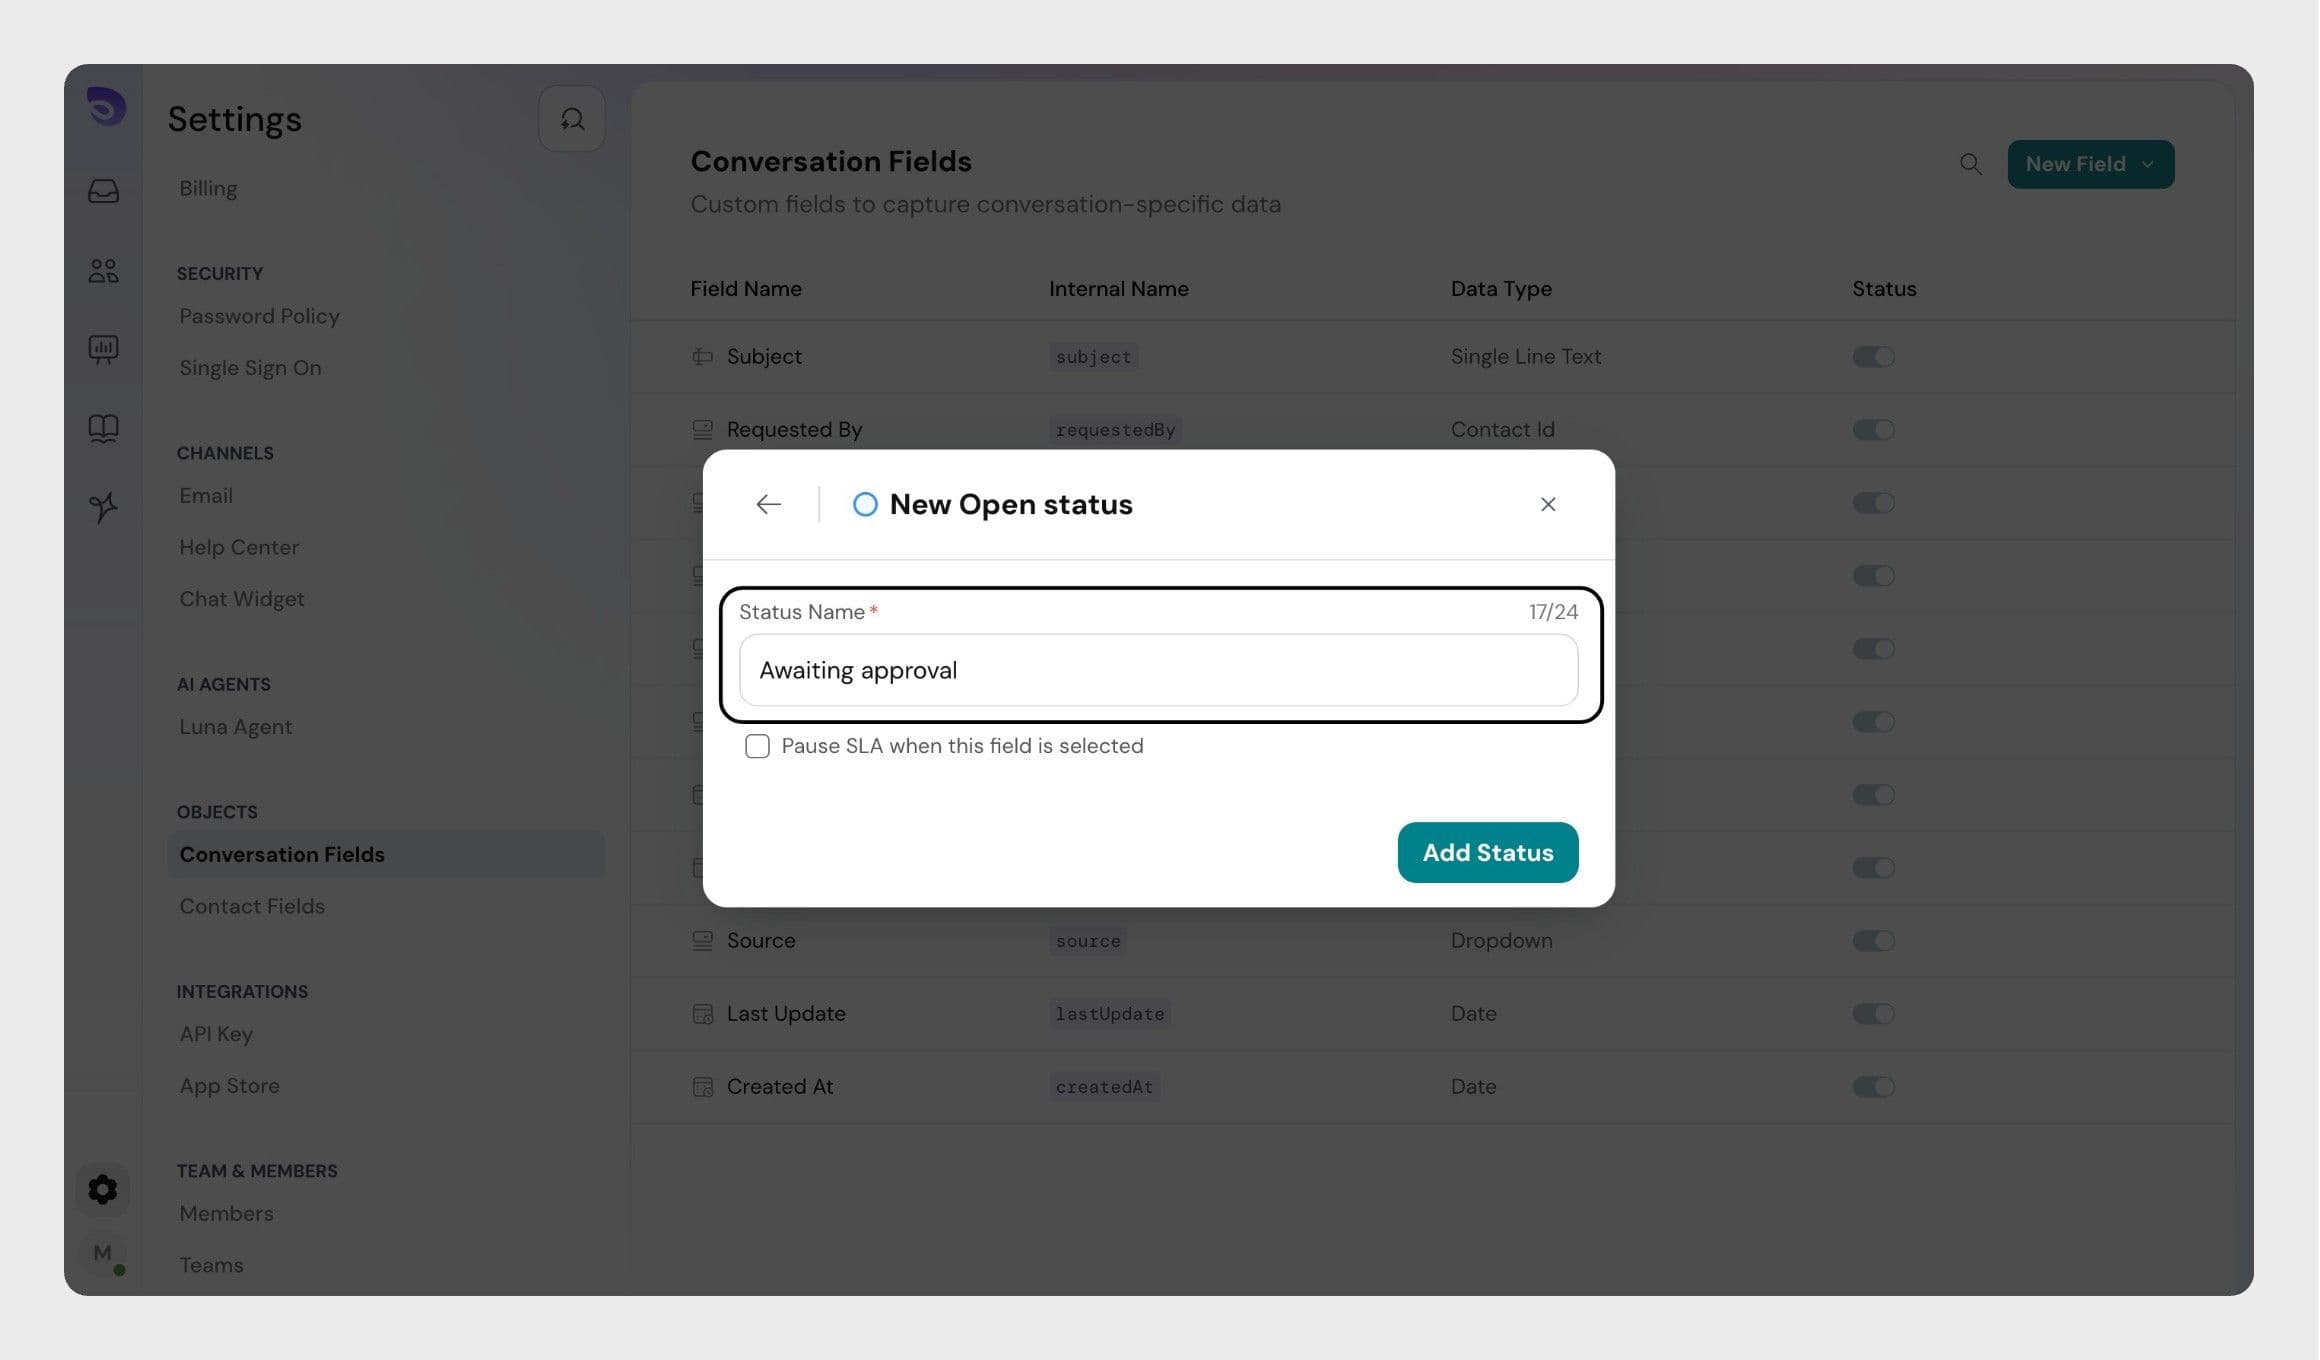
Step 5: If you'd like the SLA to be paused while the conversation is in this state (like the "Pending" status), select the checkbox below the inpu
Step 5: Click on Create button to save the details and save the new status details.
Step 6: Click on Update Property to update the newly created status and other details. 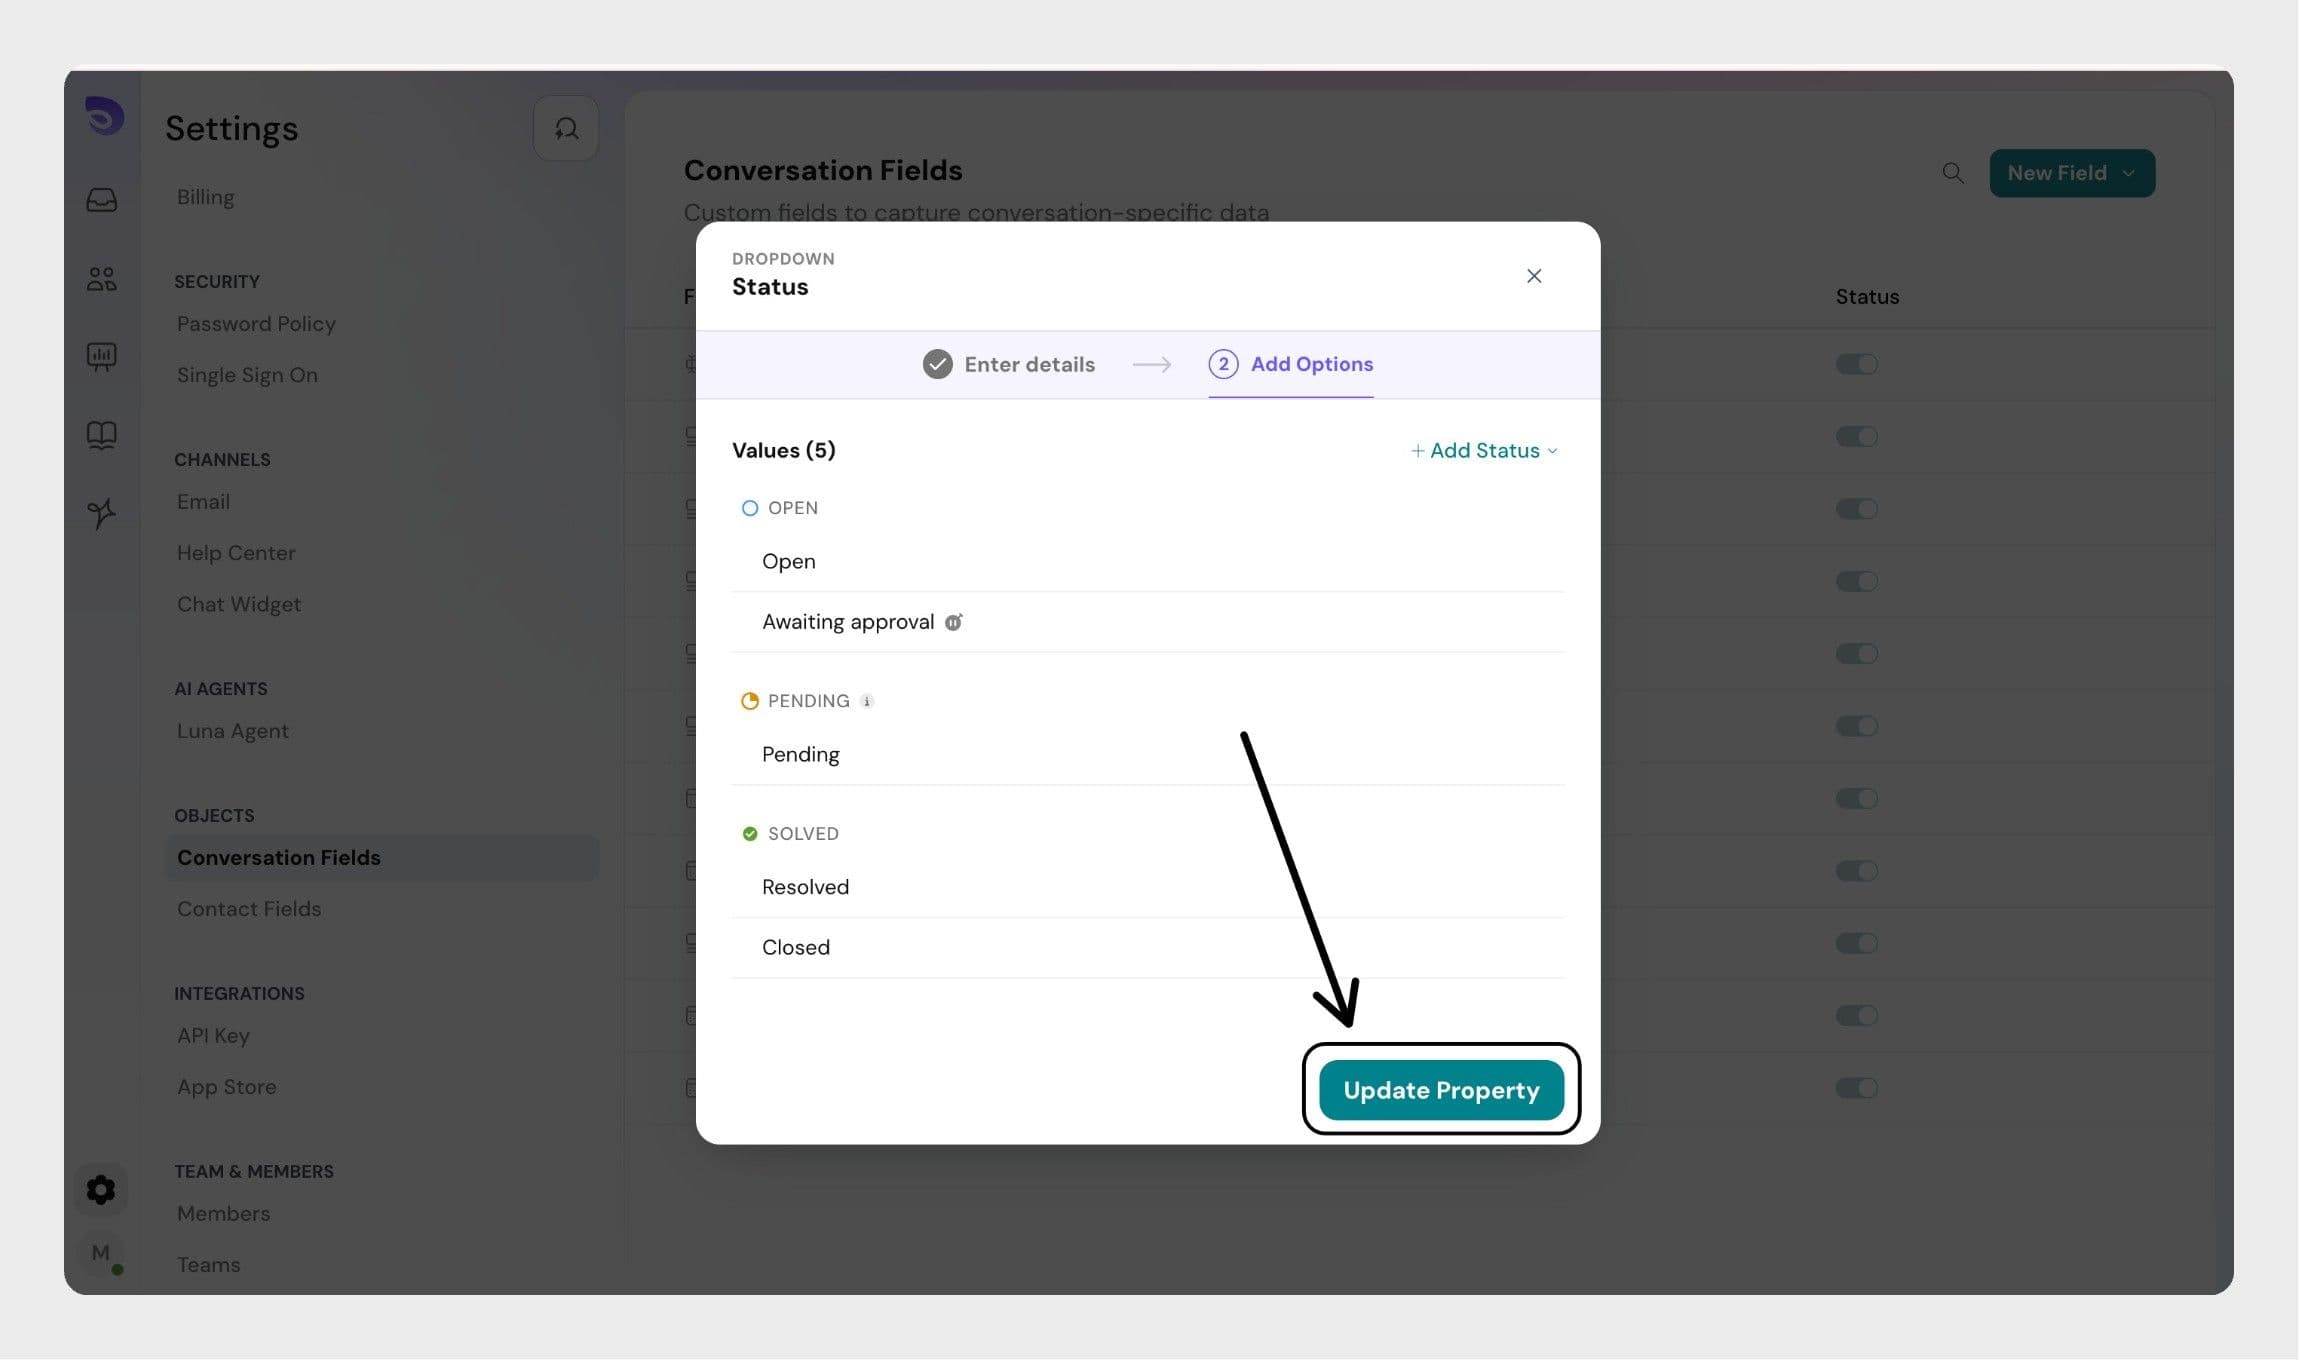
Managing Custom Statuses
- Custom statuses can be edited at any time.
- A custom status can be deleted only if no active tickets are using it. Active tickets refer to tickets that are not deleted. If any active ticket is currently assigned this custom status, you must first update those tickets to use a different status. Only then will the custom status become eligible for deletion.
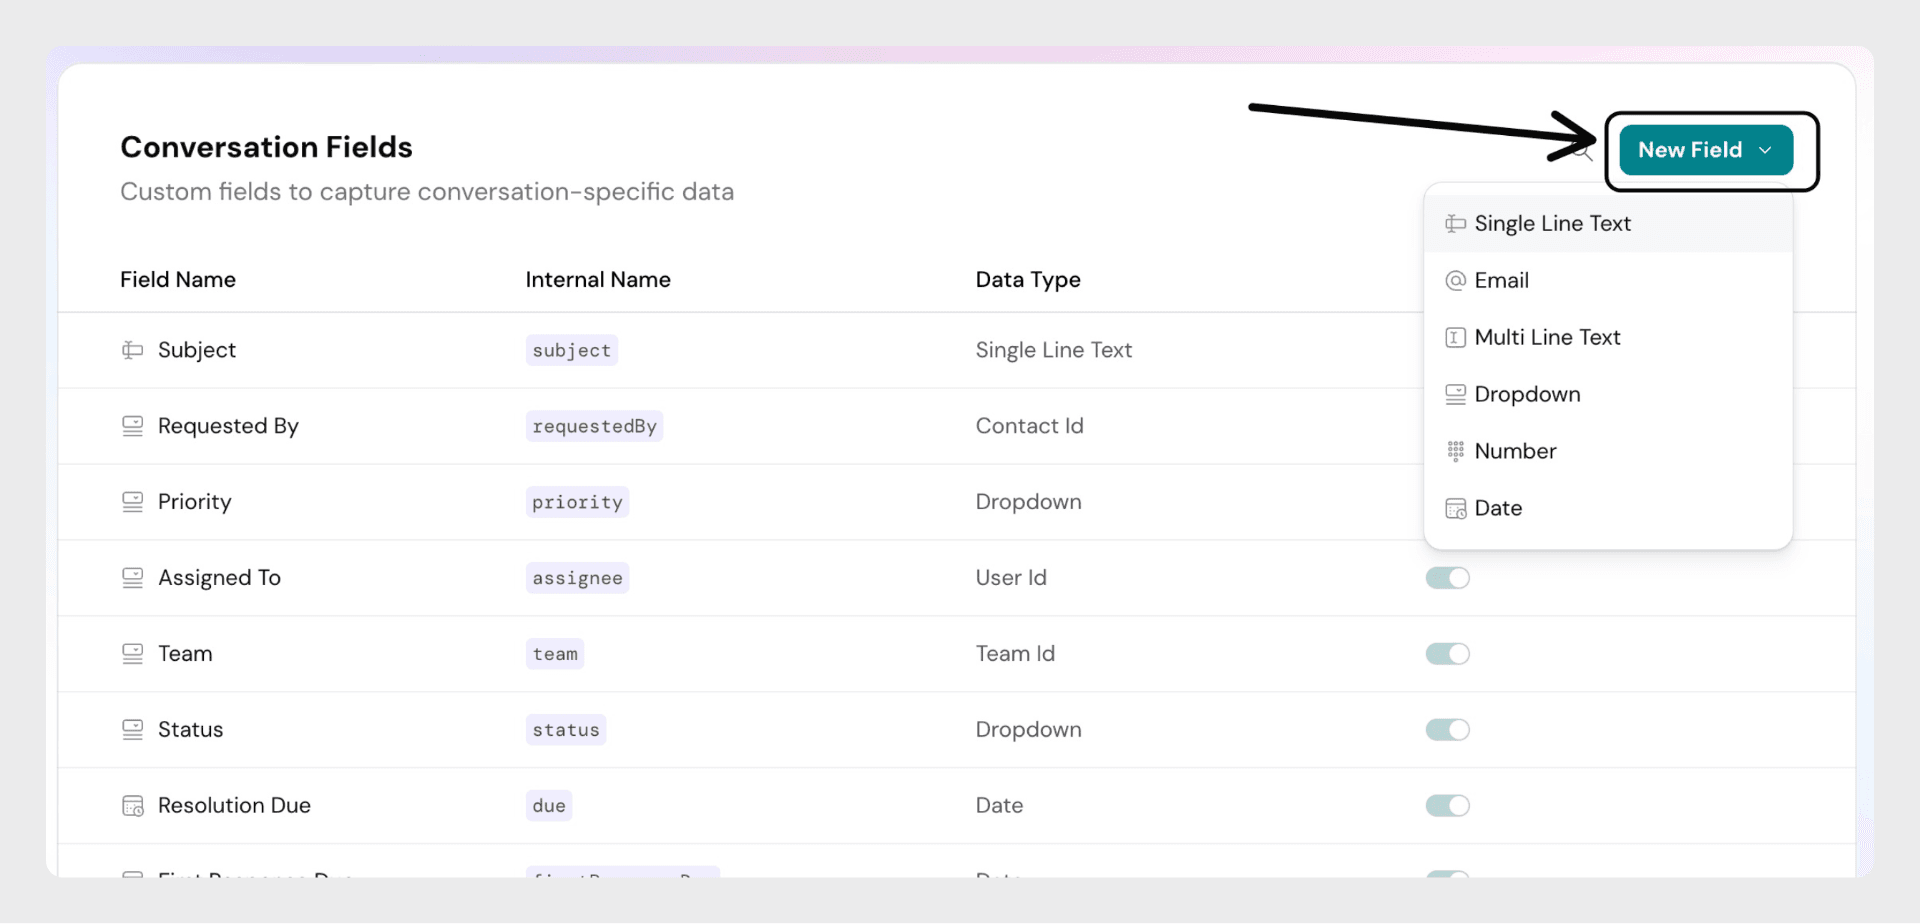
Custom Conversation Fields
Admins can create additional fields to capture information specific to their workflows or industry requirements.
Available Data Types
- Text: A single line of text input
- Multiline text: Longer, multi-line input
- Number: Accepts numeric values only
- Dropdown: Allows selection from a list of options (up to 100 options)
- Date: Calendar-based date picker
How to Custom Fields
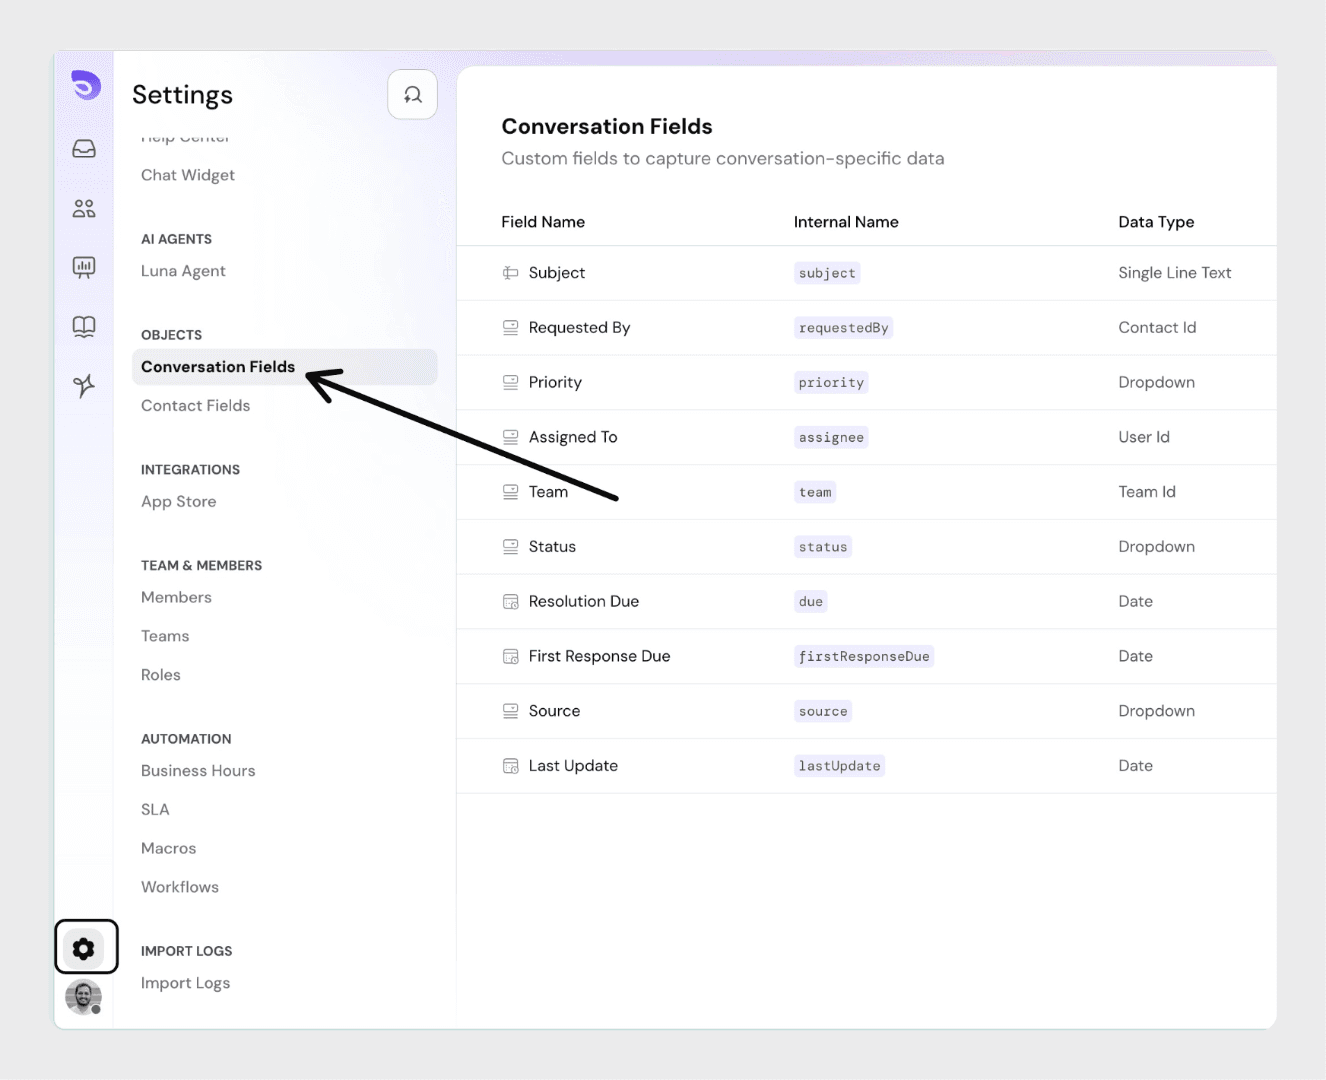
Step 1: Click on the settings icon from the left panel, and click on Conversation Fields. Or use Compass (cmd +k) and search for contact fields.
Managing Custom Fields
- Custom fields can be modified, disabled, or enabled.
- Custom fields cannot be deleted.
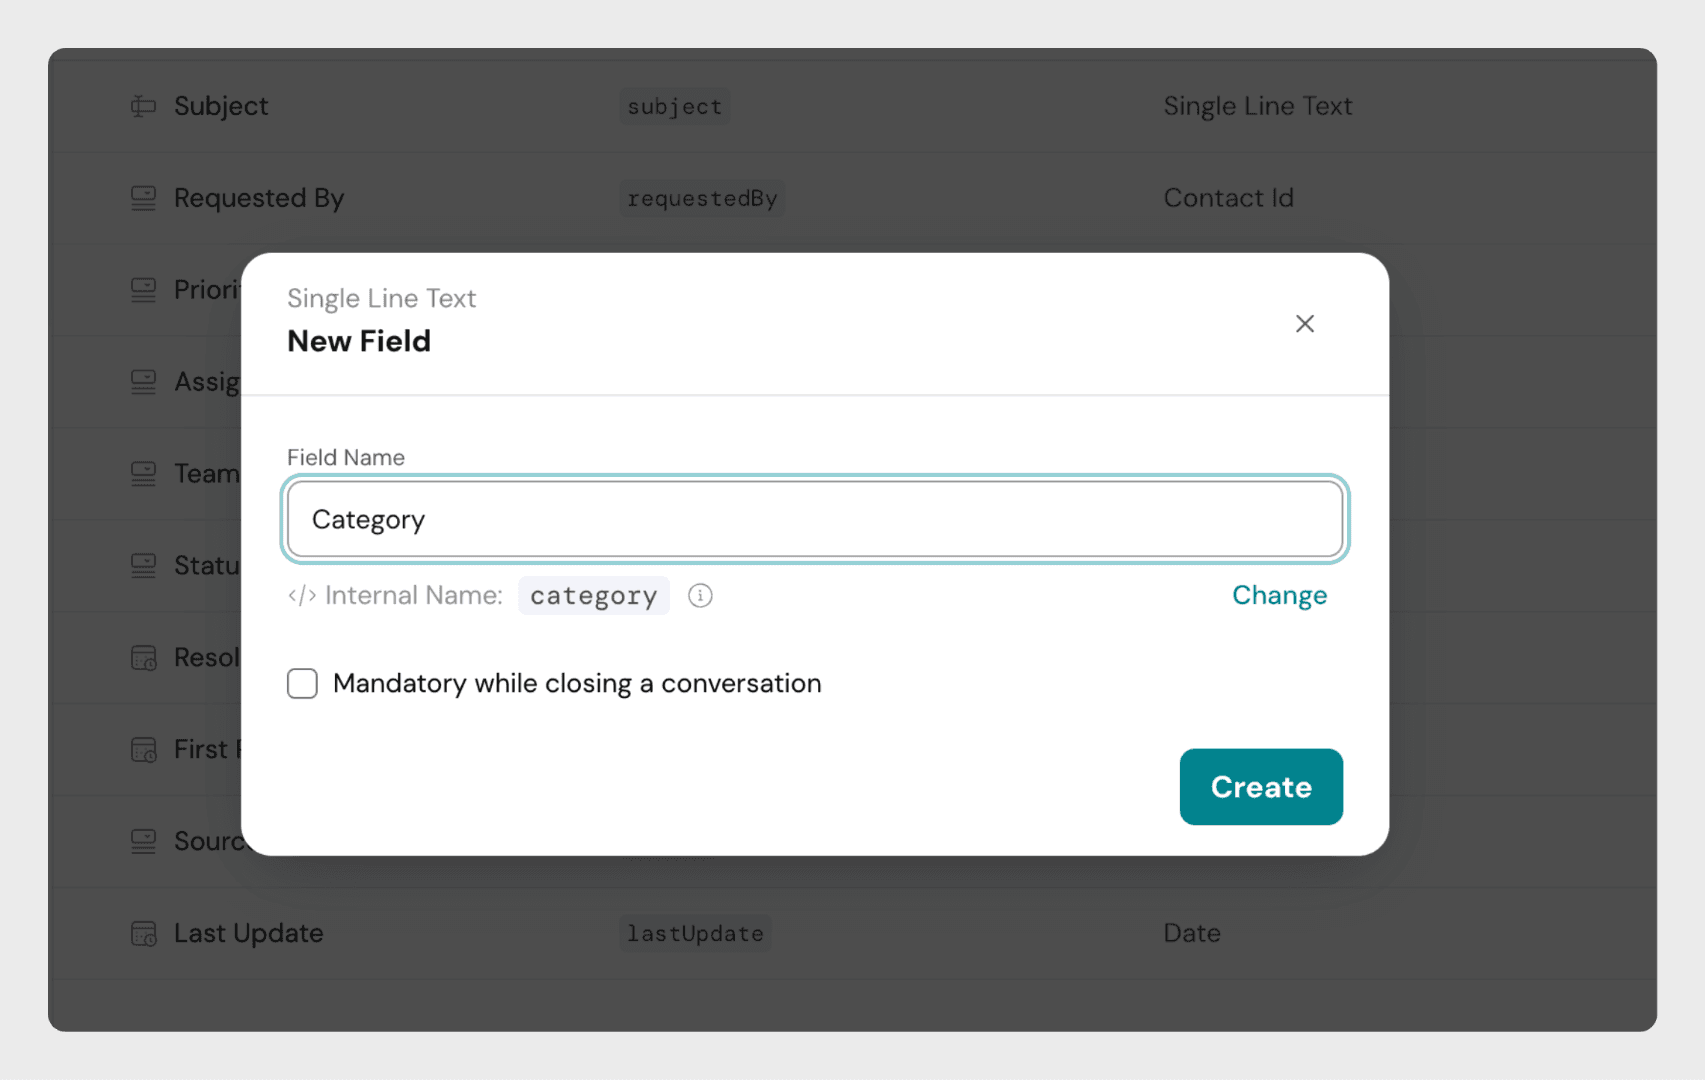
- You can mark a custom field as mandatory while closing a ticket. Tickets cannot be closed unless that field is filled.
Internal Names
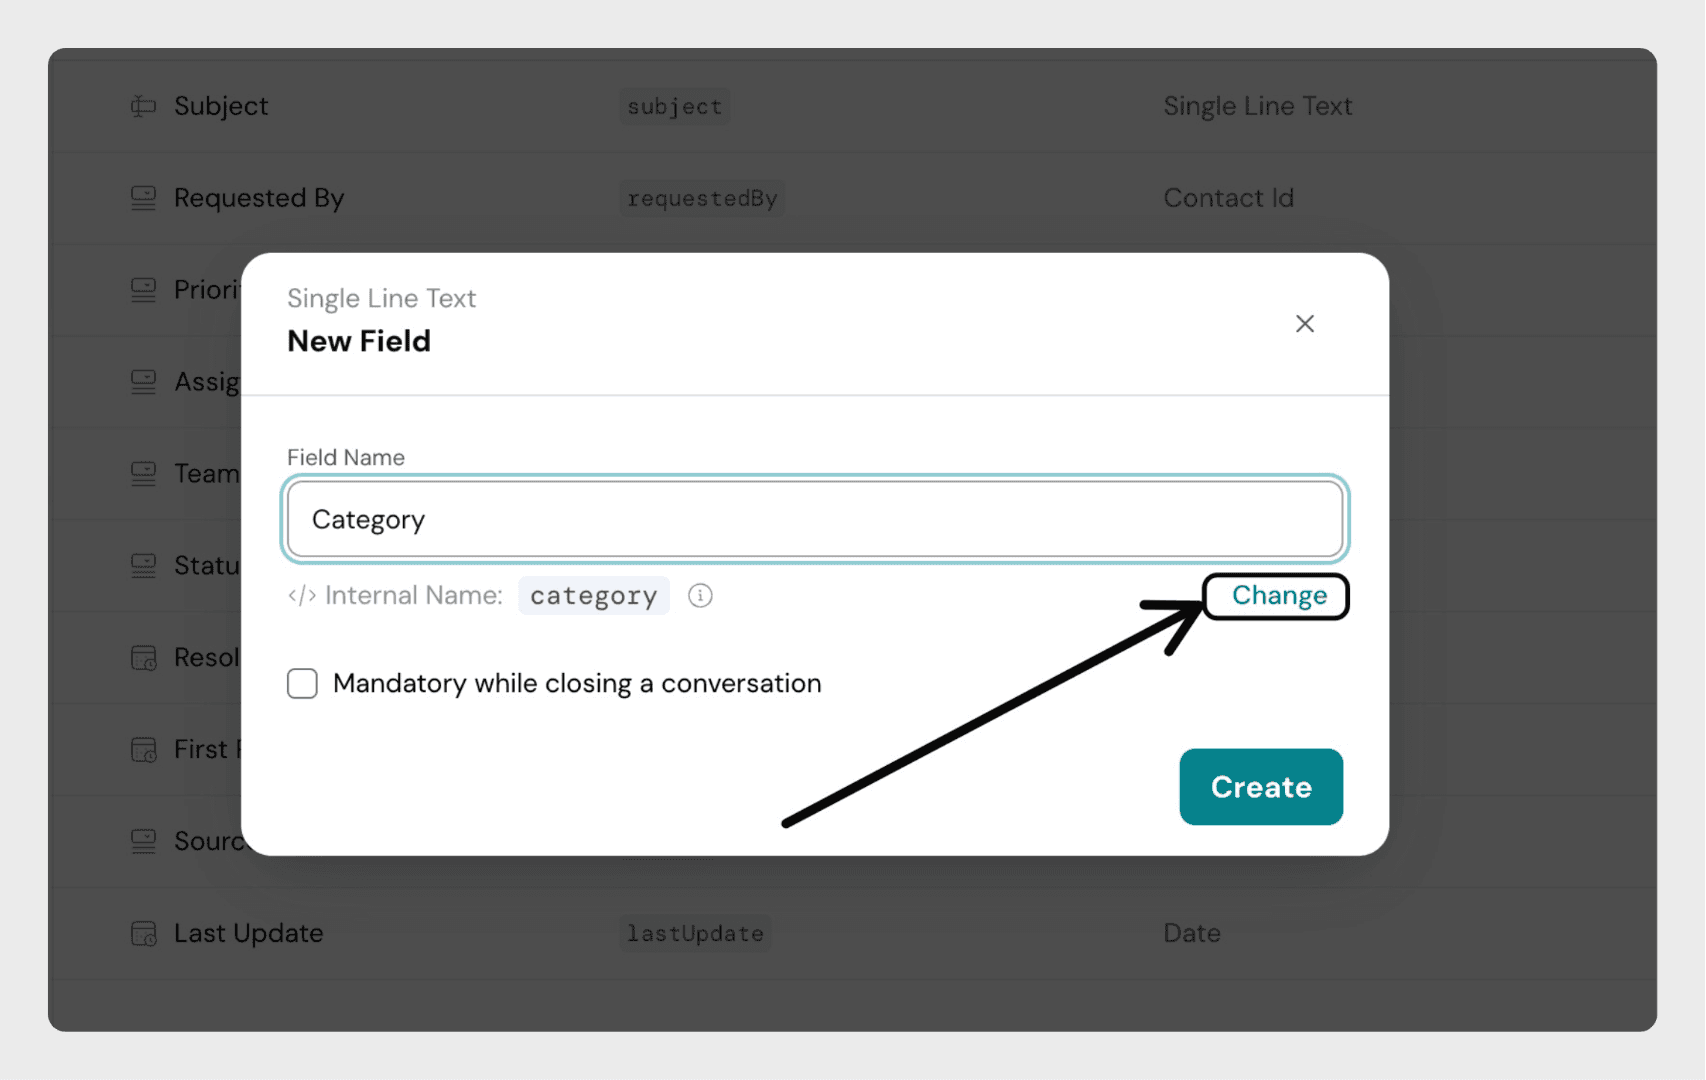
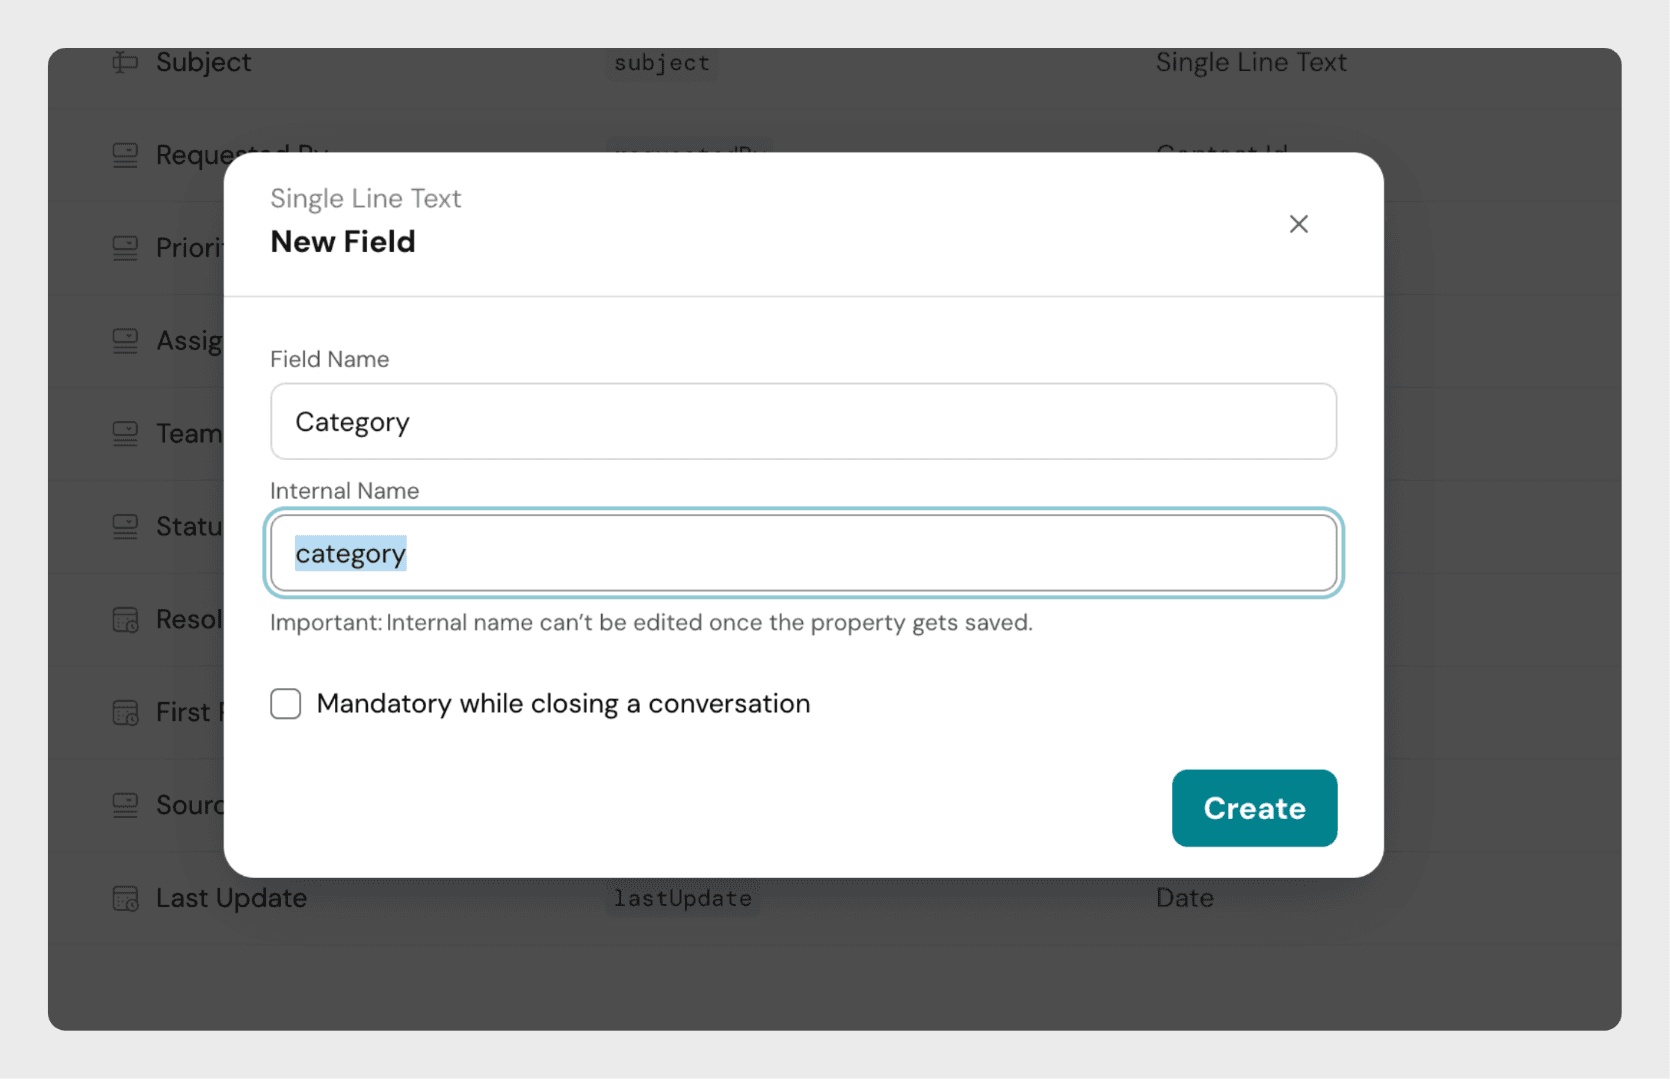
- Each field has a unique internal name used for APIs and integrations.
- When a custom field is created, its internal name is auto-generated (e.g., "Origin Country" becomes
origin_country). - The internal name can be edited only during field creation.
- After creation, only the field label and dropdown options can be changed.
Note: Two fields cannot share the same internal name. Once created, the internal name is locked.
Conversation fields play a vital role in structuring your support process. They provide context, improve automation, and enhance reporting capabilities for support teams of any size.
.