sparrowdesk-logo-transparent-1.png
Go to sparrowdesk.com
Home
SparrowDesk Overview
  • Overview of SparrowDesk
  • Feature Overview in SparrowDesk
  • SparrowDesk Glossary
Getting Started
  • Setting Up Account Details
  • Default Business Hours
  • Understanding and Creating Teams
  • Inviting Team Members to the Platform
  • Roles and Permissions
  • Single Sign-On
  • Brands in SparrowDesk
  • Getting Started FAQs
  • Use a custom domain for your support portal
Inbox
  • Understanding the Inbox in SparrowDesk
  • Managing Custom Views in Inbox
  • Live Chats in Inbox
  • Staying on Top of New Messages from Customers
  • Conversation Fields in SparrowDesk
  • Merging Conversations in SparrowDesk
  • Adding Watchers to a conversation
  • Round Robin assignment explained
  • Export Conversations as CSV
  • Bulk update fields
  • Forward a Conversation to an External Contact
  • Common Email Delivery Errors
Channels
  • Setting Up Email as a Support ChannelConnect your custom email address How do I send and receive emails via SMTP and IMAP ? How do I find my SMTP/IMAP server address and port number? Common Errors while Connecting through SMTP/IMAPHow to Prevent Emails From Going to Spam Email Signatures
  • Installing Chat Widget Chat Widget Installation on WordPressInstall the Chat Widget on ShopifyCustomising Chat WidgetEmbedding and Configuring the SparrowDesk Chat WidgetChat Widget SettingsWhy End Users Don’t Always See Their Chat HistoryTrack page visits in SparrowDesk
Contacts
  • Contacts in SparrowDesk
  • How to manage contact segments
  • Deleting and Blocking Contacts in SparrowDesk
  • Contact Fields in SparrowDesk
Reports
  • Conversation Report
  • Team Performance Report
  • Understanding the AI Agent Report in SparrowDesk
  • Viewing CSAT reports in SparrowDesk
  • Reports FAQ
  • Exporting Reports as PDF
Automation
  • Macros
  • Business Hours
  • Service-Level Agreements (SLAs)
  • Setting up CSAT (Customer Satisfaction) in SparrowDesk
Zoona AI
  • AI Suggested replies in your Inbox
  • AI-Generated Chat Subjects
  • Zoona AI Knowledge Improvements
  • Introduction to AI AgentAI Agent - Configure PersonaTraining your AI AgentZoona AI Agent CommandsAI Agent - Deploying on chatAI Agent - Deploying on EmailHow to Create a Command Zoona AI Agent - FAQUnderstanding AI resolutions in SparrowDesk
Workflows
  • Automate repetitive tasks through Workflows
  • How to Create a Workflow
  • Workflow Blocks Library
Help Centre
  • Write Knowledge Articles for your Help Centre and AI Agents
  • Setting Up and Customizing Your Help Center
  • Use a Custom Domain for Your Help Center
  • Make Your Help Centre Discoverable in Search results
  • Adding Google Tag Manager to your Help Center
  • Creating a Ticket Form Setting up Customer Portal
Billing
  • How does SparrowDesk pricing work?
  • What is Seat ?
  • Manage your Billing and Invoices
  • About Sales Tax
  • How to cancel your subscription
  • Frequently Asked Questions
  • AI Co-pilot and AI Resolution billing
  • SparrowDesk Startup Program
Apps and Integrations
  • Okta Single Sign on setup for SparrowDesk
  • Integrating HubSpot with SparrowDesk
  • Integrating SurveySparrow with SparrowDesk
  • Integrating SparrowDesk with Zapier
  • Connecting SparrowDesk with Attio
  • Connecting SparrowDesk with Linear
  • Integrating SparrowDesk with Jira
  • Connecting SparrowDesk for Gmail
  • Integrating SparrowDesk with Notion
  • Integrating SparrowDesk with Slack
  • Integrating SparrowDesk with Shopify
  • Connect WhatsApp to SparrowDesk

How to Create a Workflow

Timer2 min read
SebinSebin

Workflows in SparrowDesk help you automate repetitive tasks using the visual workflow builder.


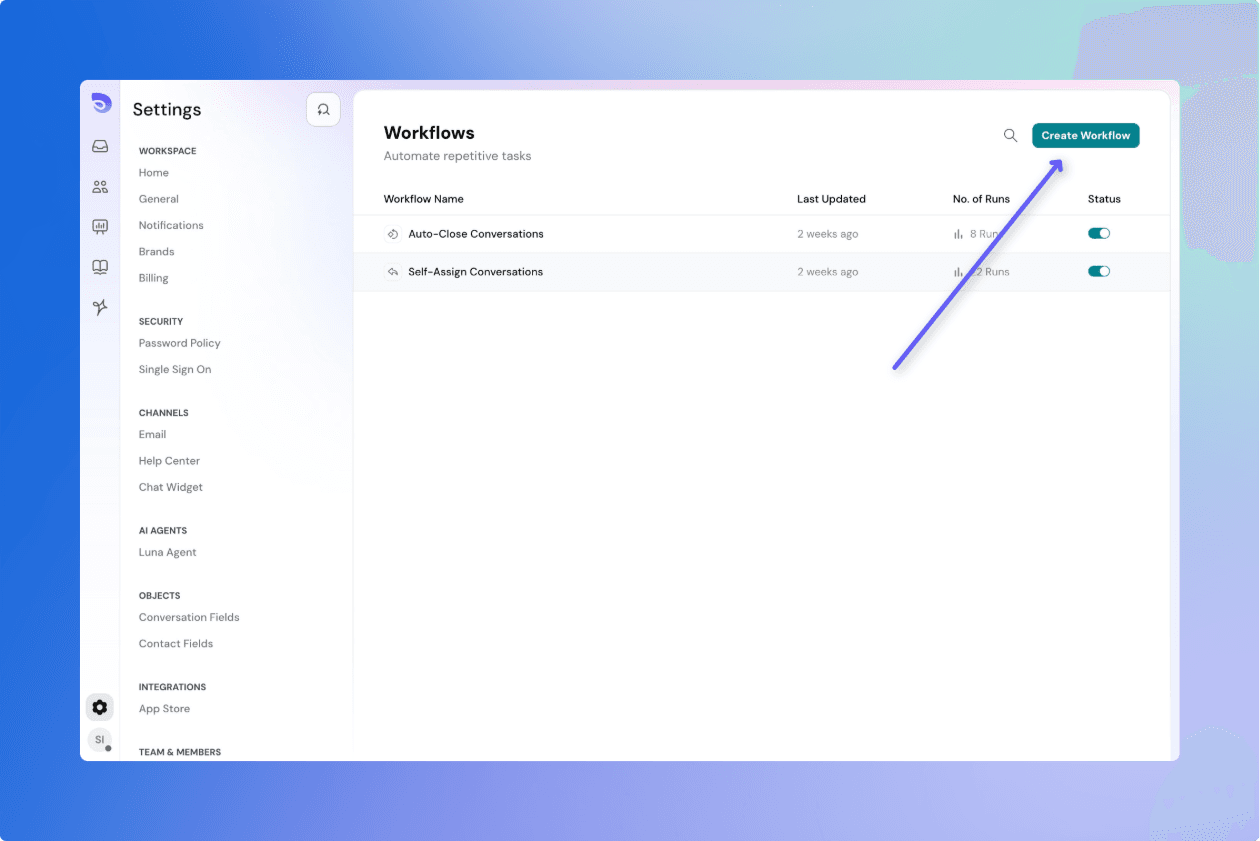
Create a new workflow.

To start a new workflow:

  1. Go to Automations from the left sidebar.
  2. Select Workflows.
  3. Click Create Workflow at the top-right corner.
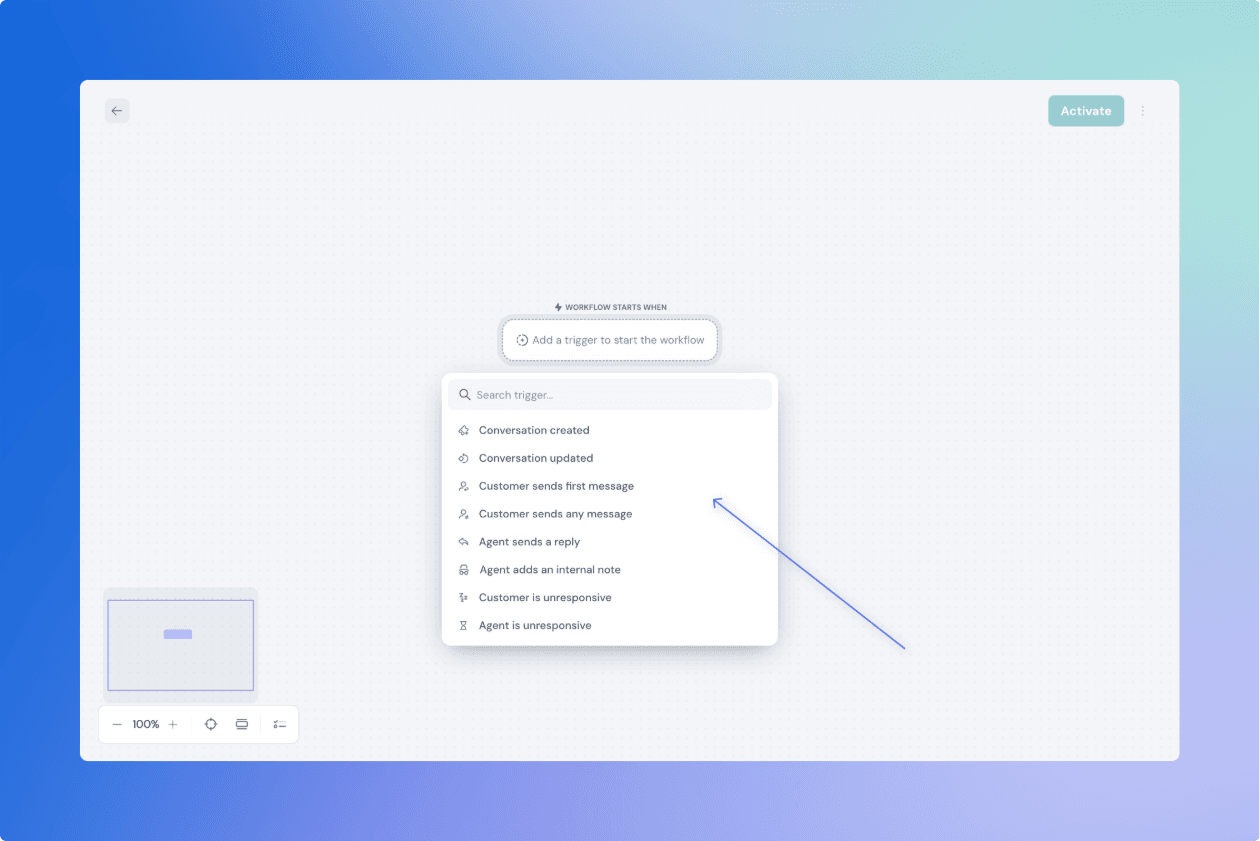
Create new workflow button.png

Choose a Trigger

Begin with a trigger block—this defines when the workflow should run.

Example triggers:

  • Customer sends first message
  • Ticket status is updated
  • Agent sends a reply
  • SLA is breached

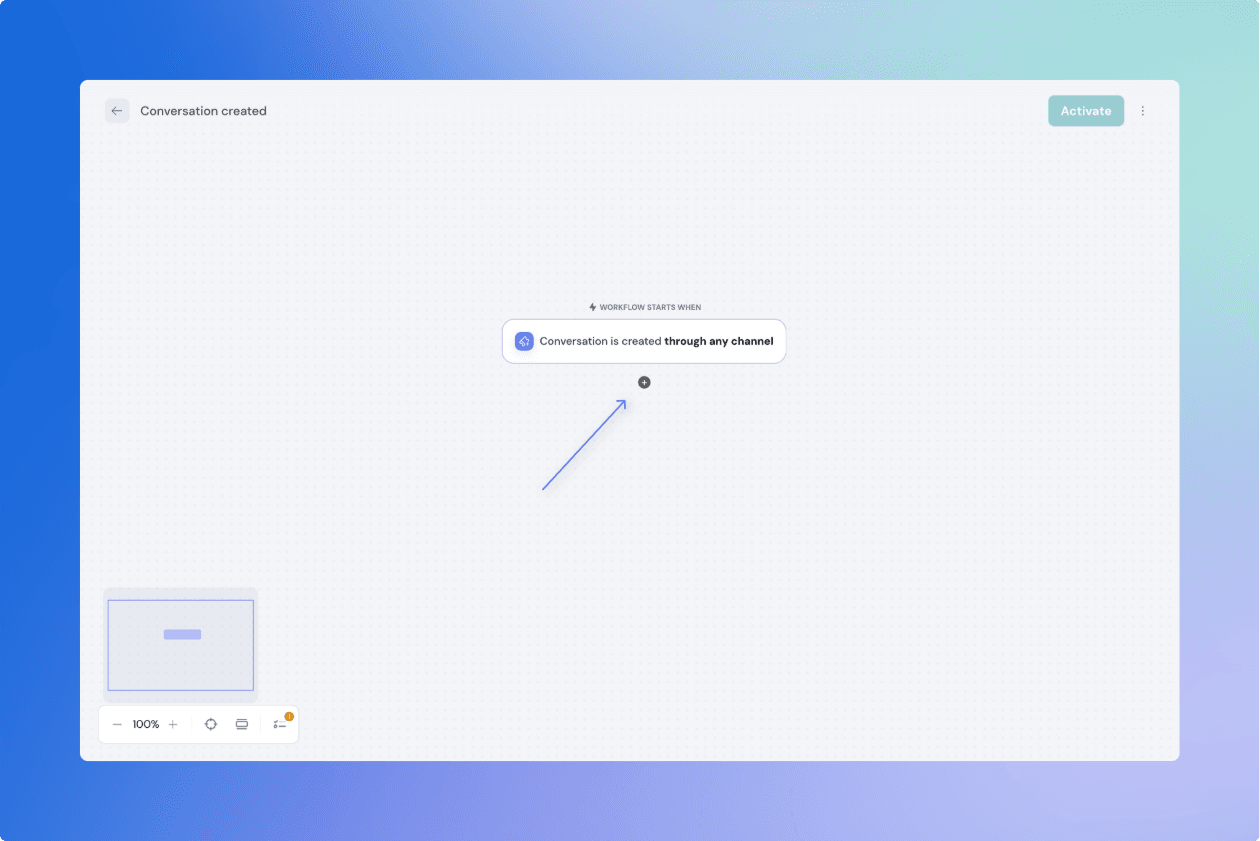
After selecting a trigger, you may need to configure details such as:

  • Channel (Email or Chat)
  • Run only when conditions to narrow down when this workflow should run.

You can change the trigger anytime by selecting the block.

Workflow Choosing a Trigger.png


Add action blocks

Once your trigger is set, use action blocks to define what the workflow should do. Some actions blocks are ,

  • Send Reply: Send a message in the same channel
  • Send Email: Send a standalone email to a teammate or contact
  • Update Fields: Modify ticket, contact, or custom object fields
  • Add Tags: Append new tags to the ticket
  • Add Internal Note: Leave a private note for your team
  • Wait: Add a delay before moving to the next step
  • Send HTTP Request: Trigger an external API call
  • Exit: Stop the workflow at that point

Click the + icon between blocks to insert the next action.

Software Interface for Conversation Workflow Setup.png


Reorder, organize, and delete blocks

Connect and disconnect blocks

  • Drag from the blue dot on one block to another to connect them.
  • Click a connection line and press Delete to remove it.
  • All blocks must be connected with blue lines to publish. Grey lines mean the block is incomplete.

Organize blocks

Click Organize blocks in the toolbar to auto-align all blocks neatly.

Delete blocks

To delete:

  • Select a block and click Delete Block in the bottom-right, or press Delete on your keyboard.
  • To bulk delete, use Shift+Click or drag to multi-select.


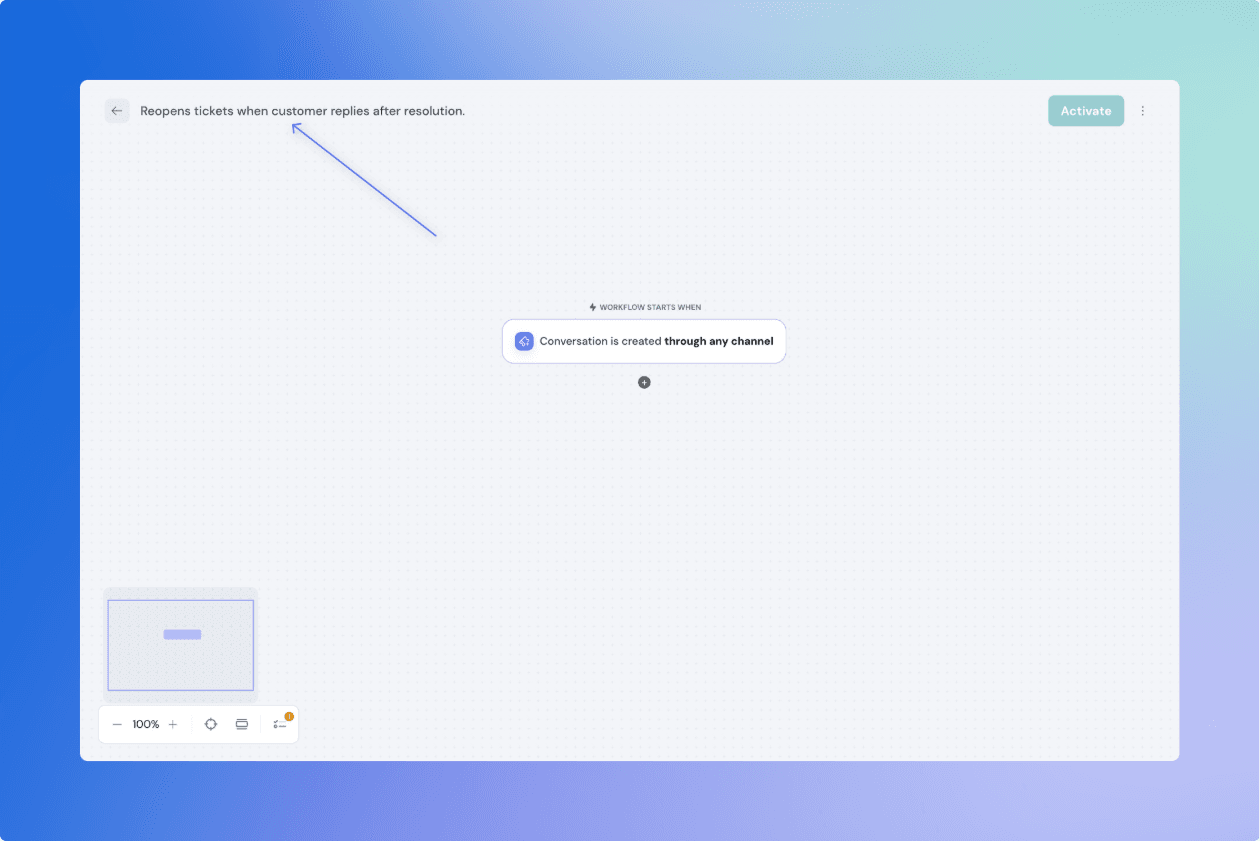
Give a name to the Workflow

Give your workflow a name and a clear description:

  • Click the top-left workflow title to rename it.
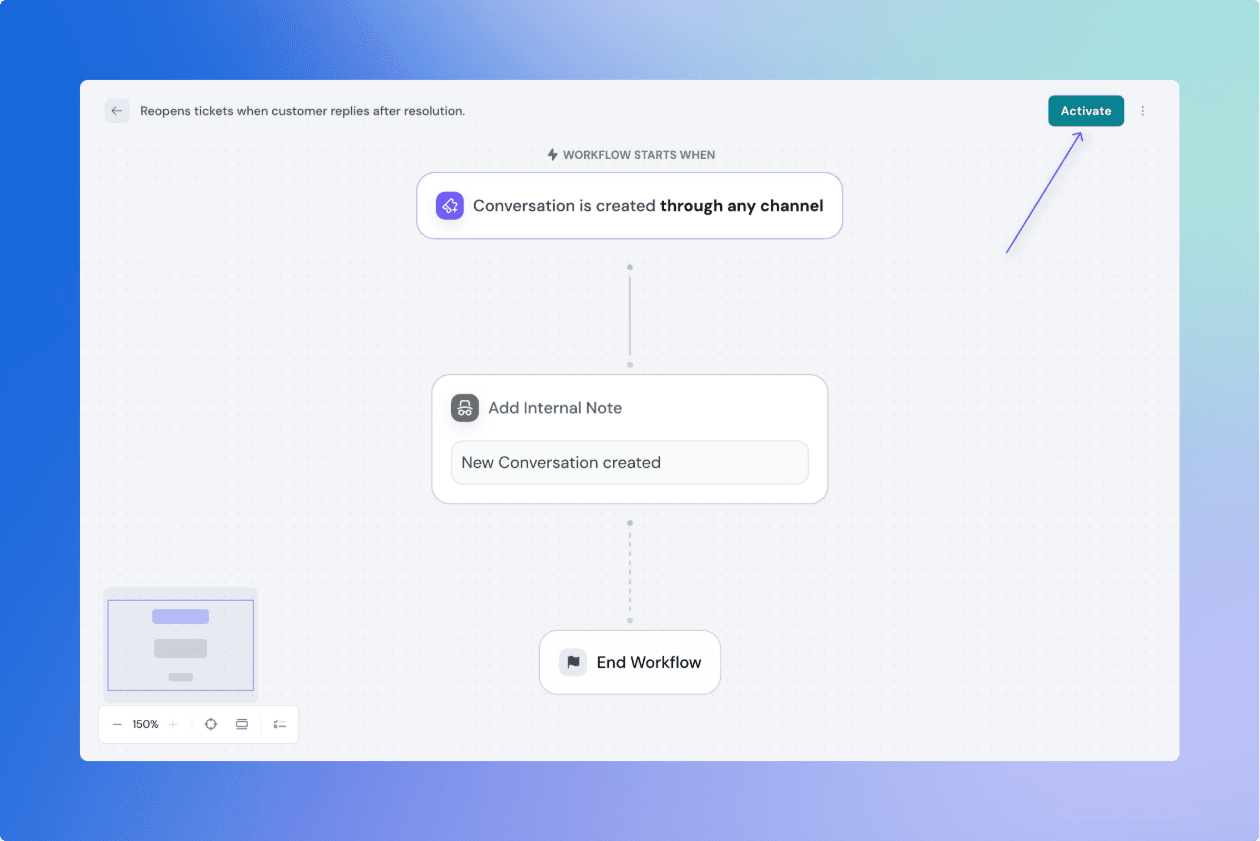
  • Example: “Reopens tickets when customer replies after resolution.”

Workflow builder interface.png


Activate a workflow

Once your workflow is fully configured:

  • Click Activate at the top to activate it.
  • If something is missing (e.g., input not set), error badges will appear on those blocks.

Publishing Flow.png

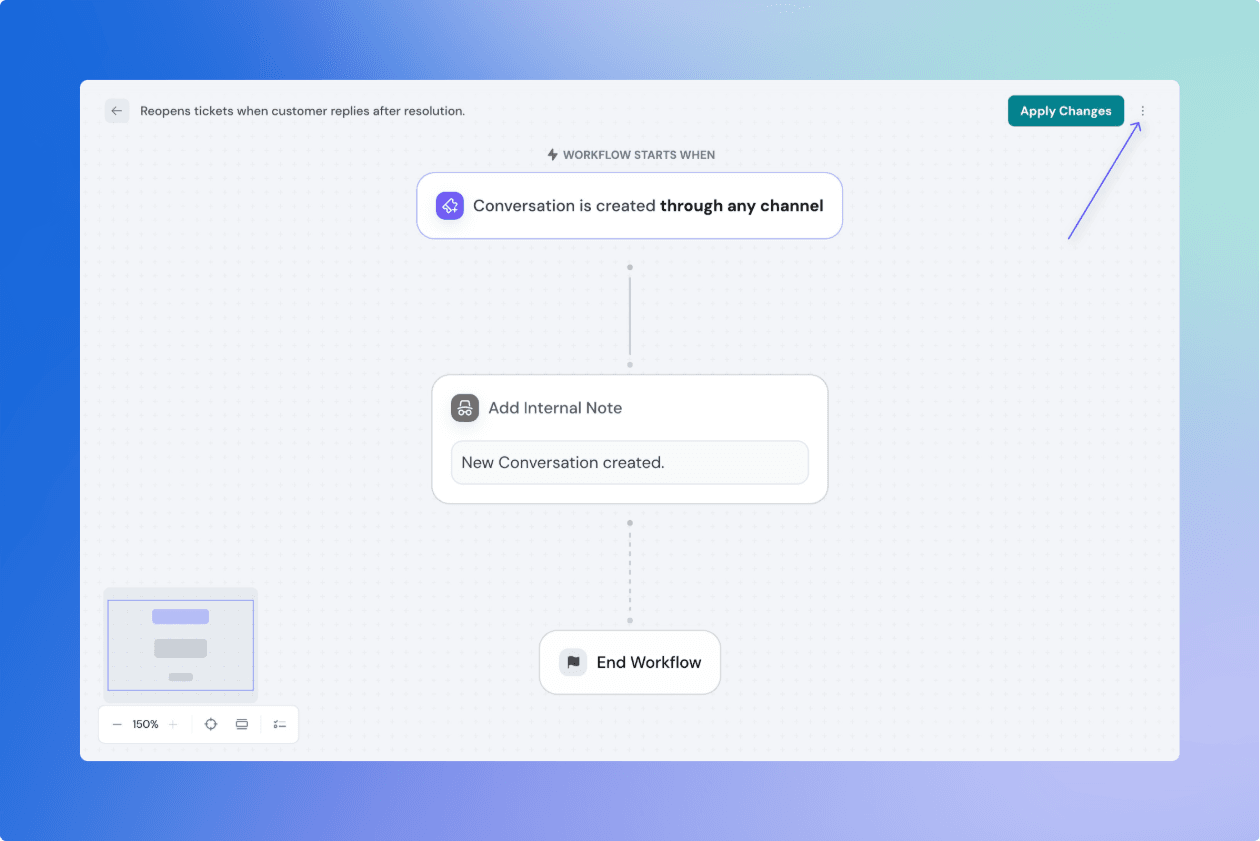
When you make any changes to the activated workflow , Click Activate Changes to make the changes live.To undo edits and revert to the last live version, click under 3 dots Discard Changes.

3 dots.png

Deactivate

  • Toggle to deactivate the workflow.
  • Inactive workflows won’t run—but any currently running executions will continue.


Powered By SparrowDesk

Table of ContentsOn this page