
Gmail Integration
Support teams that receive customer emails in Gmail can create SparrowDesk tickets directly from those emails and track ticket details without opening SparrowDesk in a separate tab.
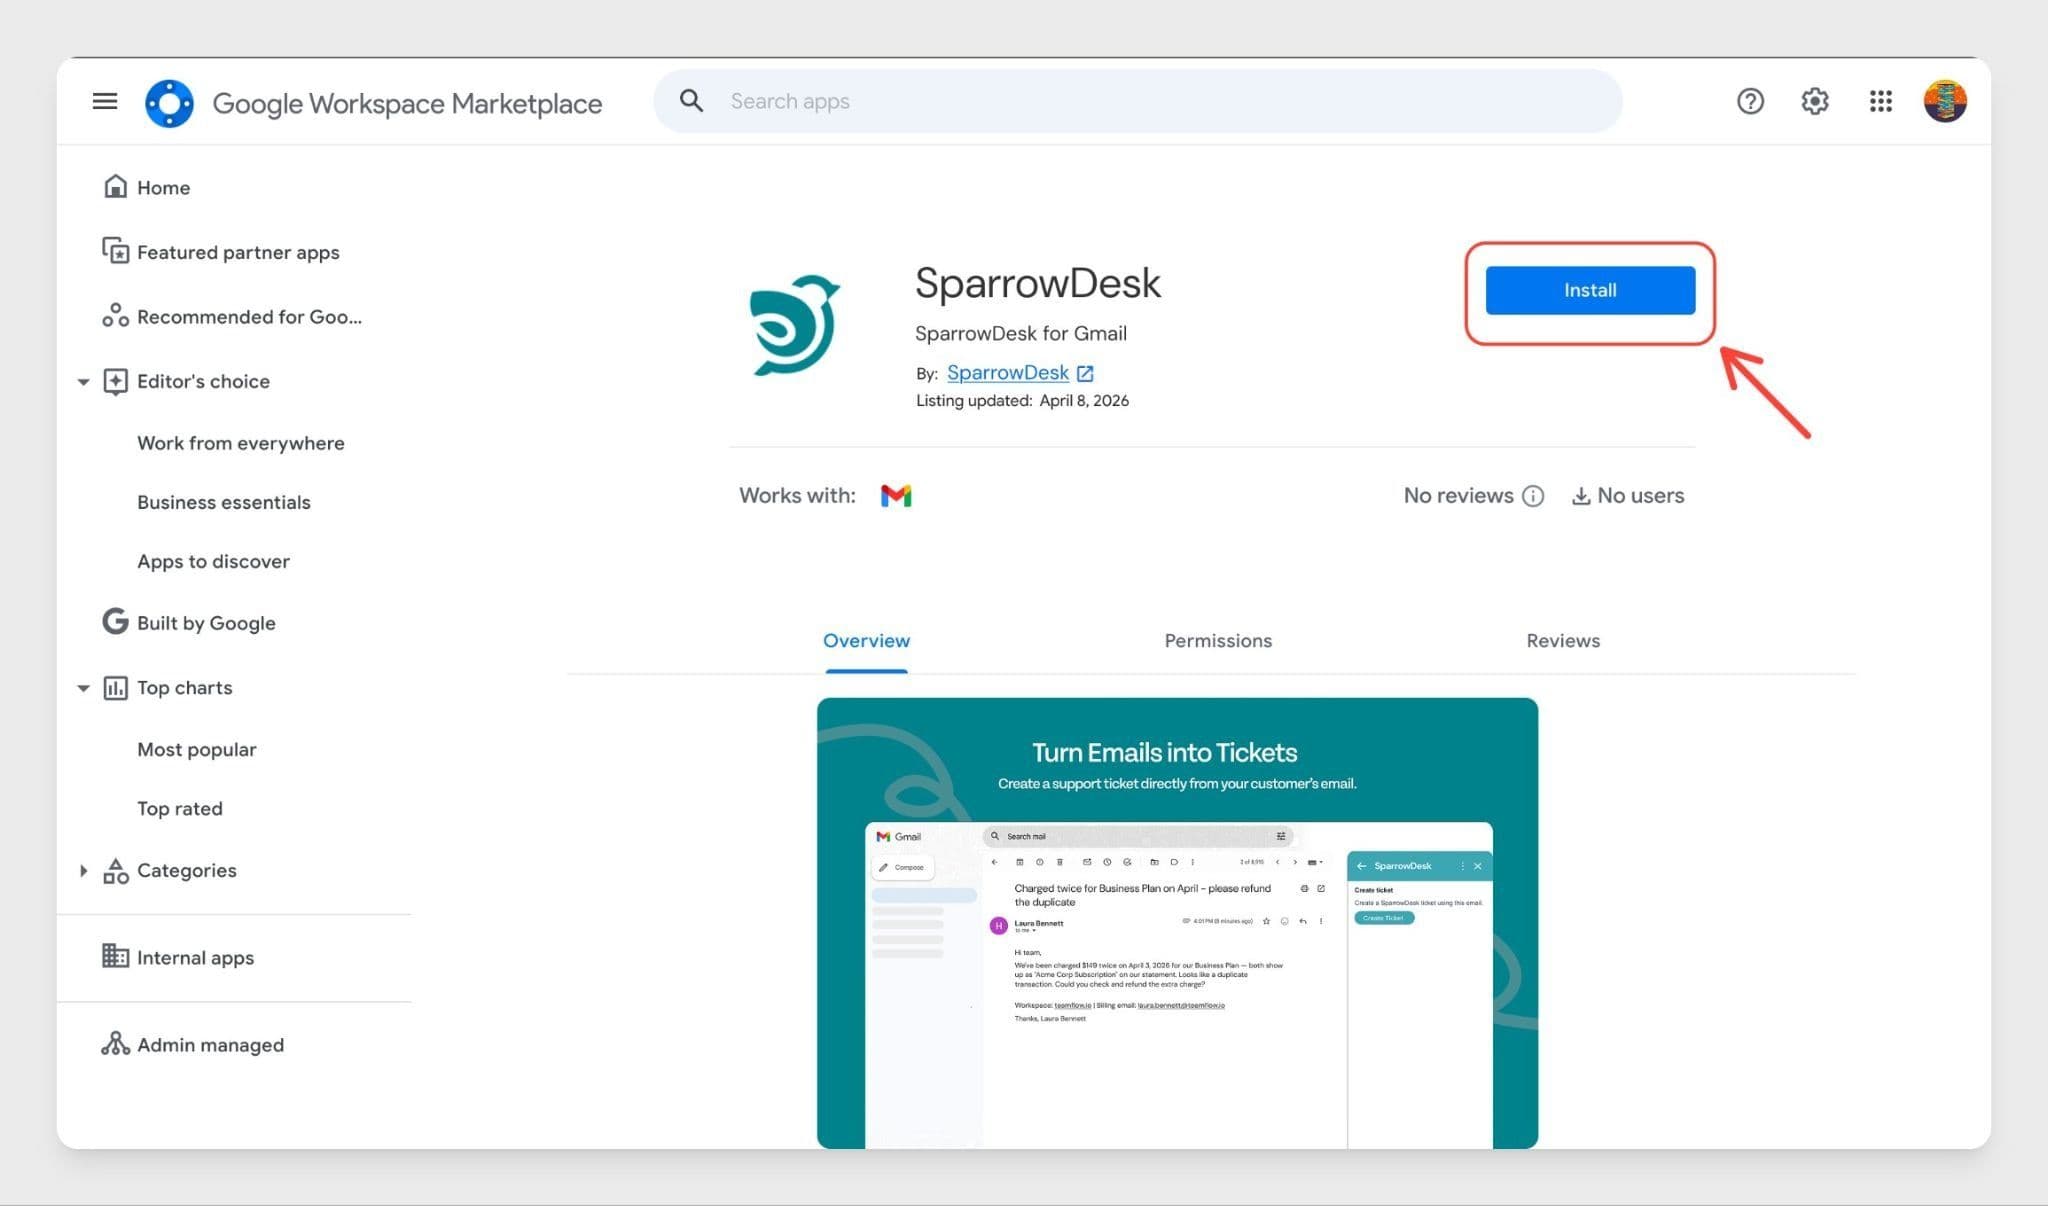
SparrowDesk for Gmail installed from Google Workspace Marketplace — visit Google Workspace Marketplace, search for SparrowDesk for Gmail, and click Install.
With the Gmail add-on, agents can create a ticket from any selected email and view ticket status, priority, and assignee right inside Gmail.
What you can do with the Gmail add-on
Once the add-on is connected, agents can:
- Create a SparrowDesk ticket directly from a selected email in Gmail
- View ticket details — including status, priority, and assignee — inside Gmail
- Stay updated on tickets without switching away from their inbox
Before you start
Make sure you have:
- SparrowDesk for Gmail installed from Google Workspace Marketplace
- Access to a SparrowDesk account
Connecting SparrowDesk to Gmail
To use the add-on, you first need to connect your SparrowDesk account.
Steps
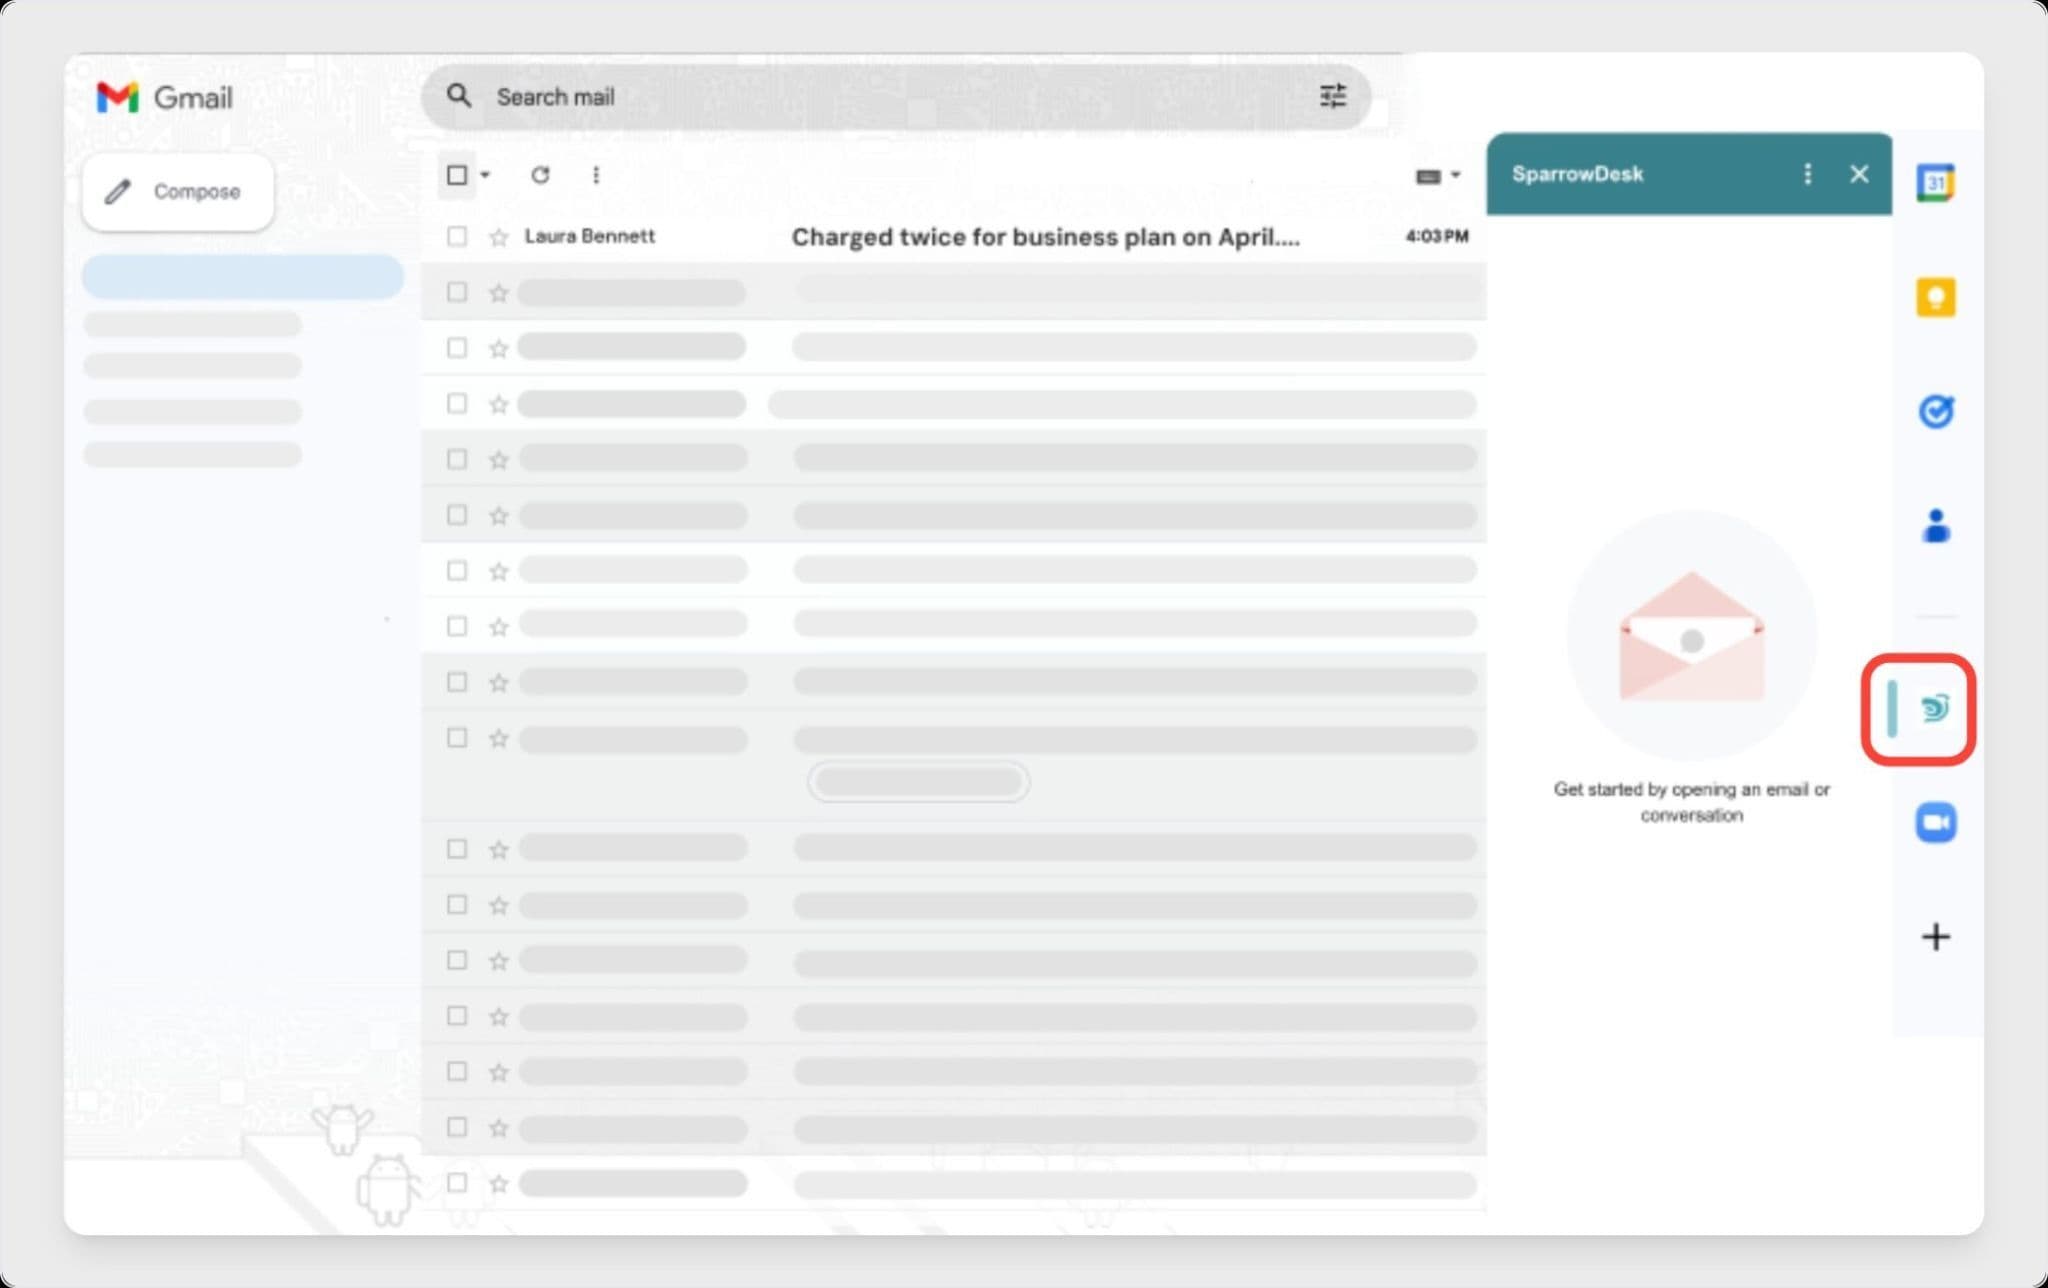
- Open Gmail
- Click the SparrowDesk icon in the right-side panel
- Click Connect
- Complete the sign-in and permissions flow
- Return to Gmail once the connection is complete
- Click Refresh inside the add-on panel
Once the add-on refreshes, it is ready for use.
Note: If ticket actions do not appear immediately after connecting, refresh the add-on. This reloads the panel and completes the setup.
Creating a ticket from an email
If a customer sends in a request or issue over email, agents can raise it as a SparrowDesk ticket without leaving Gmail.
Steps
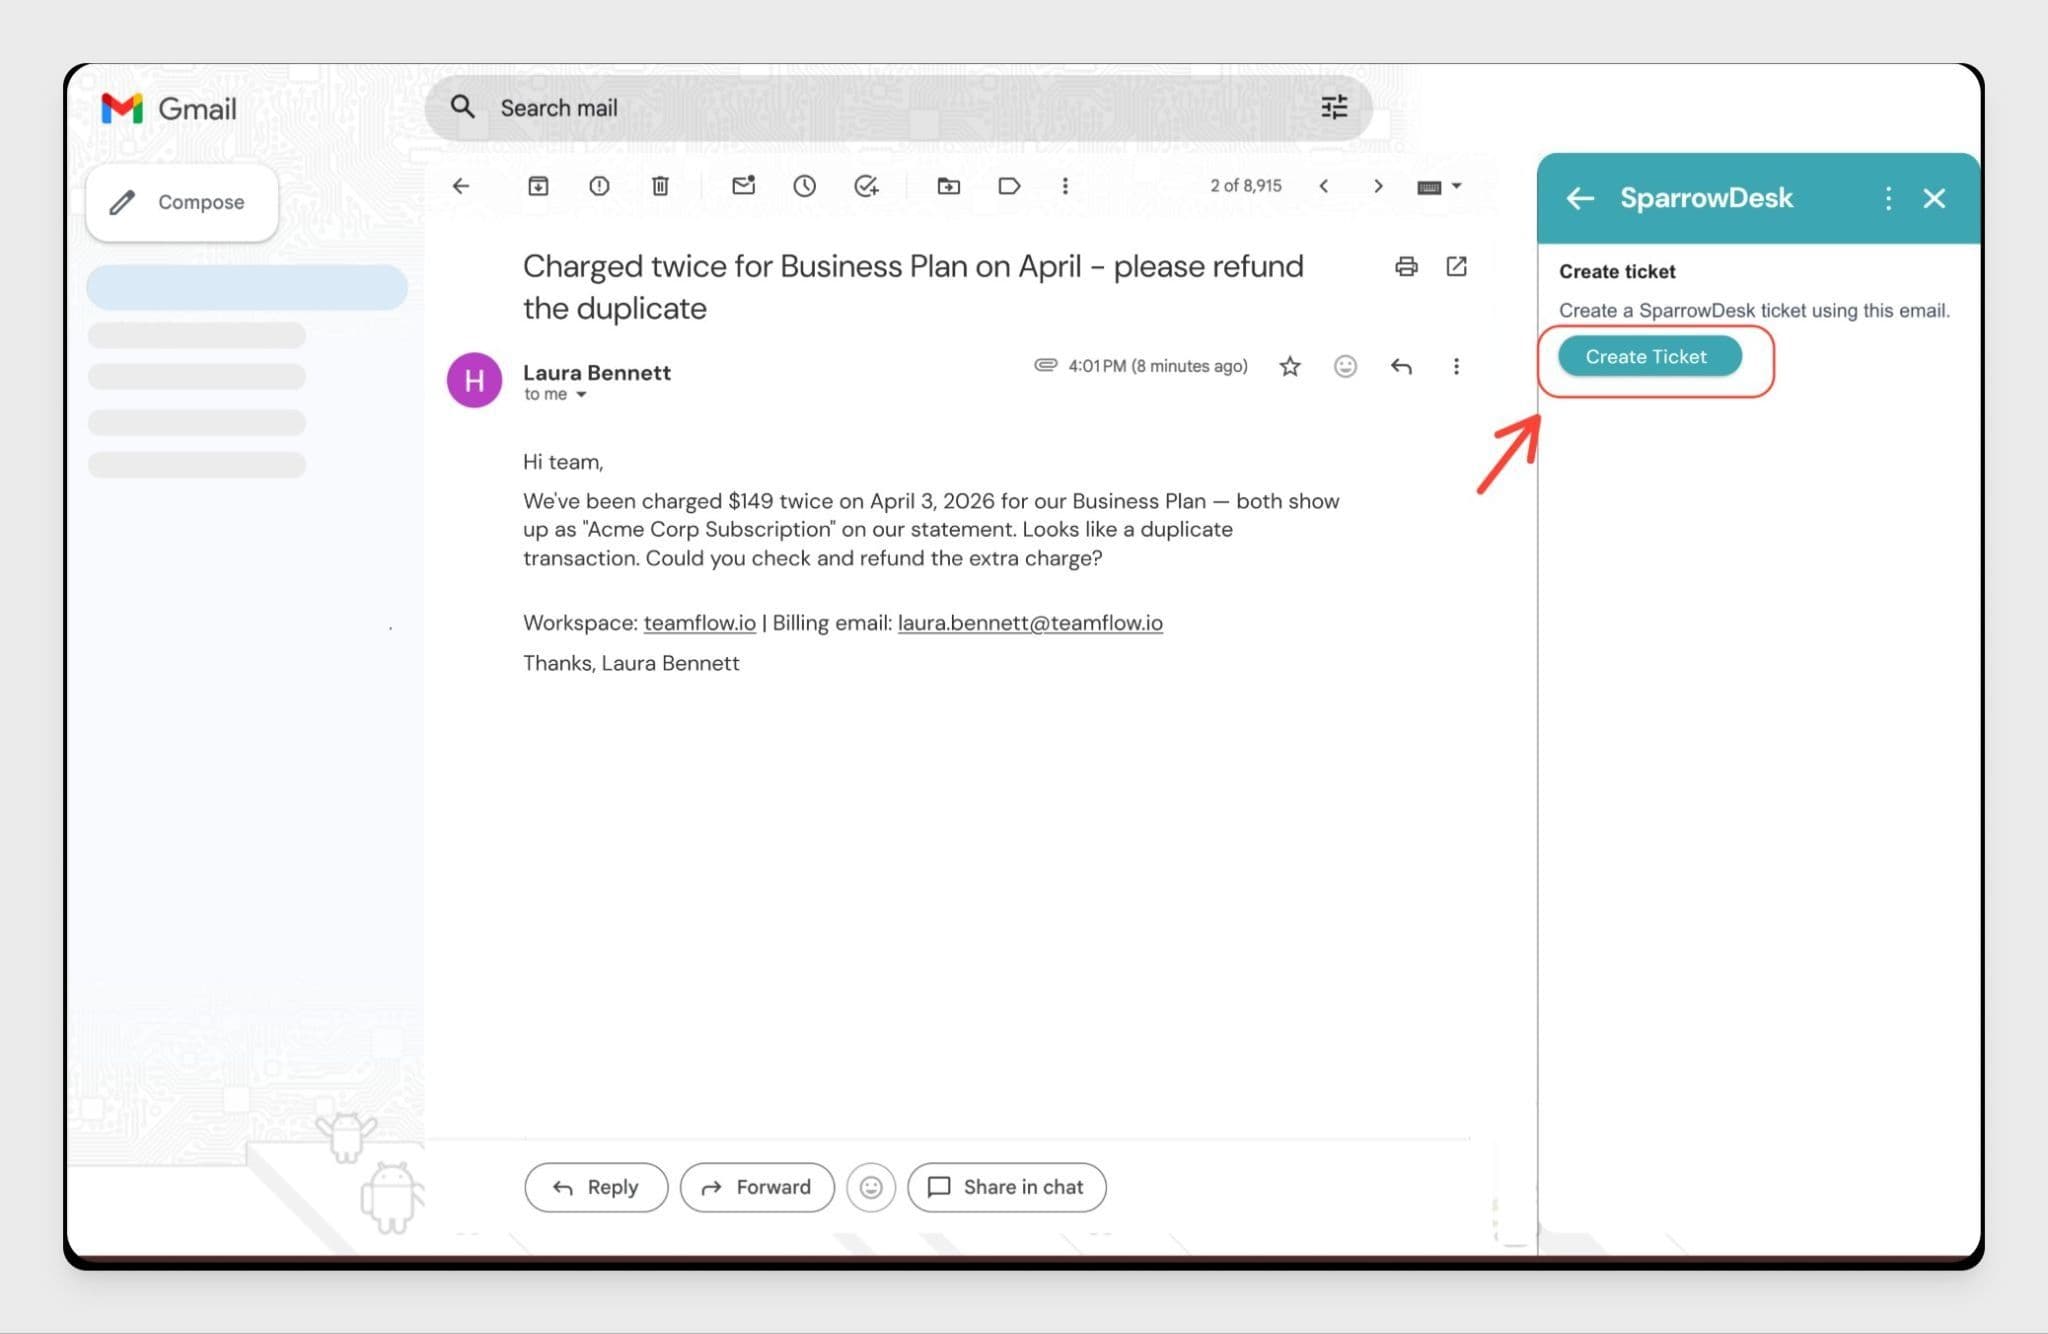
- Open the email you want to convert into a ticket
- Click the SparrowDesk icon in the right-side panel
- Click Create ticket
The ticket is created in SparrowDesk using the selected email. Agents can continue working in Gmail while the ticket is tracked in SparrowDesk.
Note: If the Create ticket option is not visible, make sure an email is selected in Gmail and reopen the add-on.
Viewing ticket details in Gmail
Once a ticket is created from an email, the add-on displays the ticket details inside Gmail. Agents can view:
- Ticket ID
- Status
- Priority
- Assignee
- Any custom fields configured for your account
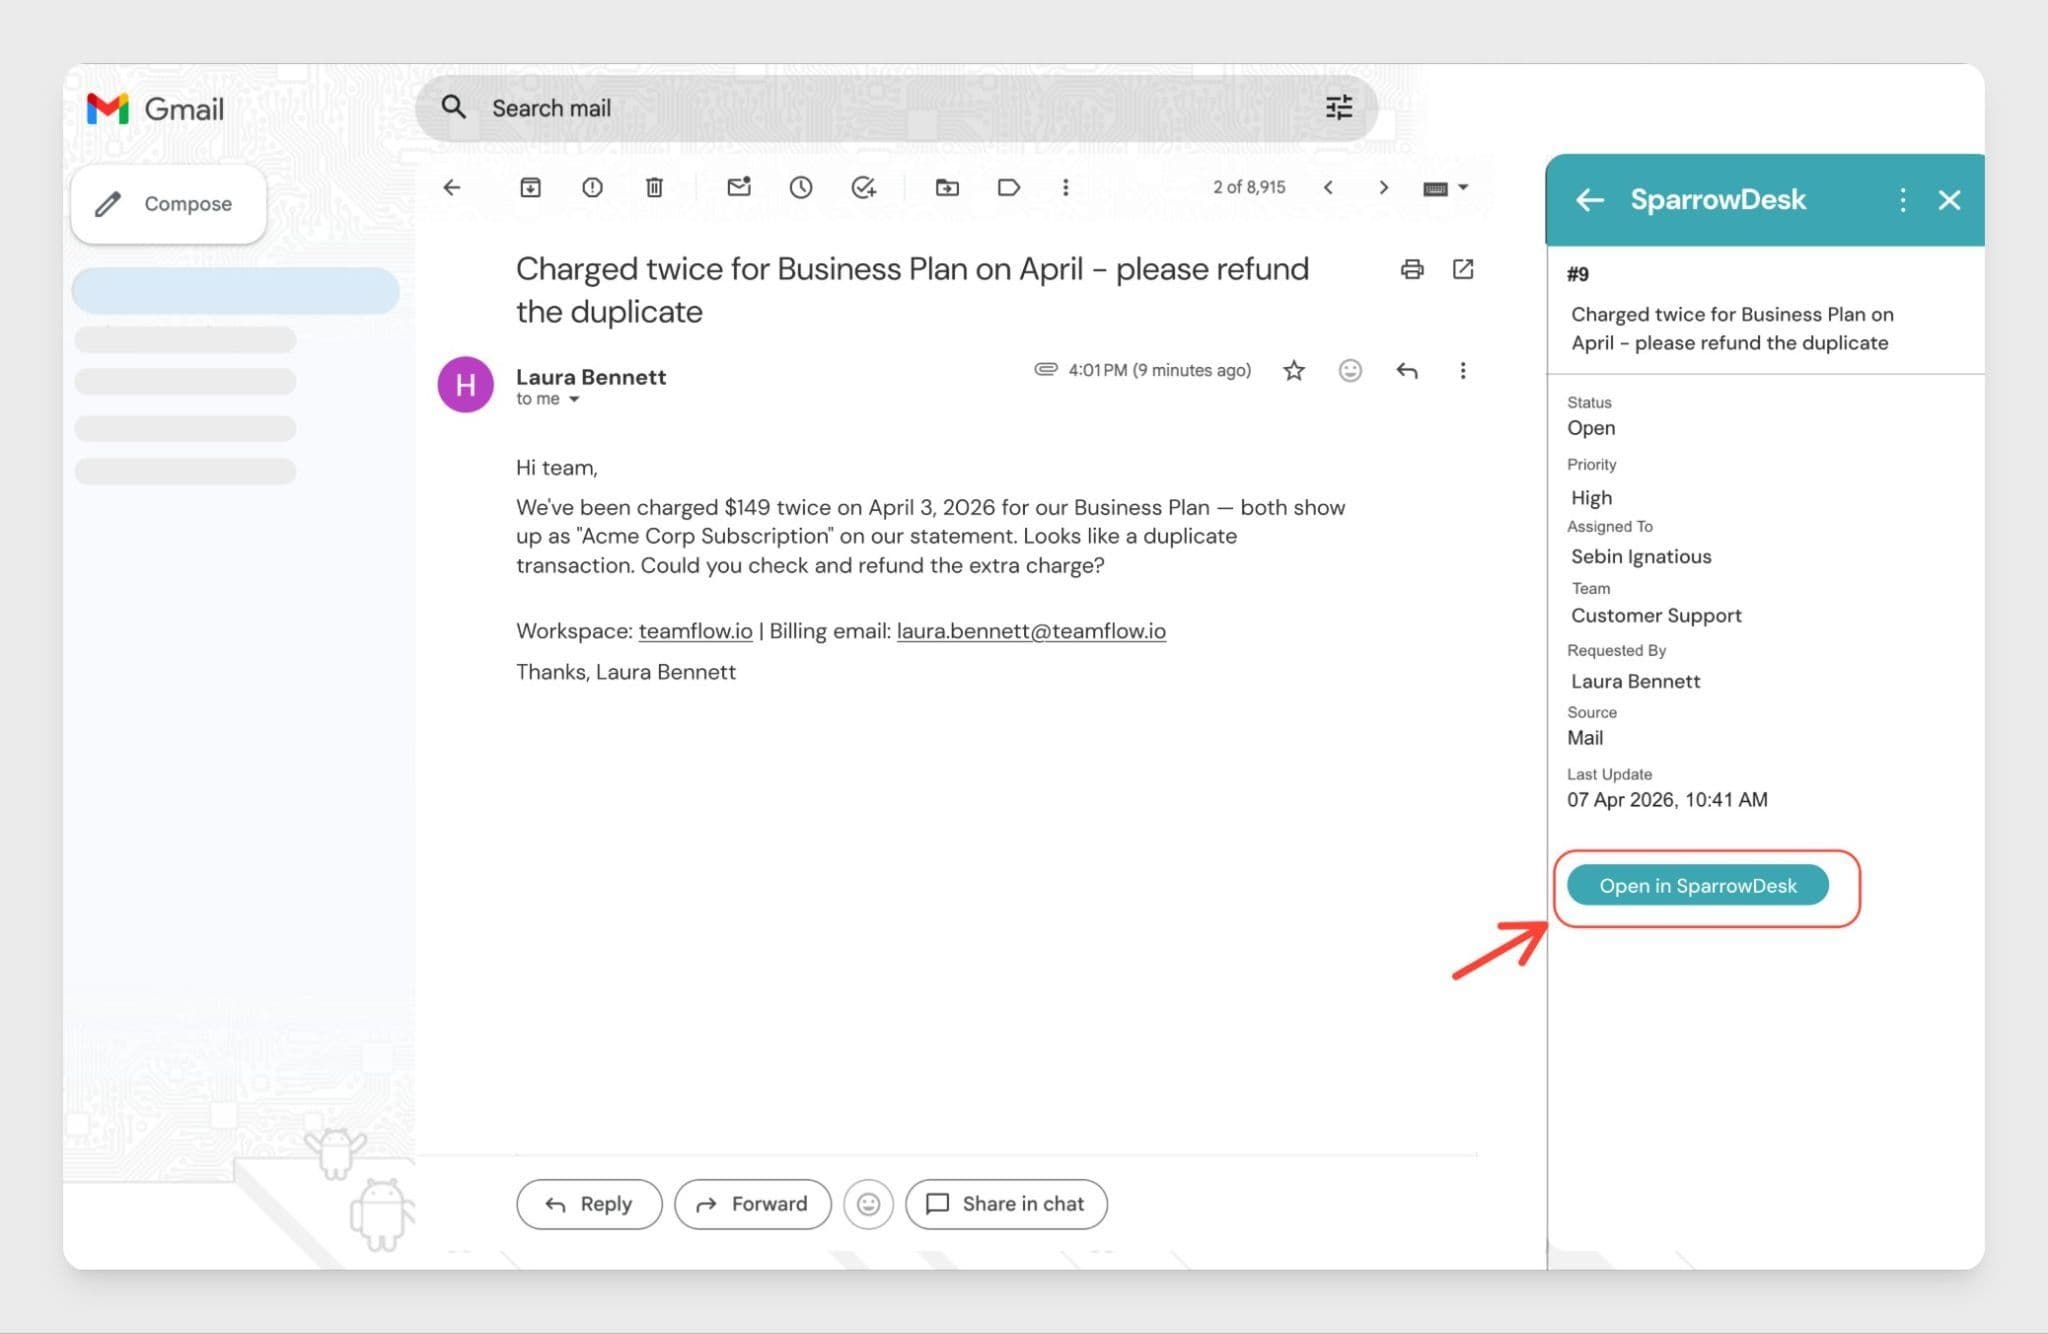
This allows agents to check where a ticket stands without opening SparrowDesk in a separate tab.
Disconnecting the Gmail add-on
If you no longer want to use the add-on, you can disconnect it at any time.
Steps
- Open the SparrowDesk add-on from the right-side panel in Gmail
- Go to Settings inside the add-on
- Click Disconnect
Note: Disconnecting removes the link between Gmail and your SparrowDesk account. Tickets that were already created are not affected. To use the add-on again, go through the connect flow.
Summary
The SparrowDesk Gmail add-on lets your team handle email-based support requests without switching tools:
- Install SparrowDesk for Gmail from Google Workspace Marketplace
- Connect your SparrowDesk account from the right-side panel in Gmail
- Create tickets directly from selected emails using Create ticket
- View Ticket ID, Status, Priority, Assignee and any custom fields configured for your account inside the add-on panel
Once connected, agents can manage support requests from their inbox without opening SparrowDesk separately.
Frequently Asked Questions (FAQ)
1. Can all team members use the Gmail add-on once it is installed?
Each team member needs to install the add-on individually and connect their own SparrowDesk account. There is no shared session across the team.
2. What information is used to create the ticket from an email?
The add-on uses the selected email to create the ticket in SparrowDesk. Fields like priority, assignee, and status can be updated from inside SparrowDesk after the ticket is created.
3. Will deleting an email in Gmail remove the ticket in SparrowDesk?
No. Deleting the email in Gmail does not affect the ticket in SparrowDesk. The ticket remains open and can be managed from the SparrowDesk inbox.
4. Can ticket fields be updated from inside Gmail?
The add-on lets agents view ticket fields in Gmail. To update fields like priority or assignee, open the ticket directly in SparrowDesk.
5. What should I do if the add-on shows a blank screen after connecting?
Return to Gmail and refresh the SparrowDesk add-on panel. This reloads the connection and brings up the ticket actions.