
Setting up Customer Portal
The Customer Portal gives your customers a single place to submit requests and track their tickets, directly from your Help Center.
It keeps all requests and updates in one place, instead of being spread across the email inbox, making it easier for customers to follow conversations and manage multiple issues.
How it works
When a customer submits a request through the Customer Portal, a ticket is created immediately.
From there, customers can:
- Reply to agents directly from the portal
- Track the status of their tickets
- Add collaborators to the conversation when needed
- Receive email notifications for updates
How customers can access the portal ?
Customers can get into the Customer Portal in a few ways, depending on your configuration.
From the Help Center
Once the portal is enabled, it becomes available inside your Help Center. Customers can submit new requests and view existing ones from here.
From email
Every ticket-related email notification includes a link back to the ticket in the portal. Customers can open and reply directly from that link. Note - this link will be only mentioned if the portal is turned on.
Required settings
Before customers can use the Customer Portal, a few key settings must be configured. Admins can also decide who can access the portal, how customers sign in, and what information they’re allowed to see.
Before you start:
- Ensure Help Center is setup (refer to this article to know more about this)
- Decide who should access the portal
- Create at least one ticket form and connect it to this help centre
Enable the Ticket Portal
To make the portal available to customers:
- Go to SparrowDesk Settings
- Select Help Center under Channels
- Click on Customer Portal and Enable Ticket Submissions
- Click Publish Changes

Once enabled, customers will be able to submit tickets and view them.
Note- For submitting tickets , there should be at least one form connected to the help centre
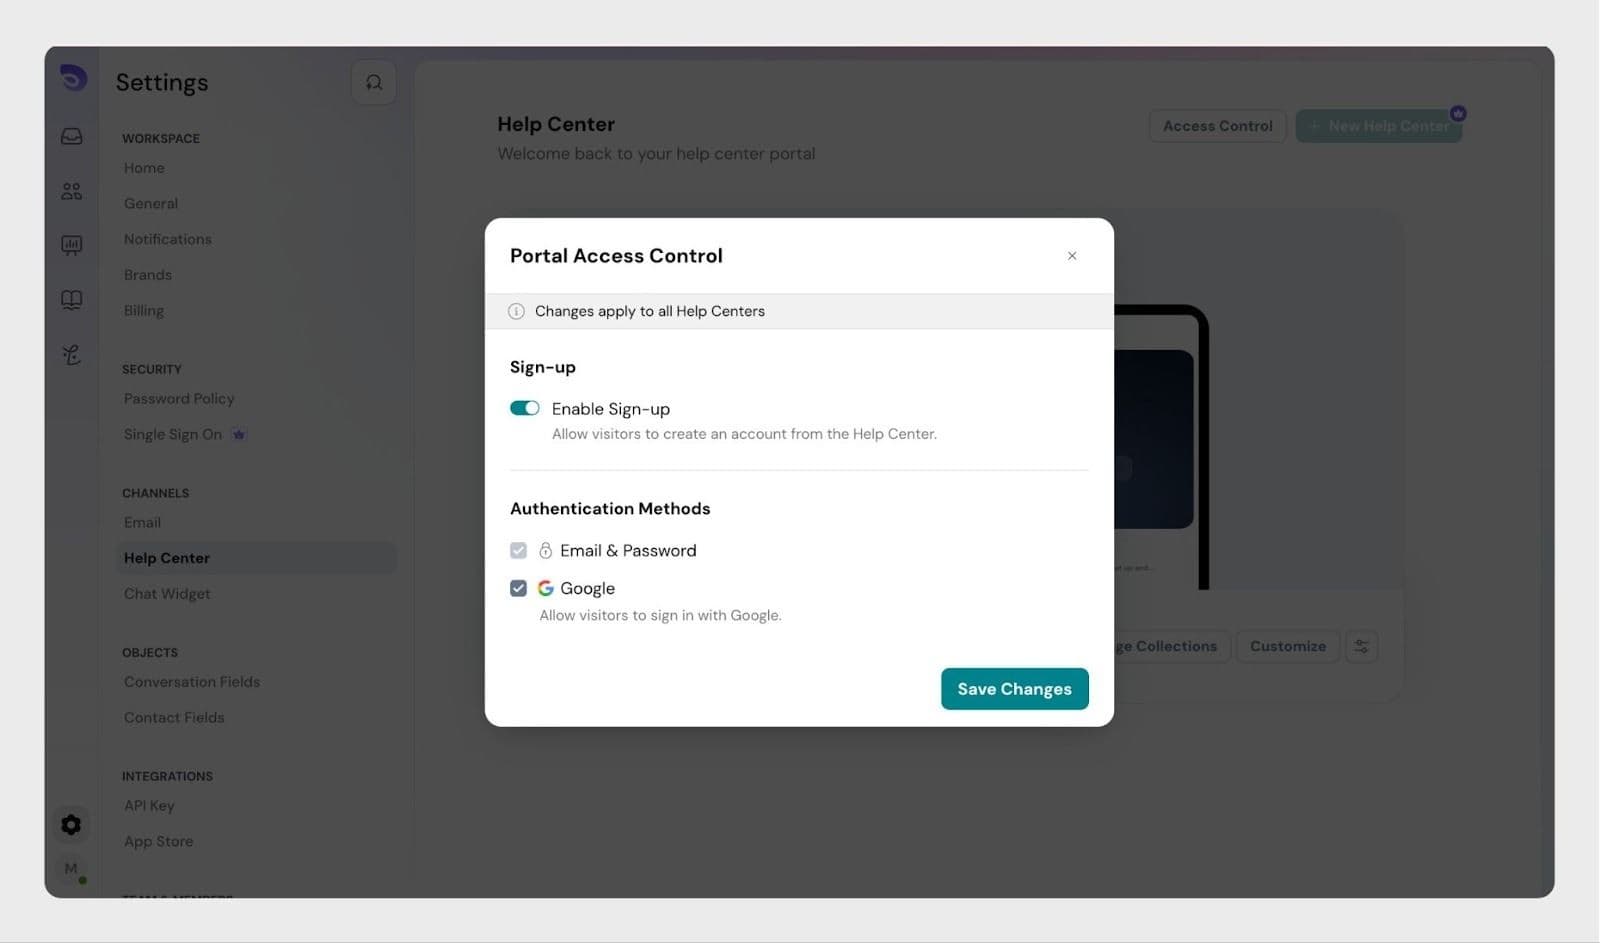
Configure access permissions
Admins can control who can submit tickets and who can view them.
Who can submit tickets ?
Choose how customers are allowed to create tickets:
- Anyone (no sign-in required)
Any visitor can submit a request from the Help Center. - Only logged-in users
Customers must sign in before submitting a request.
Who can view submitted tickets ?
Choose how customers can access their tickets:
- Only logged-in users
Customers must sign in to view their tickets. - Anyone with the ticket link
Anyone with the email link can access the ticket without signing in. But they must create an account if they want to reply from the help center.
How can customers sign up ?
Customers can sign up and login using their email address and a password. Admins can also enable Google Authentication.
How do customers get access when sign-up is restricted ?
If you want to keep self sign-up closed while still onboarding specific customers into the portal
In this case, admins must invite customers manually.
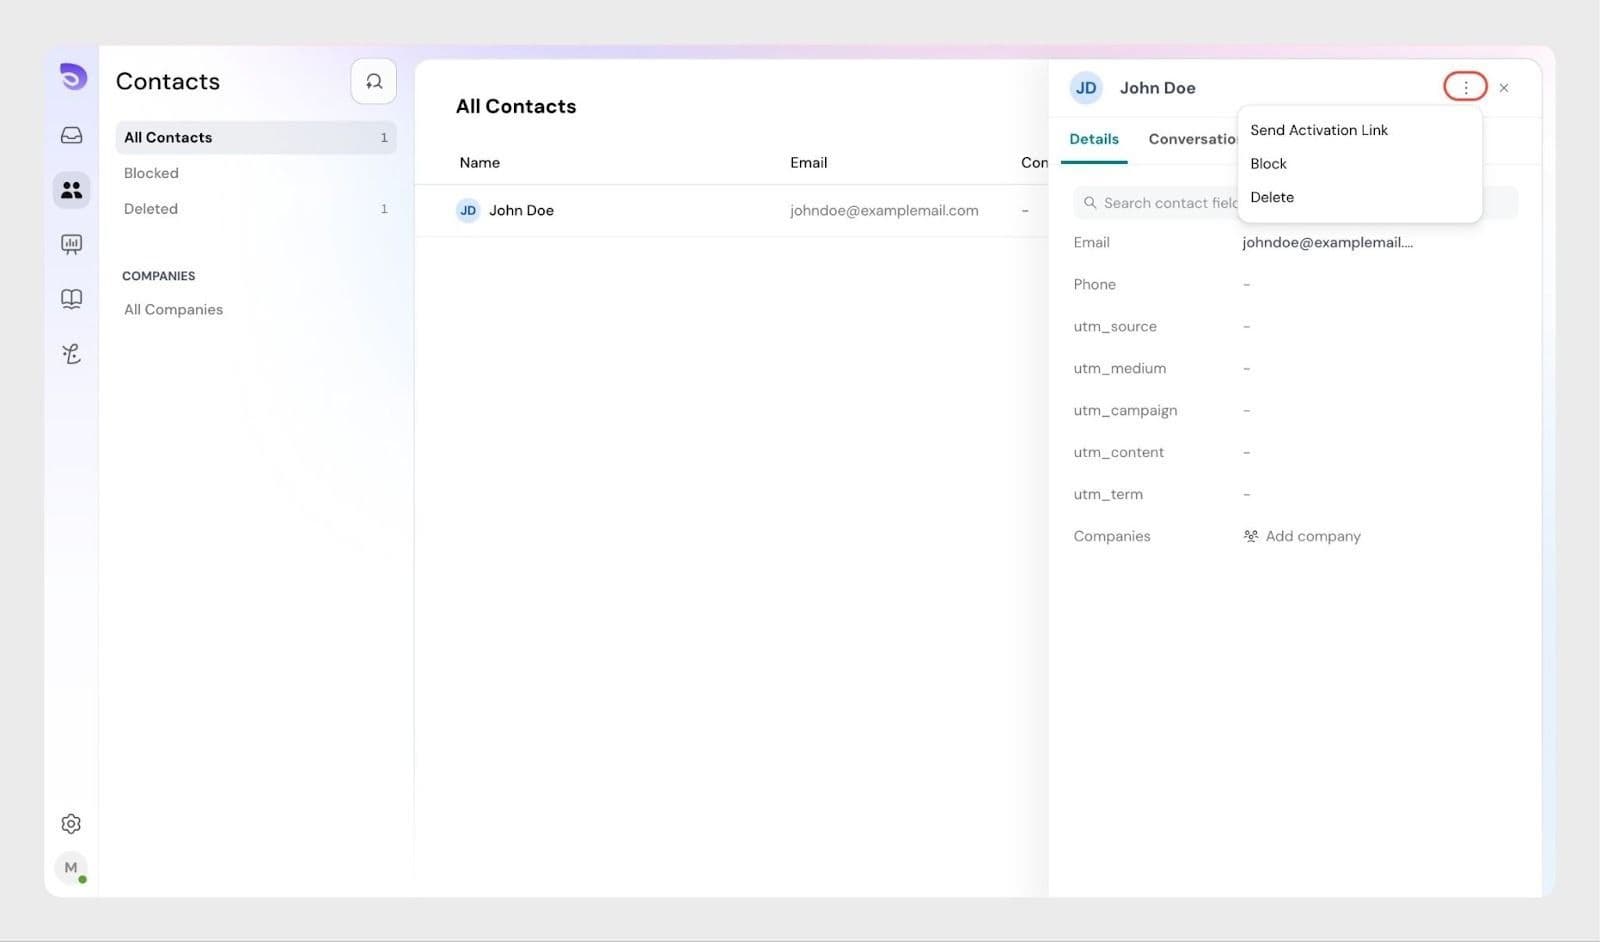
- Go to Contacts
- Open the customer profile
- Click More actions
- Select Send activation link
The customer receives an email asking them to activate their Help Center account.
Once activated, they can sign in and access the Customer Portal based on your access settings.
Add a Ticket form
The Customer Portal relies on ticket forms to collect customer requests. Ticket forms ensure requests come with the right details so that agents can start working on the ticket immediately and reduce follow-ups.
To allow customers to submit requests through the portal, you must publish at least one form to this the Help Center
Without published ticket forms, customers won’t be able to raise requests through the portal.
Take a look at this article to understand how to create Ticket Forms
Customizing the ticket forms page
You can also modify how the ticket form submission page appears in your Help Center.
Go to:
Help Center → Appearance → Ticket Submission
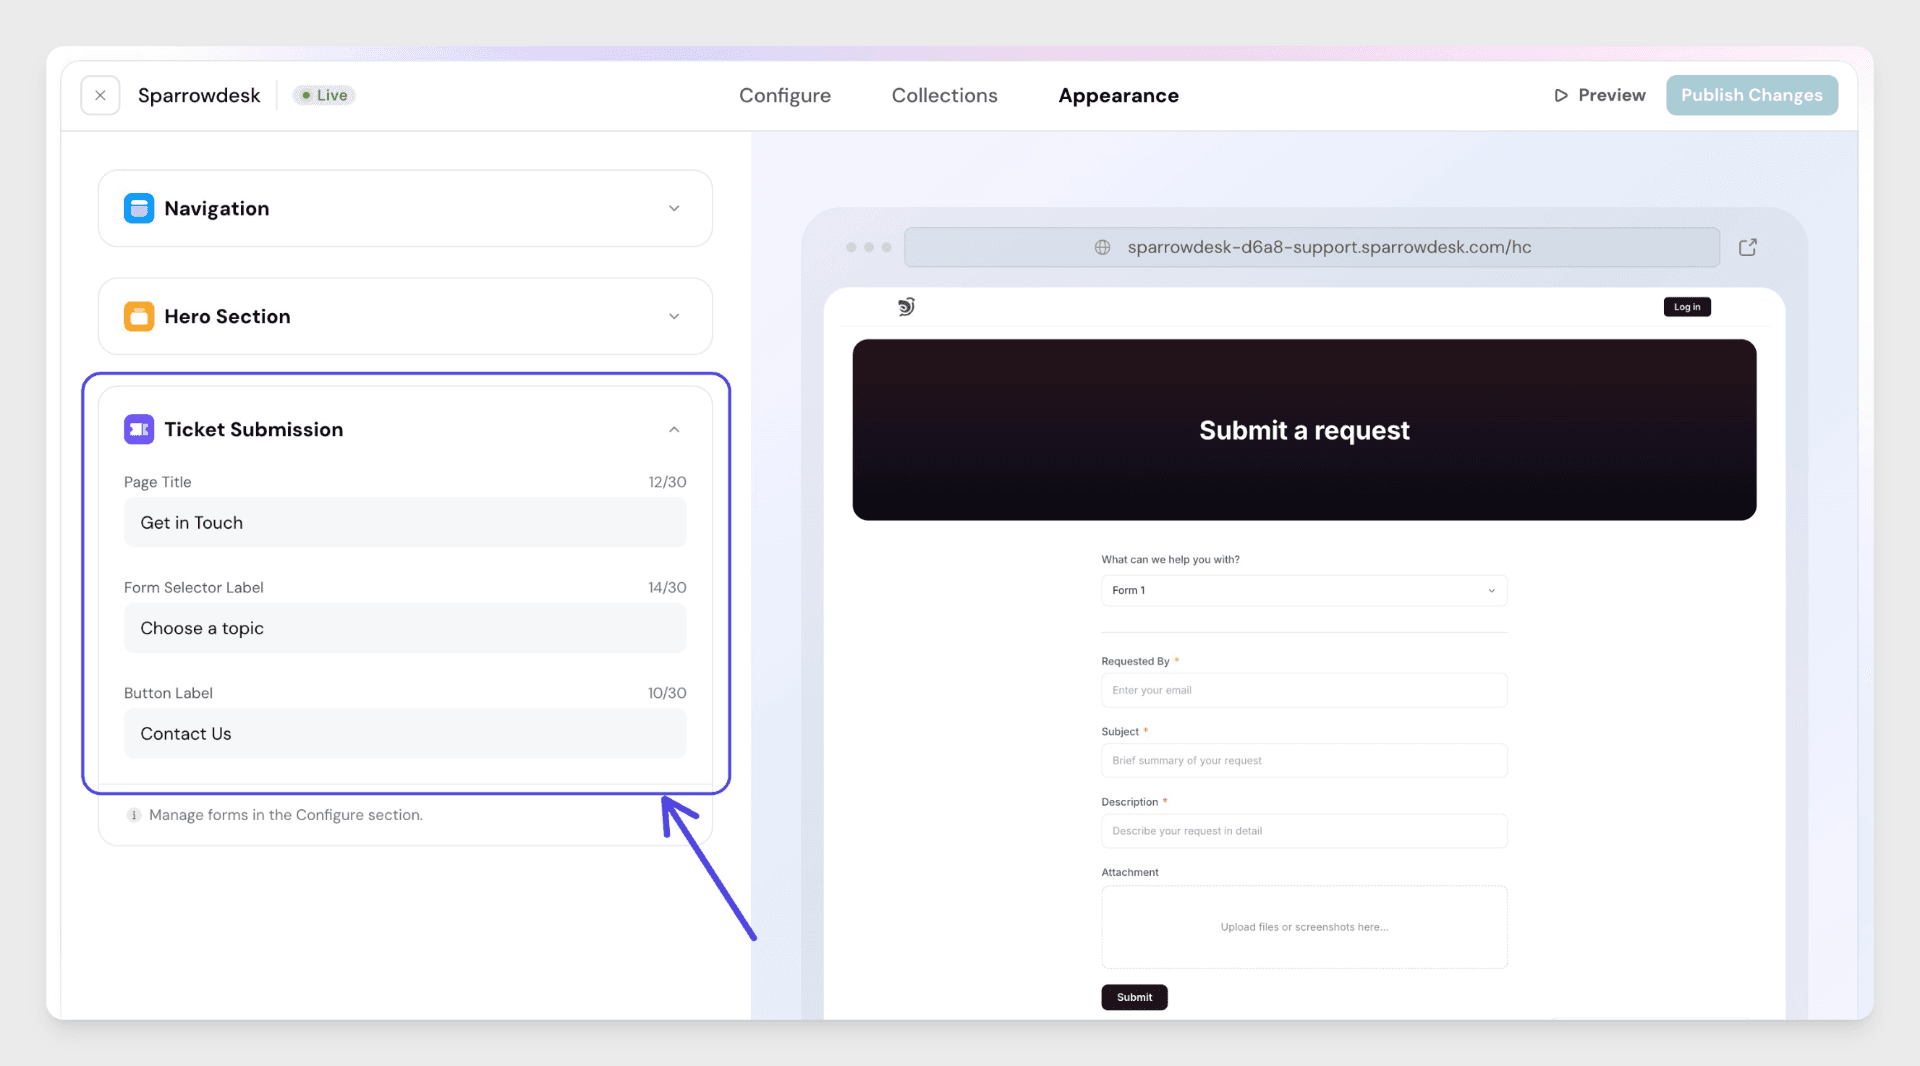
From here, you can configure:
- Button label – shown in the top navigation
- Page title – how the ticket area is introduced
- Form Selector label – helps customers choose the right form
This allows you to match the portal experience with your product language and brand.
What agents can do in the Customer Portal
When an agent accesses the Help Center, SparrowDesk detects their role automatically.
Agents are redirected to agent login and then returned to the Help Center.
From there, agents can:
- Submit tickets
- Submit tickets on behalf of customers
When an agent opens a ticket from the portal, they are redirected to the SparrowDesk platform to continue handling it.
FAQs
Why don’t I see the Ticket Submission even after enabling it?
The Ticket submission appears only when at least one ticket form is published and connected to the Help Center. If no forms are available, the ticket submission will remain hidden even if it’s enabled.
Can I configure different Sign Up methods for different Help Centers?
Sign-up is applied across all Help Centers in your account.But some settings, such as ticket forms and customer portal , can be configured per Help Center.
Does enabling the Customer Portal affect email-based support?
No. Email-based support continues to work as usual. The Customer Portal adds an additional way for customers to submit and track tickets, without replacing email.