Search
Single Sign-On (SSO) lets your team log in to SparrowDesk using your company’s existing login system, such as Okta. If you are already logged in to Okta, you won’t need to enter your email or password again when you choose the SSO login option in SparrowDesk.
The Okta–SparrowDesk SSO integration supports:
This article explains how you can configure Single Sign-On in SparrowDesk using Okta as your identity provider(IdP).
1. Log in to your Okta account.
2. Click on Admin to land the Admin Dashboard.
3. Now, navigate to Applications under Customizations.

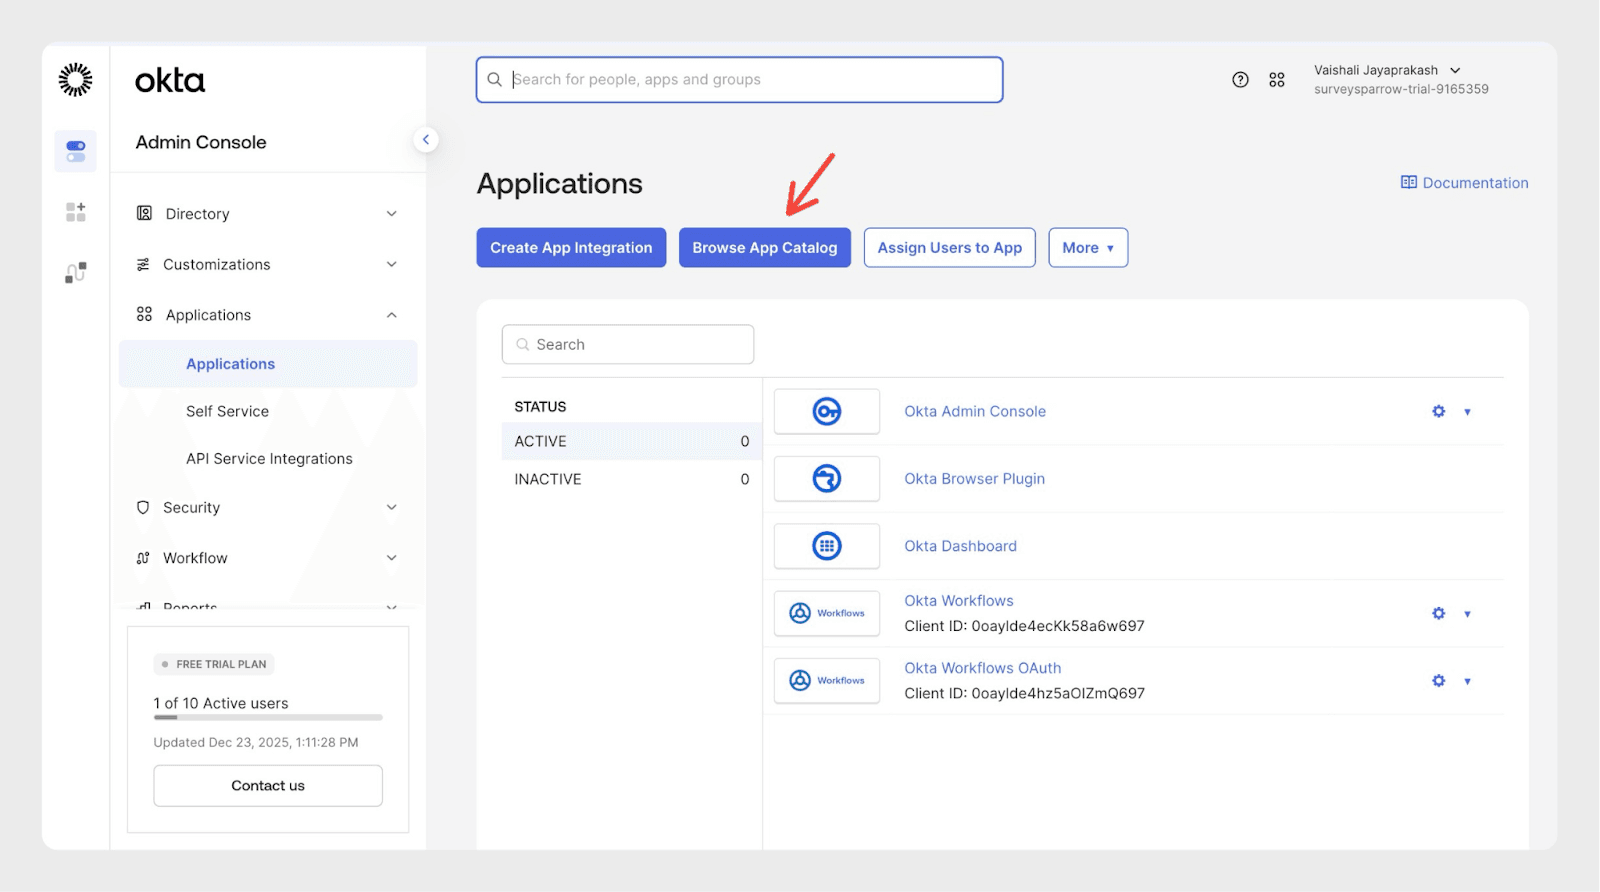
4. Click Browse App Catalog under Applications.
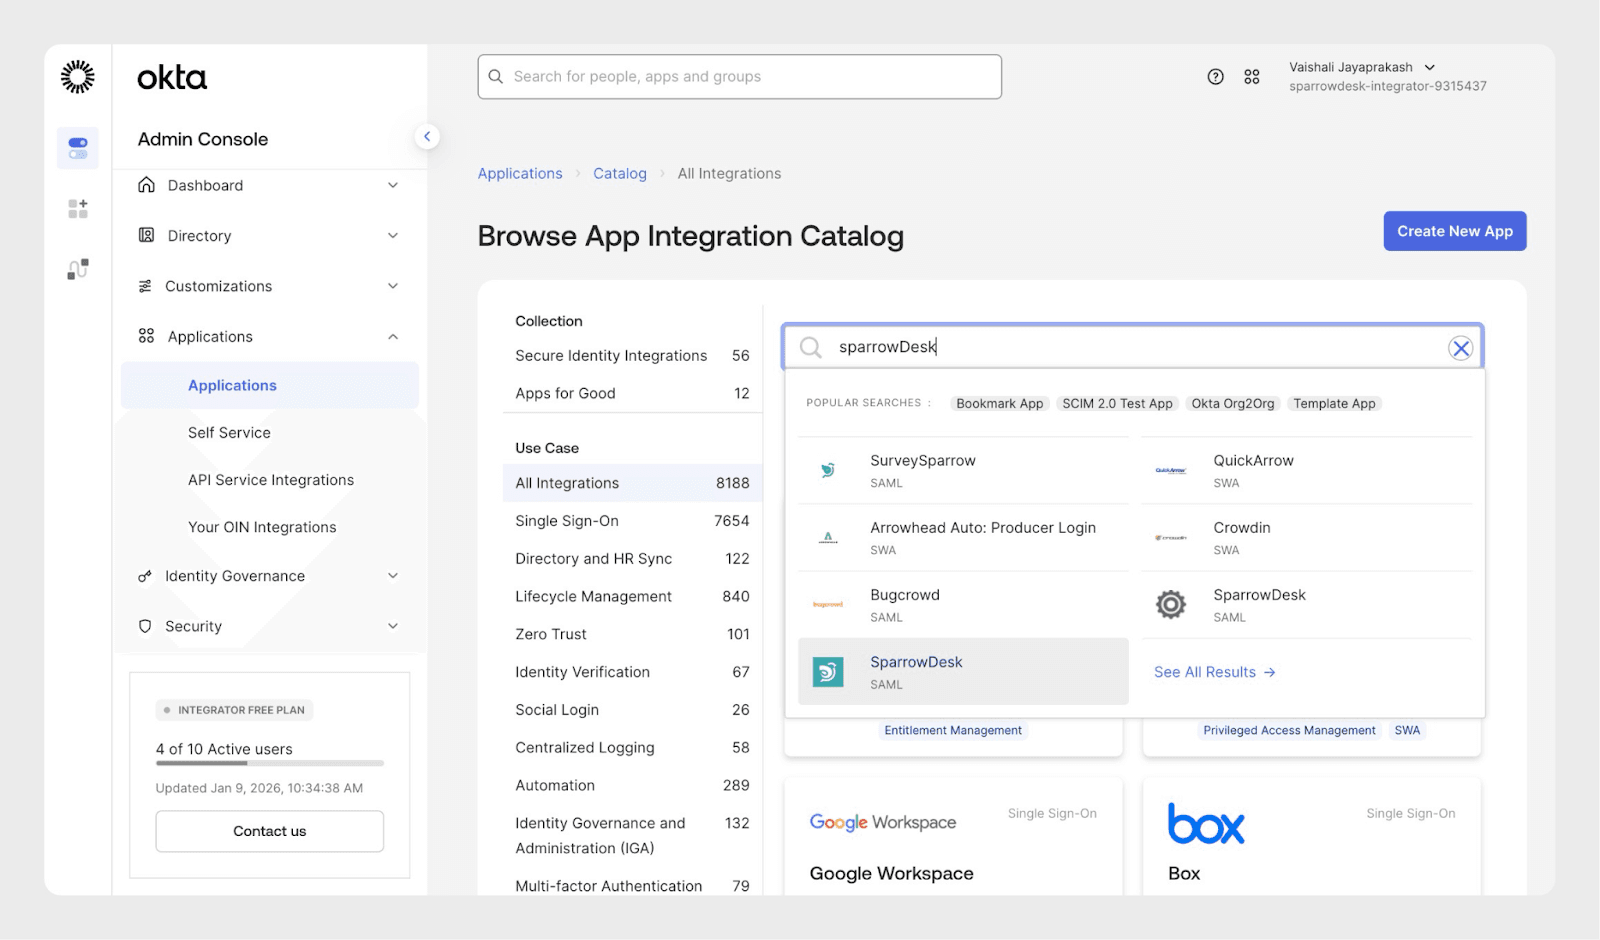
5. Search for the SparrowDesk app in the Integrations Catalog.
6. Once you find the app, go to the App page and click on the Add button.
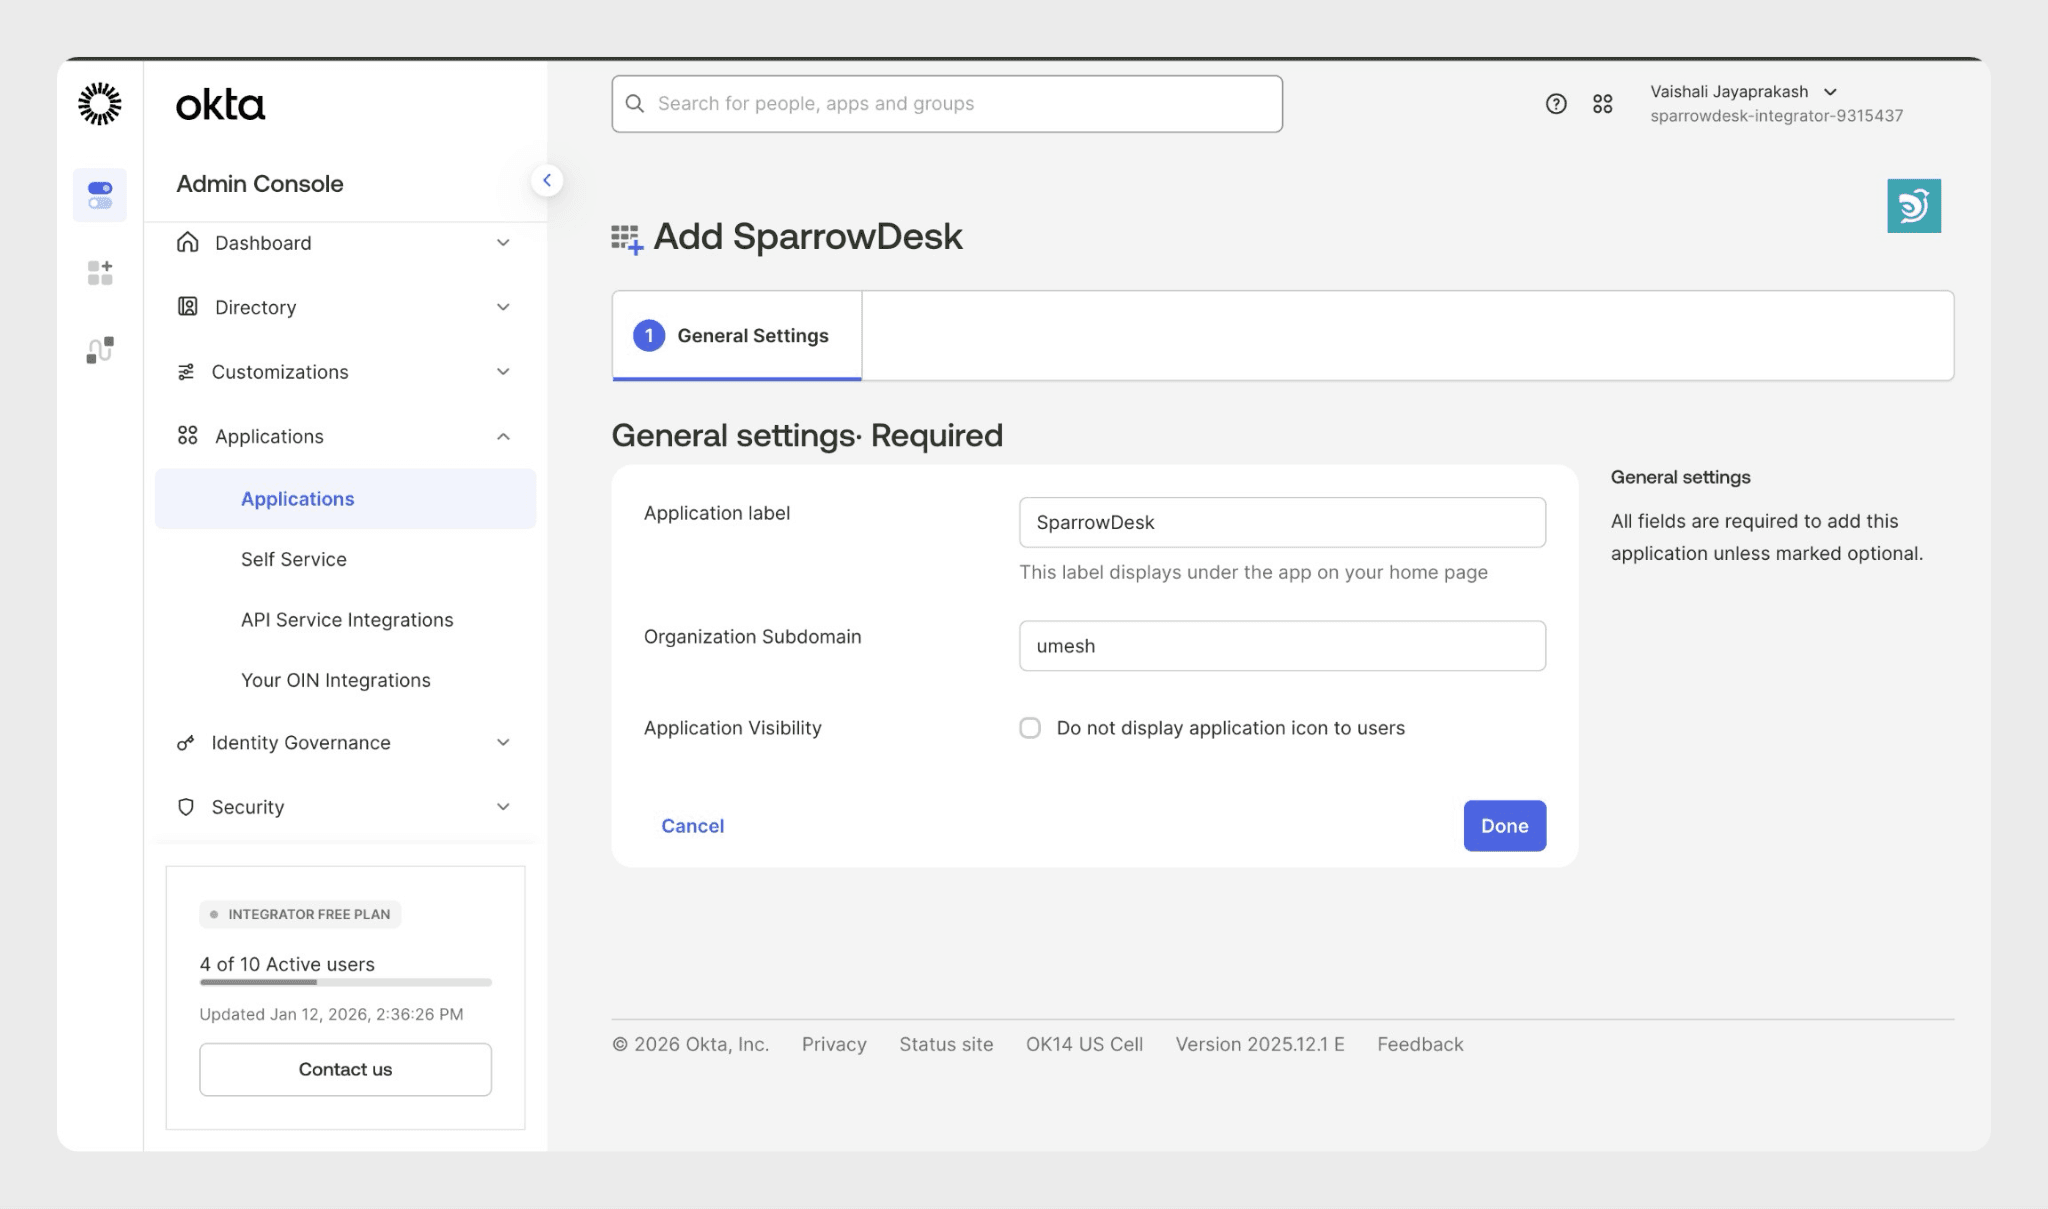
7. Enter your Subdomain. For example, if you are logging in to https://acme.sparrowdesk.com, enter: acme. Click Done when you’re ready.
8. Navigate to Sign-on and click on View setup instructions
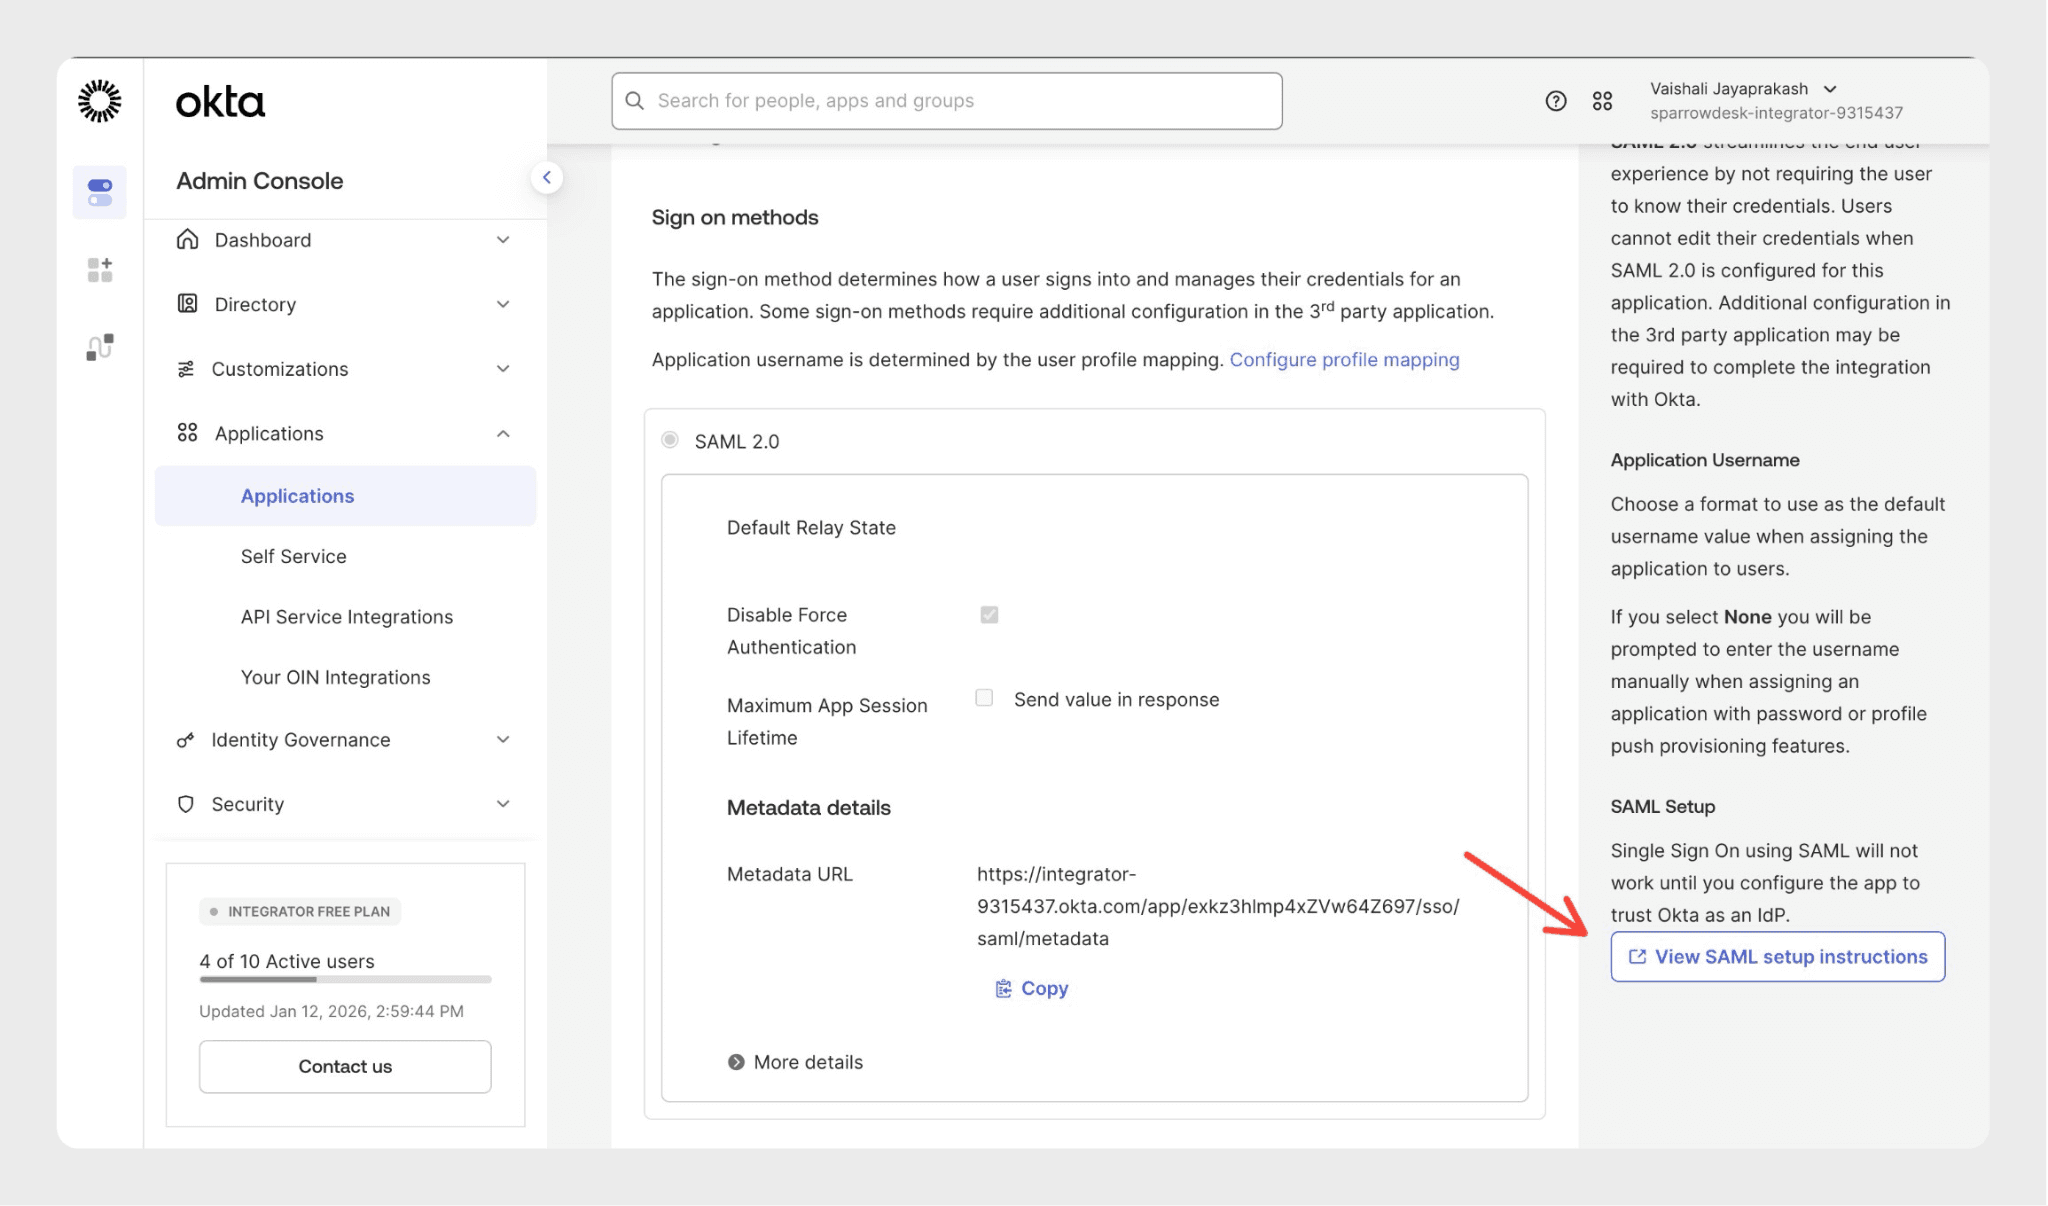
9. Under Configuration Steps copy all the details and keep them ready on your clipboard.
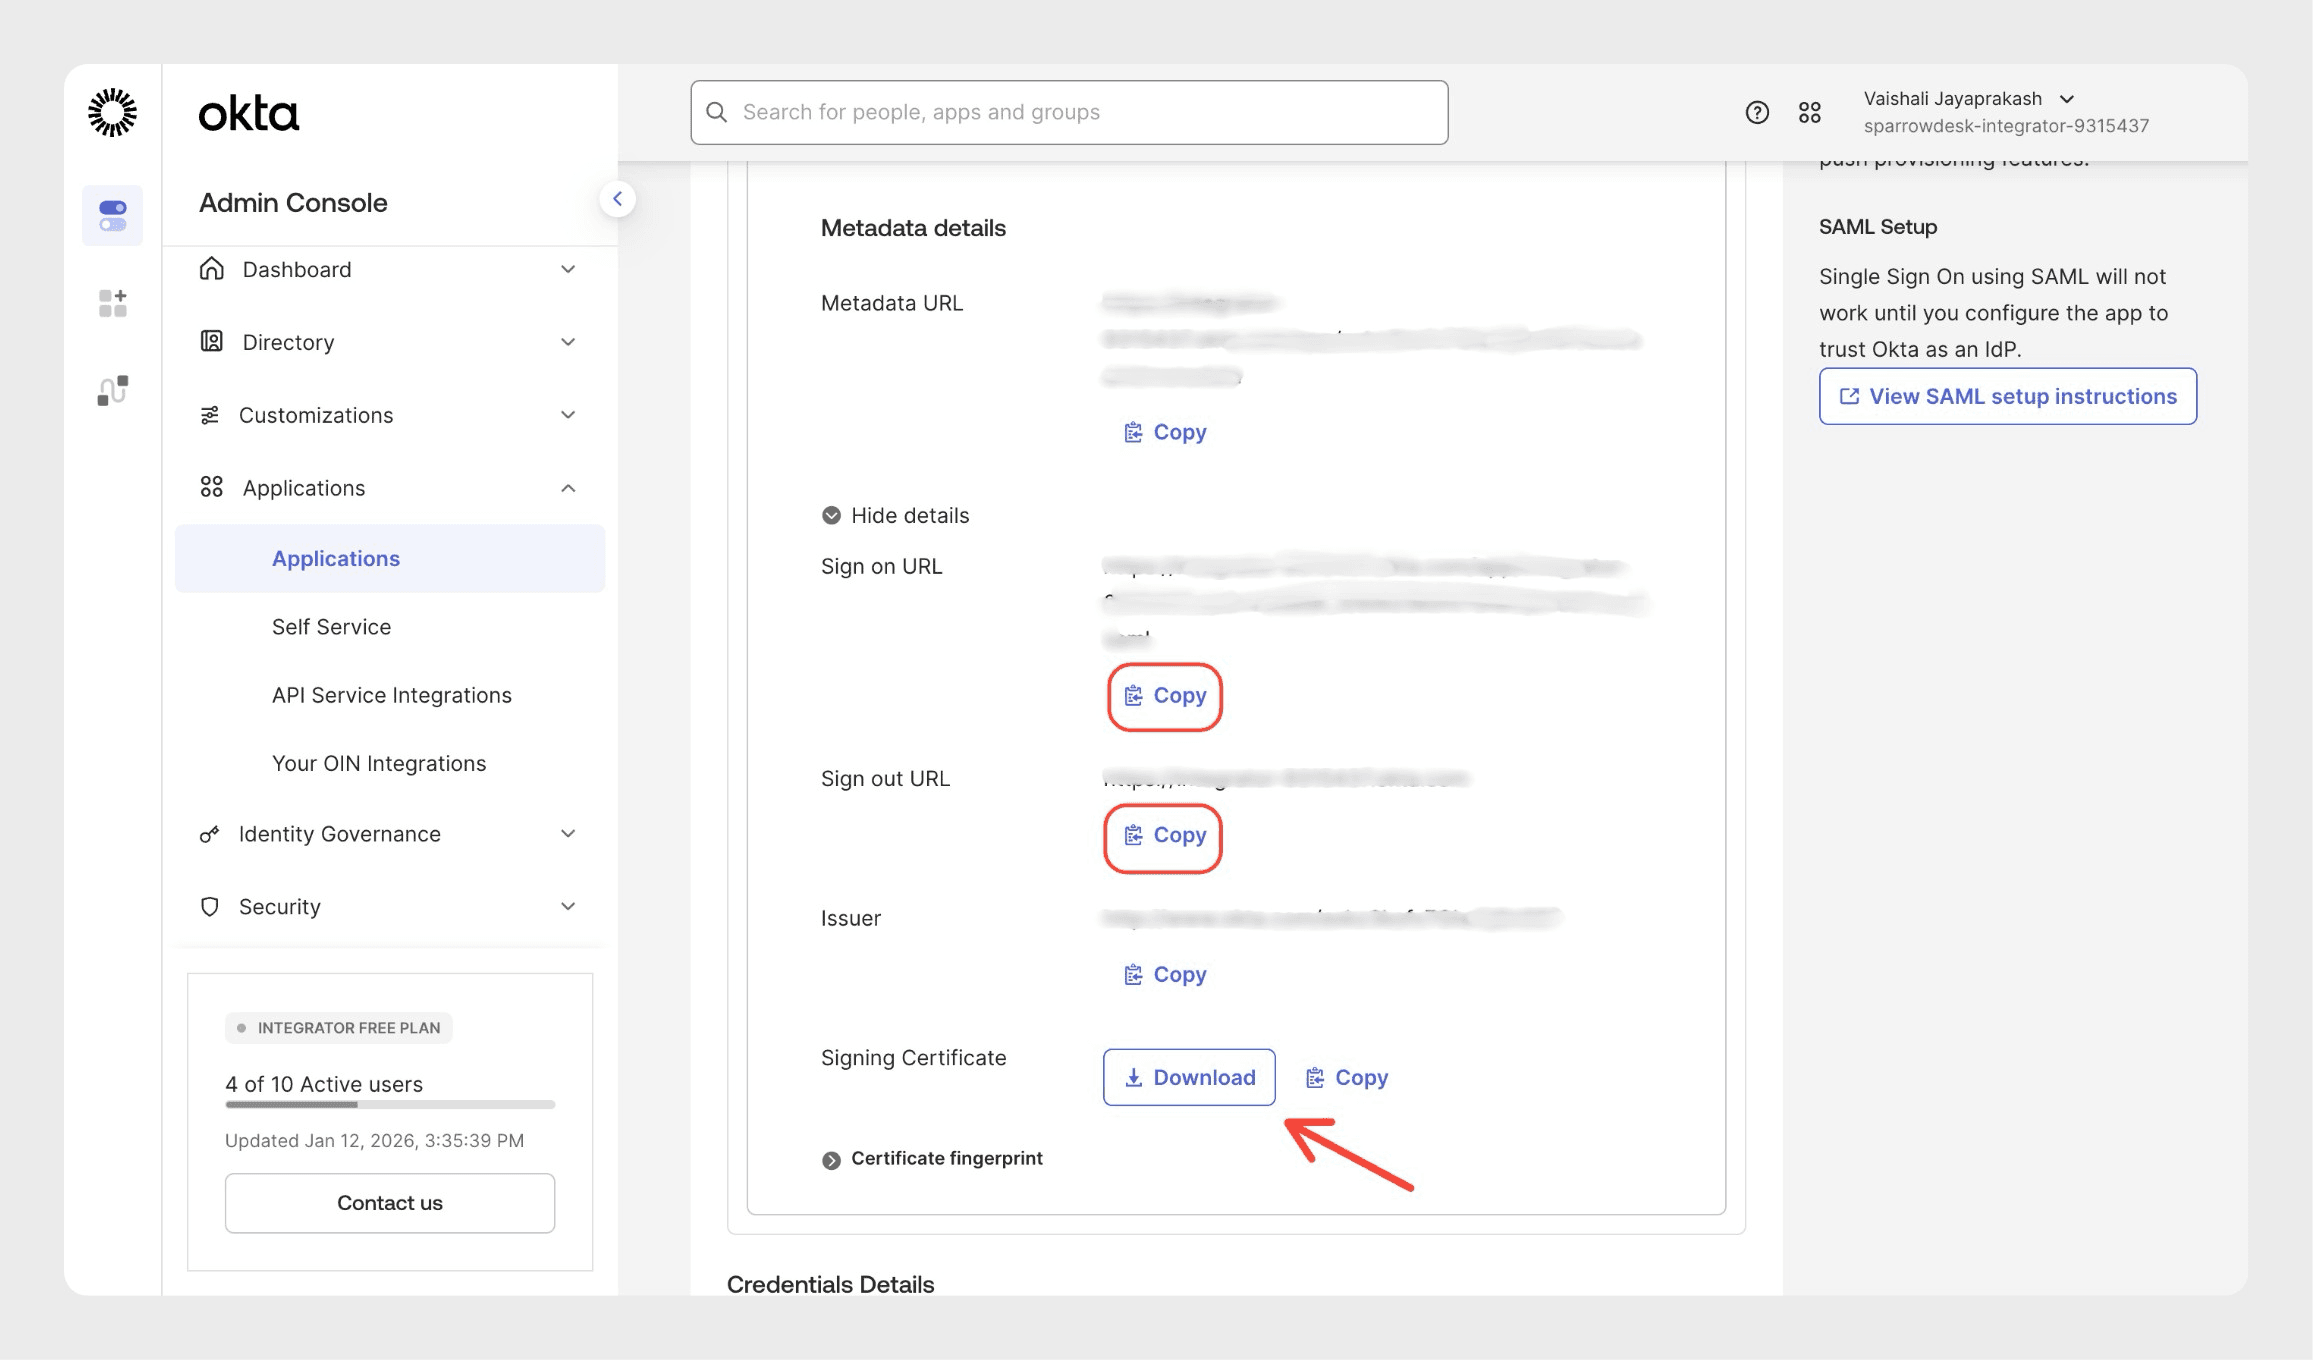
After copying the certificate from Okta, you must add the following two lines to it:
Add -----BEGIN CERTIFICATE----- at the top of the certificate and
add -----END CERTIFICATE----- at the bottom of the certificate.
Do not change the certificate text in between.
Do not add extra spaces or empty lines.
These lines are required for Single Sign-On to work.
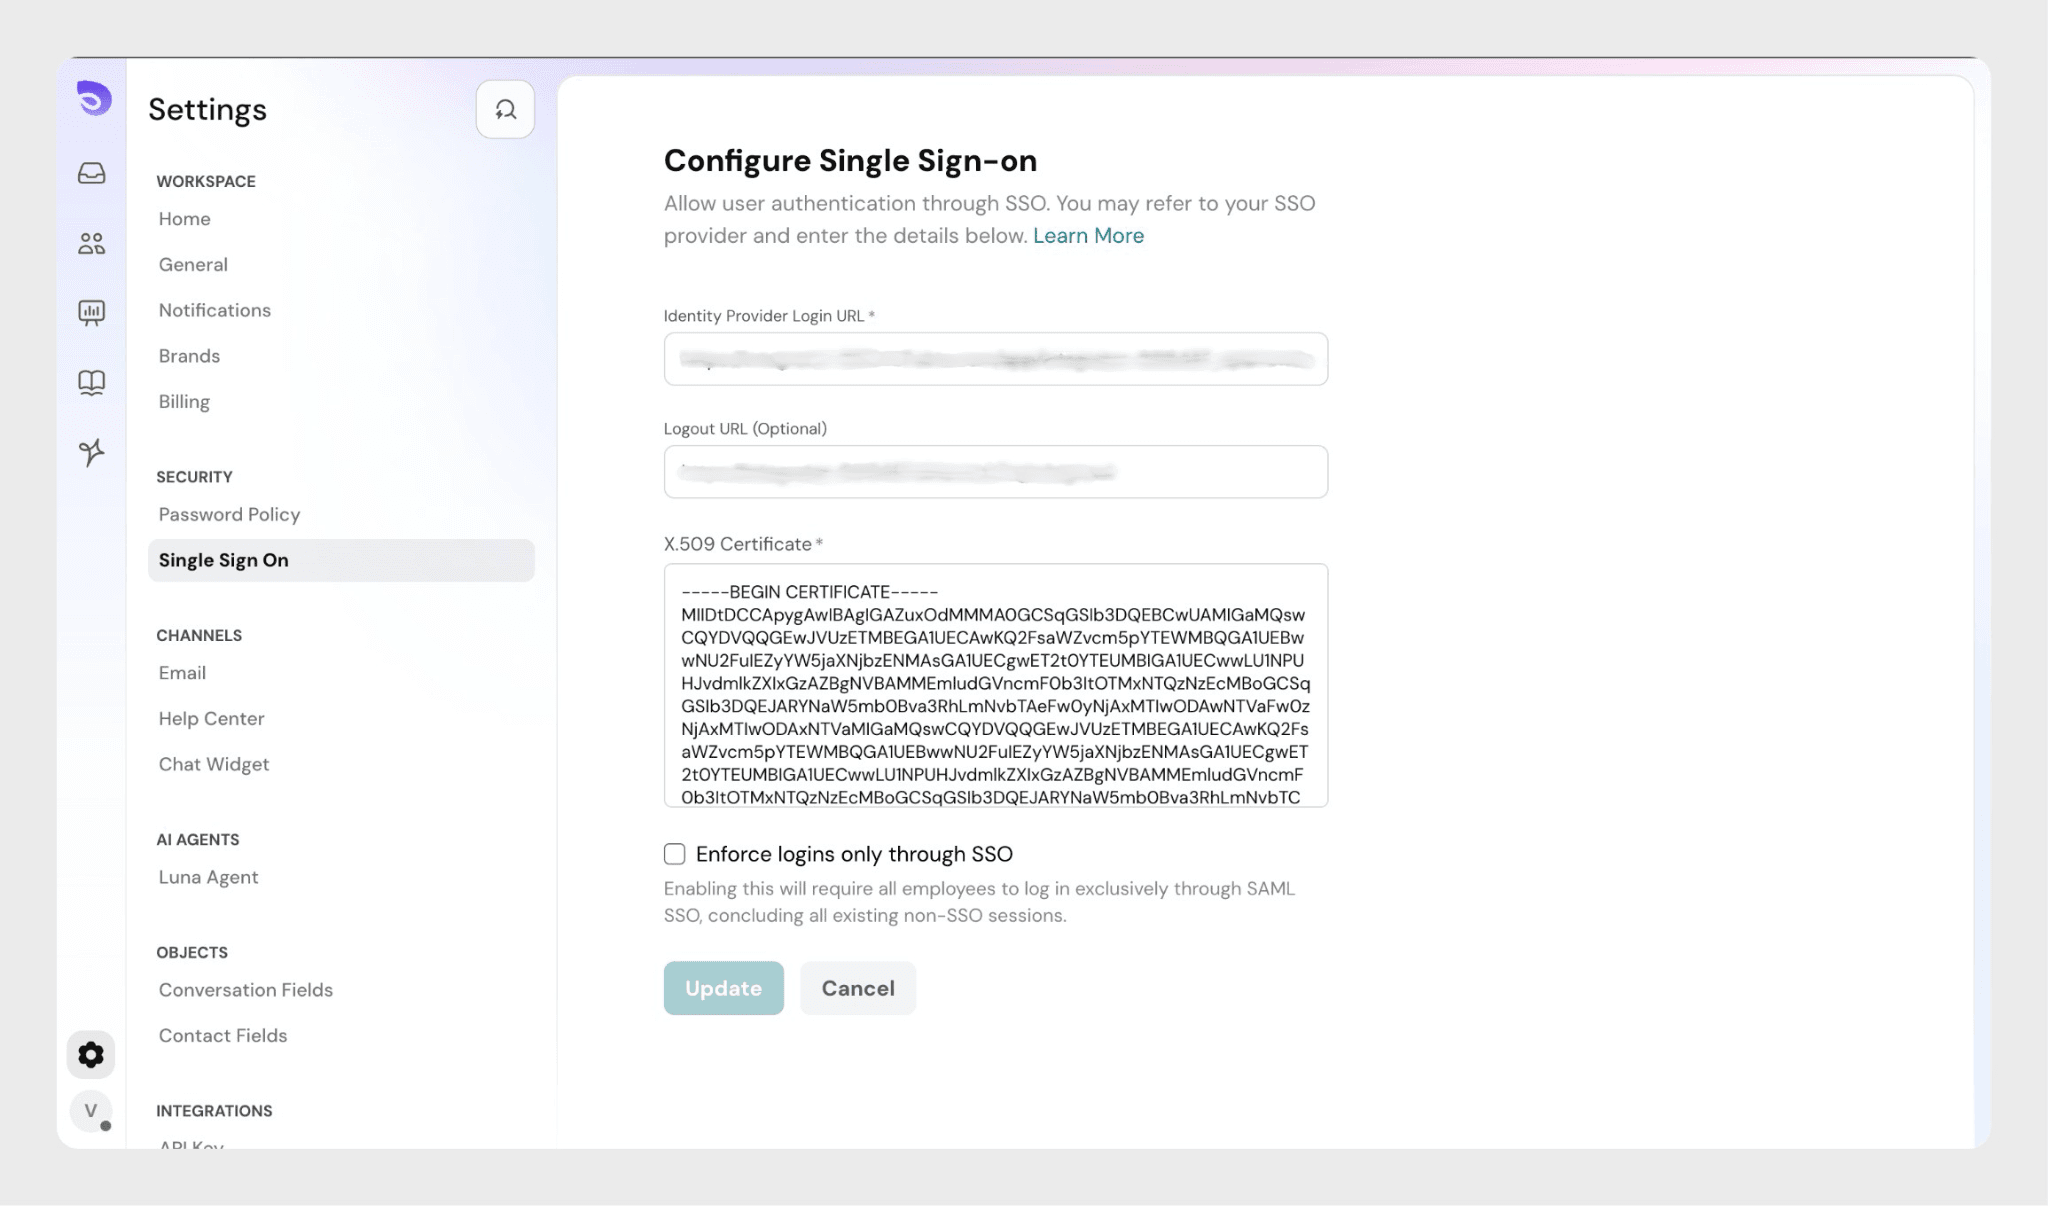
10. Now, log in to your SparrowDesk account and click the Settings icon on the top menu.
11. Under Security, select Single Sign-on and paste all the details which you copied from the Setup SSO page. Once done, click Update to set up the SSO.
Once the SSO is set up, you need to add users to the SparrowDesk application on Okta. Let’s see how to add users.
1. Navigate to the Applications section and click SparrowDesk.
2. In the Import section, click “Import from CSV”.
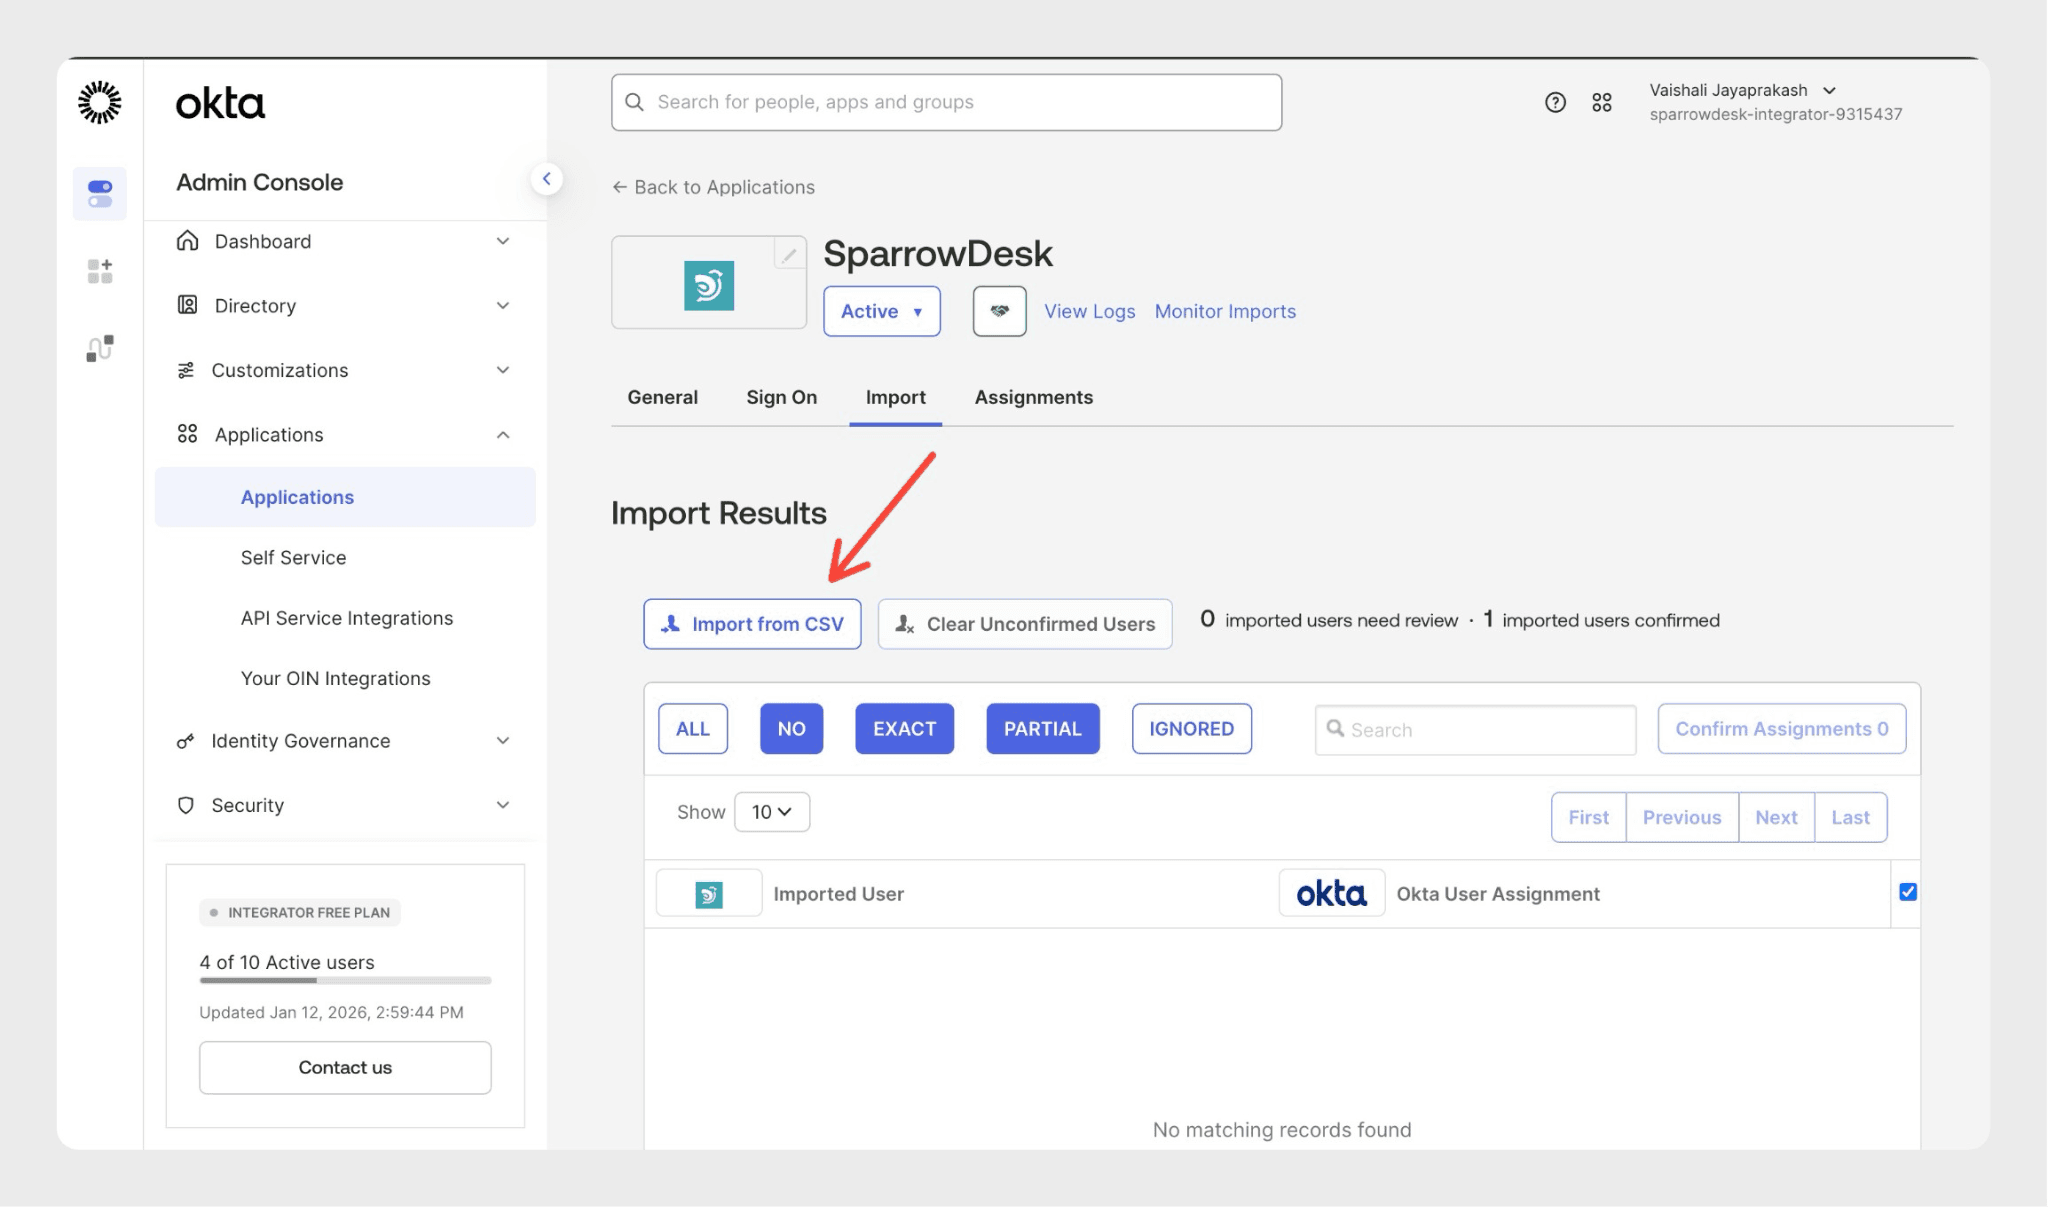
With the help of the Okta CSV template, upload the user details. Ensure that you upload the CSV file in the prescribed format to add the users.
3. You can confirm the changes made after the imported CSV file is scanned on Okta.
4. Once the user is added, you need to map the imported user with a user on Okta. After mapping, click “Confirm Assignments”.
5. Click “Confirm” to complete the user assignment process.
And you’re done. The Single Sign-on is successfully configured.
With SP-initiated SSO, users start the sign-in process from SparrowDesk.
1. From a browser, the user navigates to the SparrowDesk sign-in page.
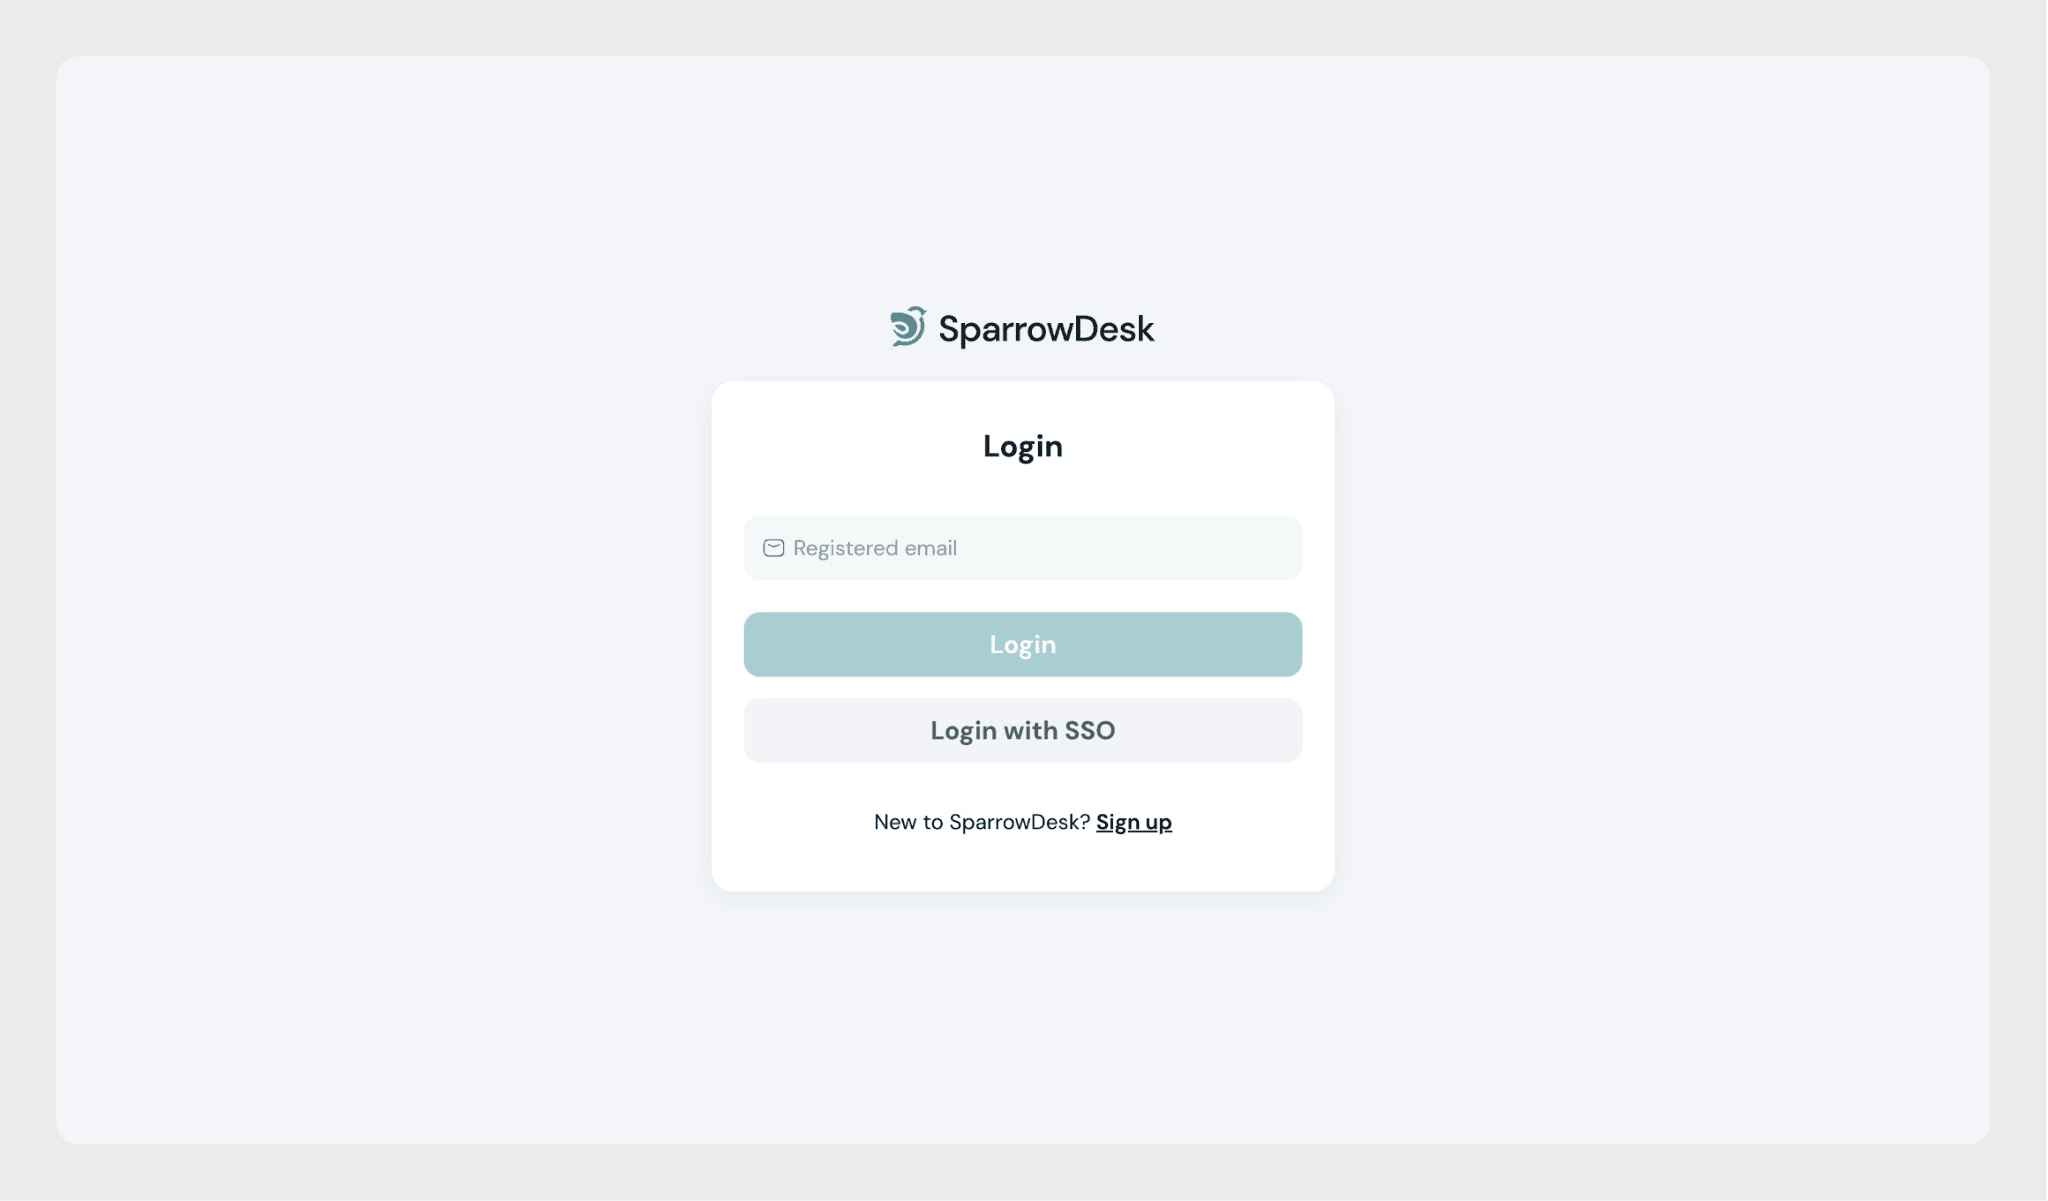
2. The user clicks “Login in with SSO”.
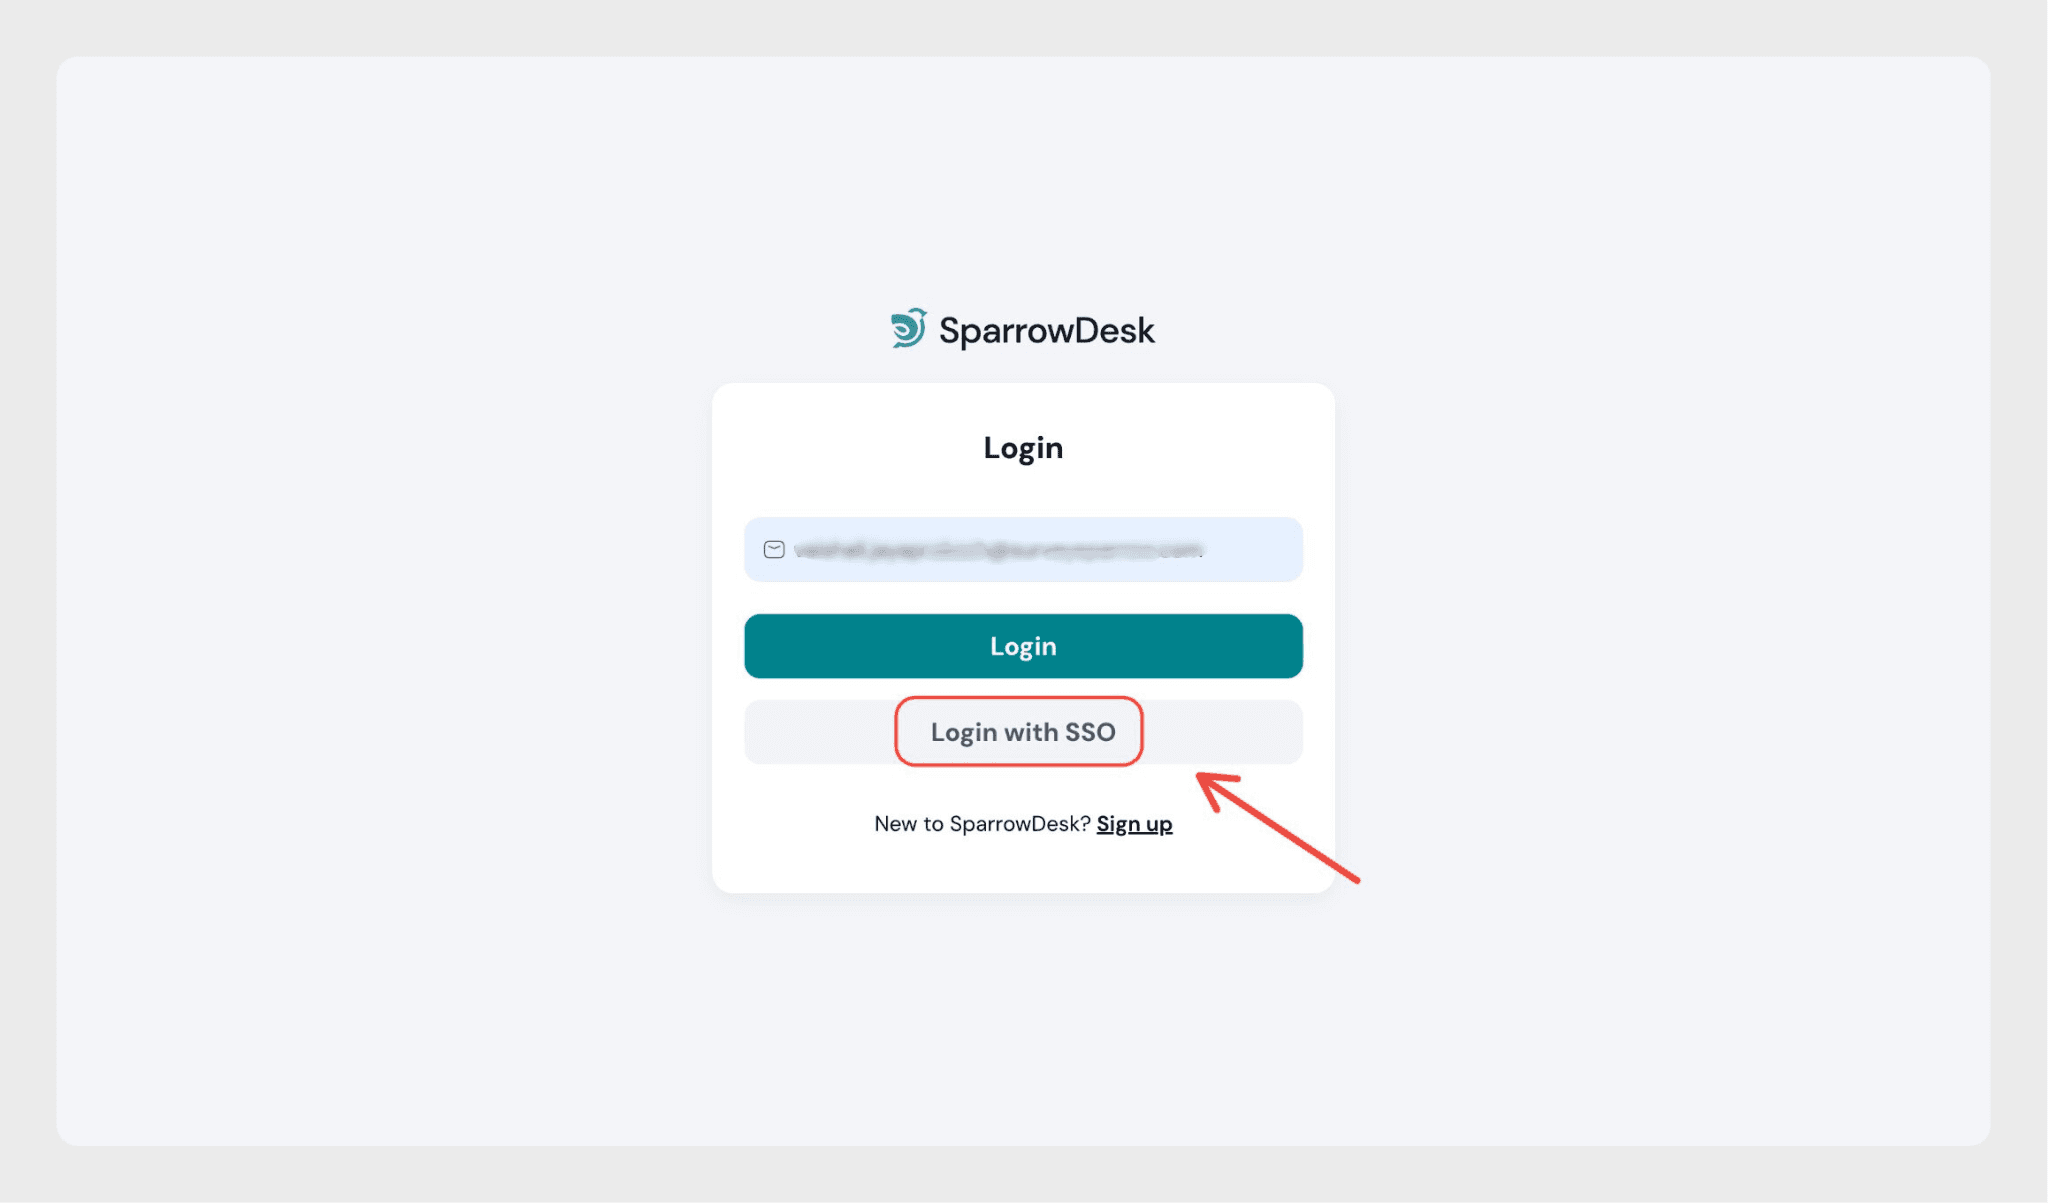
3. The user is redirected to Okta and enters their Okta email and password.
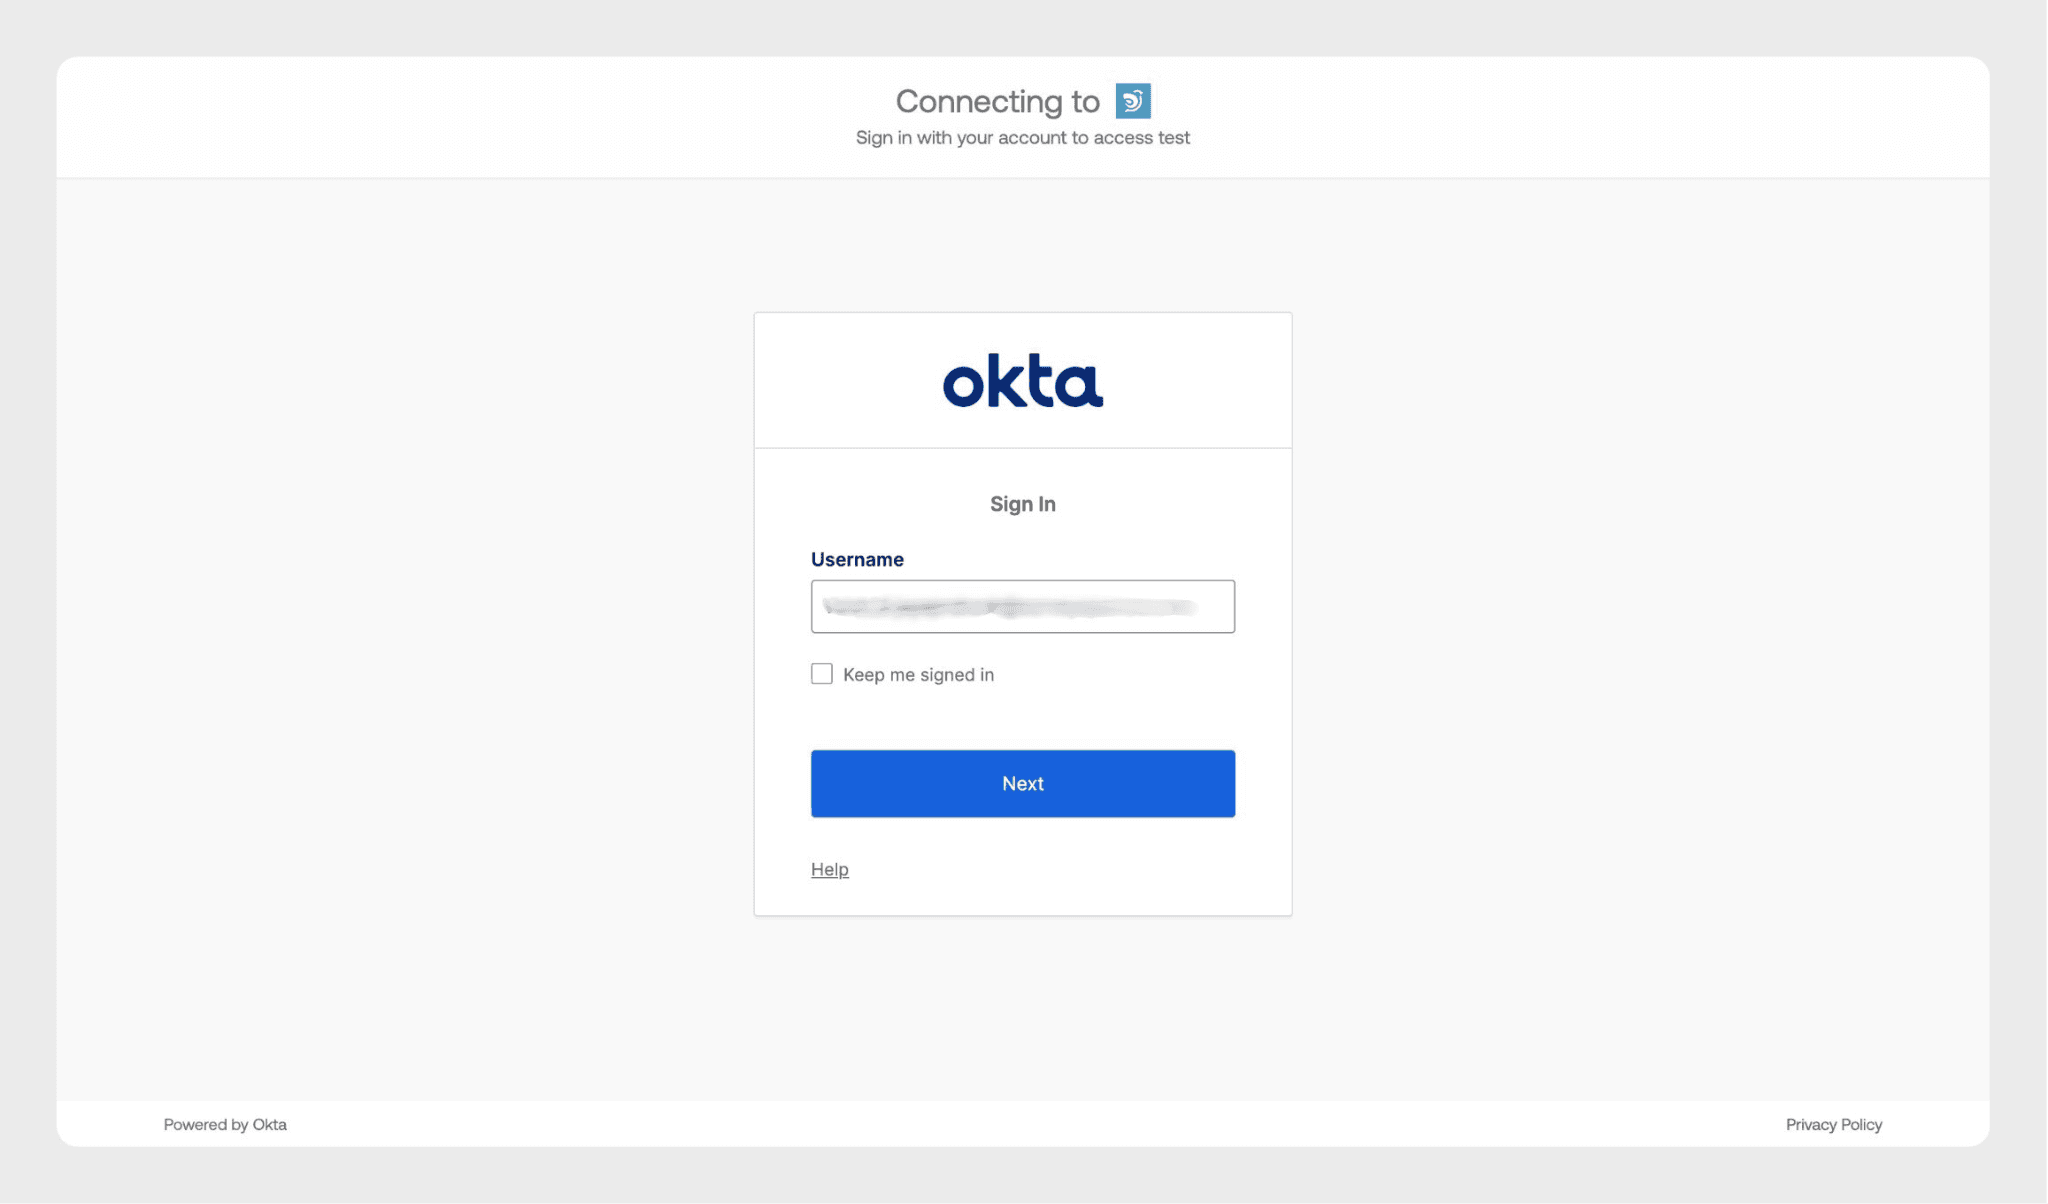
4. After successful authentication, the user is redirected back to the SparrowDesk dashboard.
If you have any questions or need help, please reach out to us- we’re just a chat away!
Powered By SparrowDesk